Monday, September 30, 2013

Transfer iTunes, Digital Copy, Amazon Videos to Galaxy Note 3

In below article you can learn about how to legally get rid of DRM copy protection from iTunes M4V, Amazon WMV and Digital Copy to freely play them anywhere you like.

As Samsung has unveiled the Galaxy Note 3, the second sequel in a series of supersized stylus-smitten smartphones, which is even taller, narrower and thinner than the first two of its kind, more and more people tend to own this new handset with 5.7-inch, 1920x1080 Full HD display screen and Android 4.3 Jelly Bean OS. Though this mobile phone has improved itself by adding a bevy of hardware and software updates, it is still not compatible with DRM copy protected iTunes M4V, Amazon WMV and Digital Copy due to the restrictive DRM technology. To watch DRM videos on your Samsung Galaxy Note 3, you’ll have to remove the DRM protection first.

Pavtube DRM Video Removal Tool can strip DRM protection from iTunes purchased M4V movies, Amazon Instant WMV videos, and Digital copies, convert them to Samsung Galaxy Note 3 supported MP4 or WMV format and freely transfer converted DRM videos to Galaxy Note 3.


Few tips before starting the whole DRM video to Galaxy Note 3 conversion:

1. Make sure that your computer is authorized for source videos, that is to say you can play the source iTunes movies in iTunes, play Amazon and digital copy using Windows Media Player.

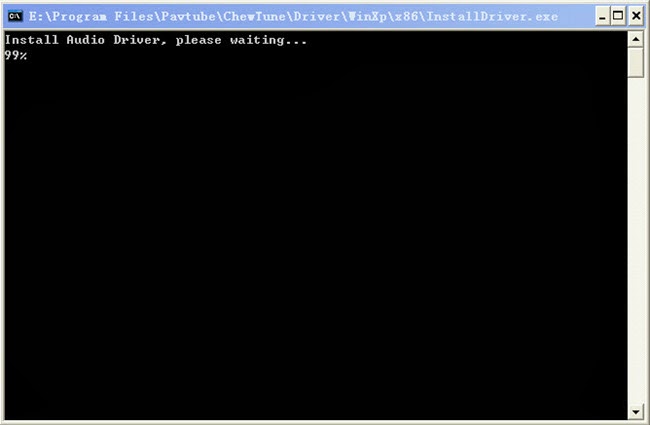
2. Allow the audio driver installed during the Pavtube ChewTune installation.


3. Close iTunes before running the Pavtube DRM Removal Converter when converting iTunes M4V movies.

4. It would take as long as the source movie length for the whole DRM video to Galaxy Note 3 conversion process since Pavtube ChewTune records source DRM videos in 1:1 video and audio quality.

How to Remove DRM-protection and transfer DRM M4V/WMV Videos to Galaxy Note 3?

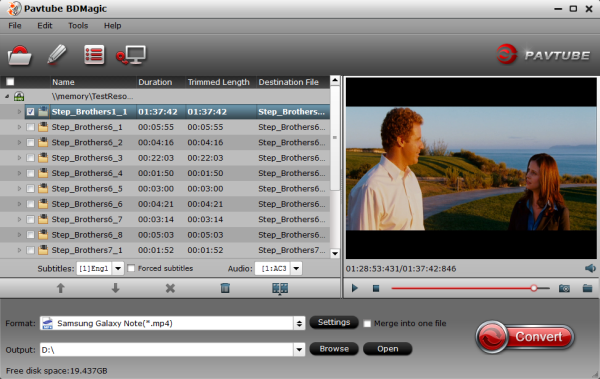
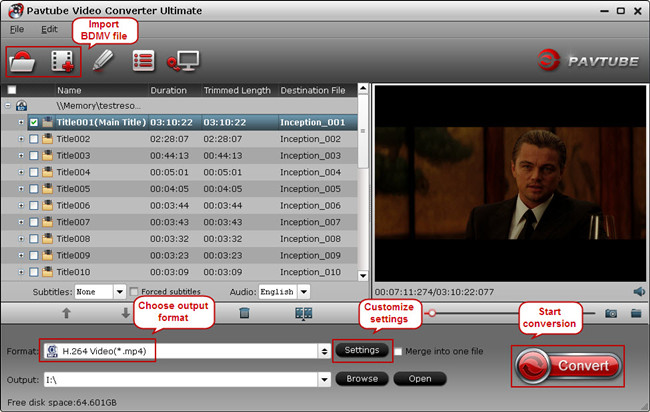
Step 1. Run Pavtube DRM Media Removal tool, drag and drop the source DRM video from local computer to ChewTune. Or hit the “Add Video” button to import your iTunes, Amazon, or Digital Copy.


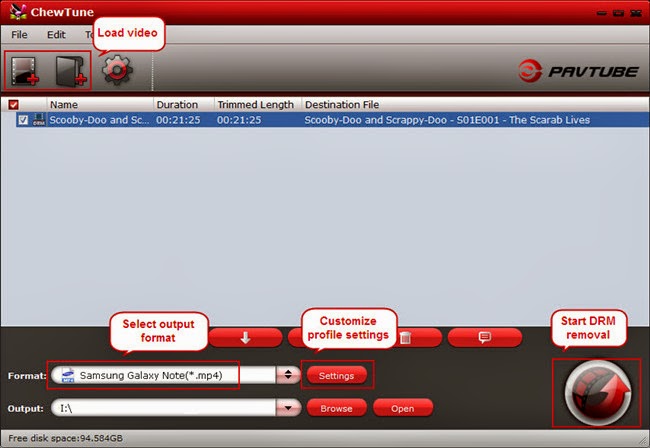
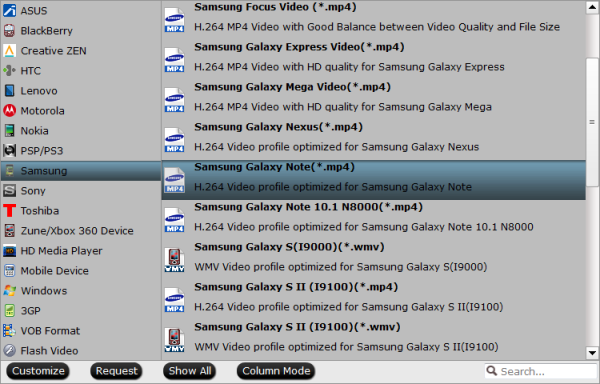
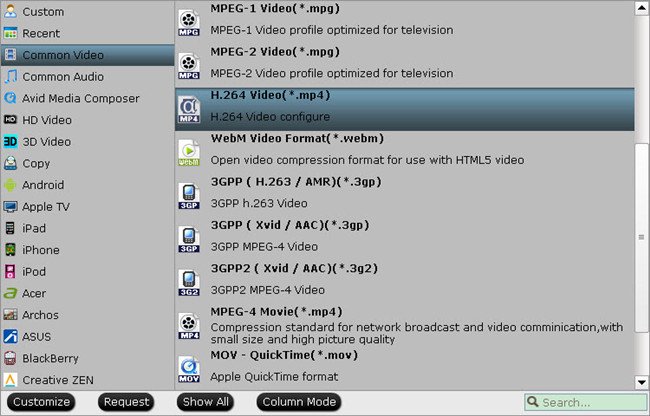
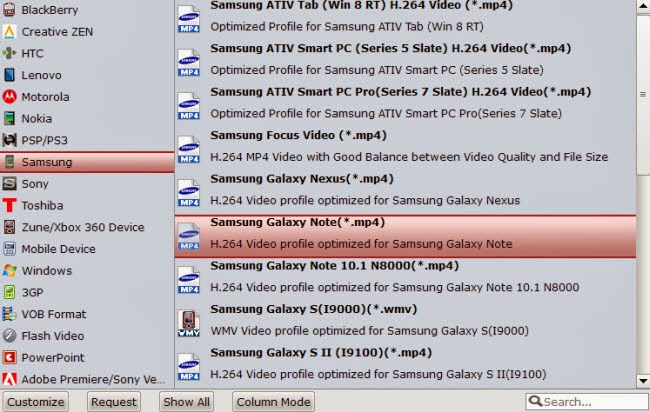
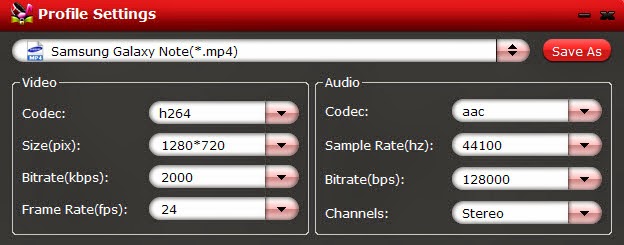
Step 2. From “Format” drop-down list, choose “Samsung > Samsung Galaxy Note(*.mp4)” as the output format.


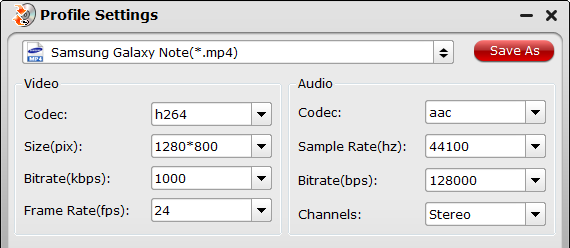
Step 3. If you like, you can enter “Settings” option to adjust profile parameters, such as video codec, bitrate, frame rate, size, etc to get better video and audio quality on Galaxy Note 3.


Step 4. Click the big “Convert” button on software main UI to start DRM video to Galaxy Note 3 conversion. When conversion completes, click the “Open” icon to locate the DRM-free movies, and transfer movies from PC to Samsung Galaxy Note 3. You are ready to watch DRM videos on Samsung Galaxy Note 3 the nest time you wait for a bus, travel, or go camping trip.

Related Articles:
               

Sunday, September 29, 2013

How to watch Blu-ray movies on Samsung Galaxy Note 3

This article aims to help you quick transfer your Blu-ray disc/ISO/folder to Galaxy Note 3 within 3 steps.

Samsung Galaxy Note 3, as one of the best Android phones, comes with a 1920*1080 high resolution widescreen, which gives users a good movie experience. There are many choices to enjoy movies with your gadget. But, if you want to get your movies off of a Blu-ray/DVD disc/ISO/folder onto the Galaxy Note 3 for playback, you may have to do some work in advance.

To make Blu-ray movie work on Samsung Galaxy Note 3, the best solution is to convert blu-ray to Galaxy Note 3 most preferred video formats: H.264 mp4. Here we’d like to recommend this Blu-ray to Galaxy Note 3 Converter, a professional and all-in-one converted which can easily finish this task within a few clicks and keep the best video quality.
 watch blu-ray on galaxy tab 3

Download a trial version here:
FYI: BD drive is required for ripping Blu-ray disc.

Step 1. Import Blu-ray/DVD disc/ISO/folder.

Click “Load files” to choose import from ROM, BD ISO/IFO or BD/DVD folder. It will detect and check the main title automatically; so keep it as default unless you want to include tidbits.

  
Step 2. Chose “Samsung Galaxy Note (*.mp4)” as target format.

Click the drop-down list besides Format, you can find many presets for different devices, editing programs and media player. Let’s choose “Samsung” in left area and select “Samsung Galaxy Note(*.mp4)” as target video format.


Step 3. Customize video specs. (Optional)

Pavtube Blu-ray to Galaxy Note 3 Ripper also offers a editor window to let you free set eo specs; click “Settings” to customize output file size, bitrate, frame rate and sample rate.


Step 4. Start Conversion.

Click the “Convert” button to start converting Blu-ray/DVD to MP4 so you can watch them in Galaxy Tab 3 smoothly. Wait for moments, then click “Open output folder” to locate the converted file quickly.

Saturday, September 28, 2013

MakeMKV and Handbrake Alternative: Convert/Deinterlace 1080i Blu-ray on Windows/Mac

 If you have problems in converting and deinterlacing 1080i Blu-ray, here is right for you. The article will show how to convert and deinterlace 1080i Blu-ray on Windows or Mac.
“I have a fetish for Backing up my 1080i Blu Ray contents, Backing up for my own use, not for Piracy. A lot of what we buy, are Period Drama, Nature, series by the BBC, and more and more were being manufactured with 1080i Video Format, that my usual combination of MakeMKV or Handbrake would not convert.”

Making digital copy of Blu-ray is a prevailing way to protect your Blu-ray collection from being scratched, or ruined by your little child. And it is also a good idea for someone who likes renting Blu-ray disc. Since it is restrict to return the Blu-ray disc in time, you can make a digital copy of Blu-ray and store in your hard device if you have little time to watch it before giving it back. In this way, you are free to watch it at any time.

To get it done, you may consider using free software like excellent Handbrake and MakeMKV. Using MakeMKV to remove any copy protection and region codes, and the resulting MKV file is further compressed with Handbreak. However, just as the above customer said at the beginning of the article, there are several Blu Ray Movies, that although they are converted, they will not be played well and screen remains just broken pixels. Further investigation proves the video format to be 1080 interlaced. The combination of Handbrake and MakeMKV is so redundant and cannot deal with 1080i Blu-ray properly. 

To find an easy-to-use tool to solve these problems, Pavtube Video Converter Ultimate deals with it fantastically. With easy workflow, it will help you to remove copy protection of Blu-ray and convert 1080i Blu-ray collection with great quality for further burning or playback. To deinterlace 1080i Blu-ray and convert into a progressive form can be done easily. 

Download it and get it installed (iMedia Converter for Mac is made for Mac users) Due to 2014 Pavtube Summer Holiday Special offer, you will get 20% off for it now, expire on Jun 4th.

How to convert and deinterlace 1080i Blu-ray collection on Windows 8?

1. Launch it and load Blu-ray.

Click “Load file” button to import Blu-ray. It takes only few seconds to remove copy protection. The main title will be selected automatically and you can preview the whole movies by clicking the main title. Then go to choose the desired subtitle and audio in the dropdown list.


2. Choose output format.

Click “Format” dropdown list to choose the desired video format for output.


Note: Directly Copy is used to copy the 100% intact main movie with multiple subtitle and audio tracks preserved. It will keep the high image quality from original Blu-ray and generate a M2TS file. If you need a lossless output file and fast conversion speed, it is a good choice.

3. Start conversion.

Click “Convert” button to start converting and deinterlacing 1080i Blu-ray collection on Windows 8. When it is completed, click “Open” button to locate the generated files.

Tips: How to deinterlace 1080i Blu-ray movies?

Click “Edit” icon you will be promoted to Video Editor. Then click “Effect” option you will find the “Deinterlacing” is checked by default. That is to say, it will deinterlace 1080i Blu-ray automatically when converting. 

More features:
  • Full disc copy supports to backup the whole Blu-ray keeping original structure and chapter markers, which can be used for further burning or creating ISO files.
  • It supports to convert different videos to another video format for further playing or editing.
  • Added 3D profiles in Format menu. (Side-by-Side, Top-Bottom, or Anaglyph 3D in MKV/MP4/MOV/WMV/AVI)
  • Choosing main title for DVD/BD by default/ full disc copying without choosing root title manually.
 
Get the generated files to your hard drive or portable devices, in this way, you can keep it safe and easily play it at any time.

  Read More:


Friday, September 27, 2013

How to Sync SD/HD Videos and Movies to iPhone, iPod, iPad with iTunes?

Do you have some HD videos in MKV/AVI/WMV/MTS/MXF/MPG/Tivo/FLV format? You may downloaded then from YouTube, forum; be emailed from friends; or shot several videos by yourself. It’s really a good idea to put these videos onto your iPhone/iPad/iPod Touch so that you can watch or share them everywhere.

We all know iTunes would transfer audio files to AC3/AAC automatically when you drag and drop them directly; however, not all the videos are supported by iTunes. To sync MKV/AVI/WMV/MTS/MXF/MPG/Tivo/FLV to iTunes for iPhone/iPad/iPod, the most recommended solution is to convert them to MPEG-4/H.264 MP4, the most compatible format to playback on iPhone/iPad/iPod.
watch hd videos on iphone ipad ipod

So here comes the problem: how do I transfer various HD videos and movies to iPad/iPod/iPhone with iTunes?

There’re several iOS Video Converters on the market; we really took some time to test and final combined out the best one with simple workflow, reliable video quality and rich functionality – the iPhone/iPod/iPad Video Converterfrom Pavtube Studio.

This is an all-in-one Video to iPad/iPhone/iPod Converter which integrates many presets for every model of your iDevices, fully support iPhone 5C/5S/5/4/4S/3GS, iPod Touch 5 and iPad 4/3/2/1 as well as iPad Mini.

At the time of writing, we found it’s on 20% OFF and it’s also works on Blu-ray/DVDs; that is to say, watching Blu-ray movie on iPad/iPhone/iPod. Bravo! It seems really great, don’t miss it!

Or you can download a free trial version here:


Tutorial of converting HD videos to MP4 for iPad/iPhone/iPod

Step 1. Import videos to iOS Video Converter Ultimate.

Get this program installed, click the top left two icons to import files into it. We checked and found the first icon seems to be designed for importing Blu-ray and DVD; so if you want to input pure videos, click the second one.

iphone ipod ipad video converter

Step 2. Choose MP4 as target format.

Click the drop-down list on the bottom, you will find various presets for different devices. No worries about choosing which one; you can submit your device model in the search box (on the bottom of the format list) to quick locate proper presets.

Step 3. Edit your video before conversion.(Optional)

Now back to the main interface, click the pencil-like edit icon on the top to open Video Editor as below:

editing videos for ios devices

In this Video Editor, you can trim, crop, add watermark/subtitles or edit audio of the source files.

You can also click “Settings” in the main interface to edit video size, bitrate, frame rate or sample rate all at your nees.

Step 4. Start conversion.

Click the red “Convert” to start converting MKV/AVI/WMV/MTS/MXF/MPG/Tivo/FLV or Blu-ray/DVD to your iPad/iPhone/iPod. It allows running up to 4 tasks simultaneously, the rest will be queued up. After the conversion, click “Open output folder” to locate converted video quickly.

convert videos to iphone ipod ipad

TADA! Now we get the videos ready for transferring to iPad/iPhone/iPod, follow this link to learn how to do the transferring via iTunes:
   Read More:

DRM Video Recorder: Import iTunes M4V file to Premiere Pro with best video/audio quality

A step-by-step guide to walk you through removing DRM protection from iTunes M4V and converting iTunes M4V to Premiere Pro on Windows/Mac with best video quality and perfect video/audio sync so that you can edit iTune M4V videos in Adobe Premiere Pro.

Do you have some M4V files that downloaded from iTunes Store and wonder how to import M4V files to Premiere Pro for editing or transfer them to your Tablet/Phone? Maybe you are emailed with a video that right in M4V format but you don’t know what to do to do with it? 

Not only video players, but also editing programs do not appreciate this format. M4V is not supported natively on both Windows and Mac as well as NLEs, for instance, Adobe Premiere Pro. 

What is M4V file?

M4V is the most common format used in iTunes videos for watching on Apple TV. However, videos purchased from iTunes store is protected by DRM so that you cannot playback them on any devices other than iDevices, nor edit in NLEs.
  
Moreover, M4V is also not a proper format for playback on tablets/phones like Galaxy Tab 3, Galaxy Note 3, Surface RT/Pro, Kindle Fire HD, Nexus 7(2013), Moto X, Sony Xperia Z1, HTC One, watch on PC or do precise editing in programs like Adobe Premiere Pro, FCP, iMovie, Avid Media Composer, Pinnacle, etc.; for that M4V files are highly compressed in MPEG-4 with not good video quality.

To remove DRM protection from iTunes M4V videos, or get better video quality and edit in Premiere Pro, the recommended solution is to remove DRM protection and then convert M4V to MPG/MOV/AVI/WMV that works with your Adobe Premiere Pro or devices (like: Blackberry, Nokia, HTC, and Palm Pre, etc.).

Here we would like to introduce this professional DRM Removal software or Mac DRM Removal software, a powerful iTunes M4V converter software on both Windows and Mac. With it, you can easily remove DRM protection from iTunes video and encode them to various formats including AVI/MOV/WMV/MP4/MKV/MPG/FLV/F4V, etc.
You can choose to download a free trial version of the DRM removal tool:

How to remove iTunes DRM and convert iTunes video to Adobe Premiere Pro

Step 1. Load M4V files to the DRM Removal Tool.

Get this DRM Removal Tool installed, drag and drop your iTunes M4V files to it directly.
  
Step 2. Choose output file format for editing or playing.

Adobe Premiere Pro supports FLV, F4V, MPEG-2, QuickTime, AVI file formats, Just click the drop-down list besides “Format” and choose “Adobe Premiere/Sony Vegas” -> “MPEG-2 (*.mpg)”, “MOV (AVC)(*.mov)” or “WMV (VC-1) (*.wmv)”; You can also key in AVI in the search box to quick locate this profile.

pavtube drm media removal tool

And “Settings” button provides you more customize options like video size, bitrate, frame rate, sample rate(Hz) etc. for output files.

Step 3. Strat removing DRM protection from iTuens M4V.

Now you can click “Convert” button to start removeing DRM protection and converting iTunes M4V for editing or playing smoothly. Wait for moments, then click “Open” to locate the converted video.

Here are several tips during the conversion:

a). Please don't use iTunes during converting, or an error may occur.
b). It's highly recommended to use iTunes V10.5.0 or higher. 
c). This product cannot convert unplayable iTunes files (damaged, unauthorized, etc).
d). The DRM removing process may mislead your anti-virus software to falsely report virus/worm. Please ignore the report to keep on ripping.

Now, you can follow this page to learn the Adobe Premiere Pro workflow: How to import media files to Premiere Pro?.

FYI: if you just want to convert unprotected M4V to MOV/WMV/MP4/MKV/MPG/FLV/F4V, Pavtube Video Converter Ultimate is high recommended for good video quality and reliable workflow.

You may be interested in some Money-Saving Tips:

Read More: