This guide introduces the best workflow to import QuickTime mov to iMovie on Mac OS X 10.9 Mavericks or Mountain Lion for smoothly editing.
How to transcode Quicktime MOV files for editing in iMovie?
The above introduced Pavtube HD Video Converter for Mac program, which is not only able to convert various HD videos (including Quicktime mov, MKV, MTS, MXF, AVI, VOB, MPG, 3GP, Flash videos etc.) to AIC, but also convert them to Apple ProRes for FCP, DNxHD mov for Avid Media Composer/Xpress Pro, convert to MPG/AVI/MOV for Premiere Pro, convert to various video formats for editing, playback, sharing, storing and burning, etc.
First download a free trial version and install it on your Mac(including 10.9 Mavericks and Mountain Lion 10.8).
Let’s start to quick convert QuickTime MOV to iMovie compatible codec on Mac.
1. Load .mov files.
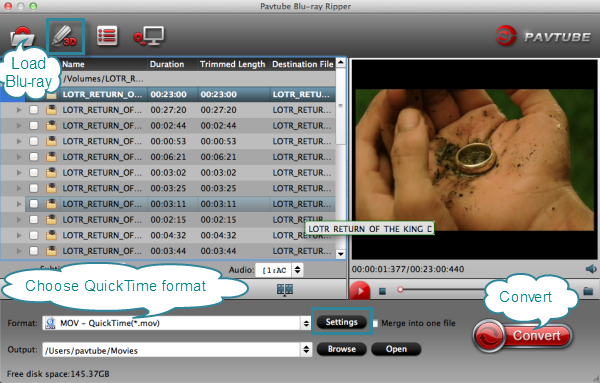
Run Pavtube HD Video Converter for Mac, then click the top left two icons to load individual mov videos, or import the entire folder.
2. Choose the proper format for iMovie.
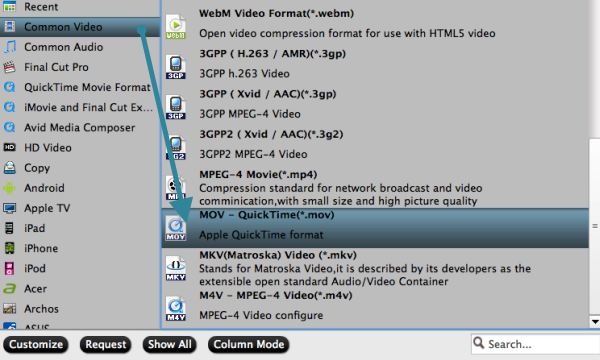
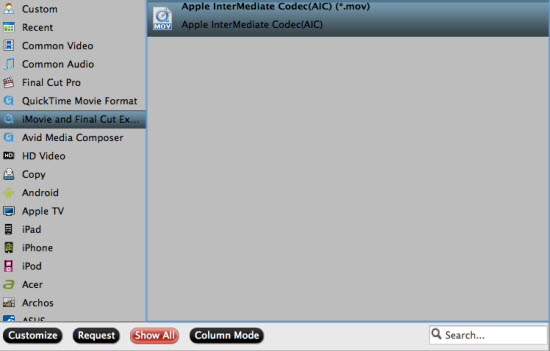
Click the drop-down list besides “Format” and choose “iMovie and Final Cut Express > Apple InterMediate Codec (AIC) (*.mov)” as the best format for editing in iMovie. Click “Browse” to choose output path.
Tips: Click the Pencil-like icon on the top to trim, crop, edit audio, add 3D effect and subtitles.
3. Custom video/audio settings for iMovie.
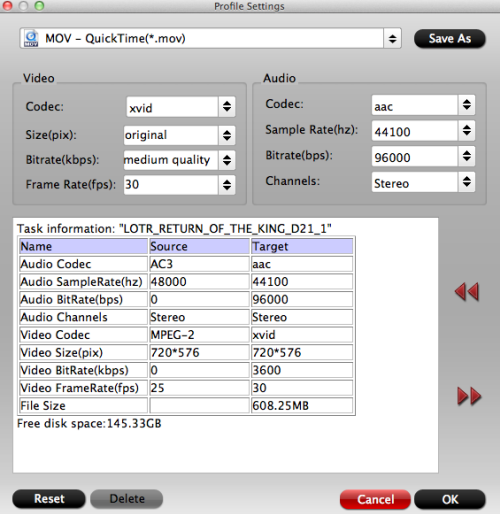
Click the “Settings” and customize output video size, bitrate (decide video quality and size), frame rate and other specs. You’d better set the video frame rate as 30fps, video size as 1920*1080 to keep the best quality for editing in iMovie.
4. Start Quicktime mov to AIC mov conversion.
Click the “Convert” button to start converting Quicktime mov to AIC mov for iMovie. Wait for moments and you will get the best video. Click the “Open” button to locate the converted video and then import them to iMovie for editing on Mac Mountain Lion and Mavericks.
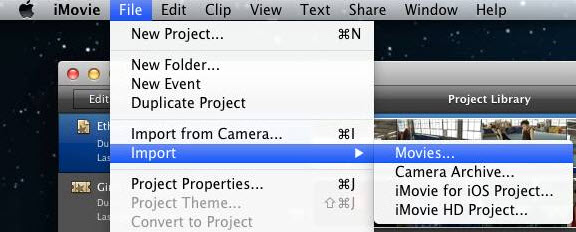
5. Import video files to iMovie.
Launch iMovie, choose “File” > “Import” > “Movies…” and choose the path above:
Related Tips:
Q: “I have some standard MOV files and enjoys playing back them smoothly in QuickTime Player. But when I import them to iMovie and want to edit, now the videos seem to randomly switch frame rates during playback. Did you do anything wrong?”A: iMovie is really picky on video formats as well as video codecs. For example, normal mov files are not supported natively so that you cannot playback smoothly your quicktime mov in iMovie. The best compatible codec for iMovie is Apple InterMediate Codec(AIC); in this case, you are suggested to use Pavtube HD Video Converter for Mavericks to convert QuickTime MOV to AIC MOV for editing in iMovie.
How to transcode Quicktime MOV files for editing in iMovie?
The above introduced Pavtube HD Video Converter for Mac program, which is not only able to convert various HD videos (including Quicktime mov, MKV, MTS, MXF, AVI, VOB, MPG, 3GP, Flash videos etc.) to AIC, but also convert them to Apple ProRes for FCP, DNxHD mov for Avid Media Composer/Xpress Pro, convert to MPG/AVI/MOV for Premiere Pro, convert to various video formats for editing, playback, sharing, storing and burning, etc.
First download a free trial version and install it on your Mac(including 10.9 Mavericks and Mountain Lion 10.8).
Let’s start to quick convert QuickTime MOV to iMovie compatible codec on Mac.
1. Load .mov files.
Run Pavtube HD Video Converter for Mac, then click the top left two icons to load individual mov videos, or import the entire folder.
2. Choose the proper format for iMovie.
Click the drop-down list besides “Format” and choose “iMovie and Final Cut Express > Apple InterMediate Codec (AIC) (*.mov)” as the best format for editing in iMovie. Click “Browse” to choose output path.

Tips: Click the Pencil-like icon on the top to trim, crop, edit audio, add 3D effect and subtitles.
3. Custom video/audio settings for iMovie.
Click the “Settings” and customize output video size, bitrate (decide video quality and size), frame rate and other specs. You’d better set the video frame rate as 30fps, video size as 1920*1080 to keep the best quality for editing in iMovie.
4. Start Quicktime mov to AIC mov conversion.
Click the “Convert” button to start converting Quicktime mov to AIC mov for iMovie. Wait for moments and you will get the best video. Click the “Open” button to locate the converted video and then import them to iMovie for editing on Mac Mountain Lion and Mavericks.
5. Import video files to iMovie.
Launch iMovie, choose “File” > “Import” > “Movies…” and choose the path above:

Related Tips:


