Thursday, August 31, 2017

How to Watch 4K video on PS4 Pro via Netflix, Amazon, Youtube and USB

We all want to see the crisp, hyper-detailed glory of 4K from the comfort of our own home, but there’s a few twiddly things you need to do beforehand. As the PS4 Pro doesn’t support some 4k Blu ray discs you’ll be restricted to streaming 4K mainly via Netflix, Amazon Prime video, YouTube or USB.

First you need a 4K/UltraHD TV. If you haven’t got one of them, you might as well stop reading now... 

Still with us? Good! In this article, we will go through 4 parts to make you more clear with this question "how to watch 4k videos on PS4 Pro".


Part1: Stream Youtube 4K Videos on PS4 Pro

Part2: Play Netflix/Amazon 4K Videos on PS4 Pro

Part3: Watch 4K Videos on PS4 Pro via USB

Part4: Convert Local 4K Videos to PS4 Pro


Part1: Stream Youtube 4K Videos on PS4 Pro

If you want to stream YouTube videos in 4K you need:

  • A PS4 Pro set up for 4K image quality.
  • An Ultra HD or 4K display device (TV, projector, etc.).
  • A steady internet connection of at least 25 Mbps.

Once a 4K video is selected, the PS4 Pro will automatically stream the content in 4K resolution.

If you want to make sure you’re streaming in 4K, in the You Tube app go to [Settings] > [Show Video Info] > [Enabled].

ps4 pro youtube 4k

A 4K video normally has 3840 x 2160 resolution, so if you see these values, you are streaming in 4K quality.

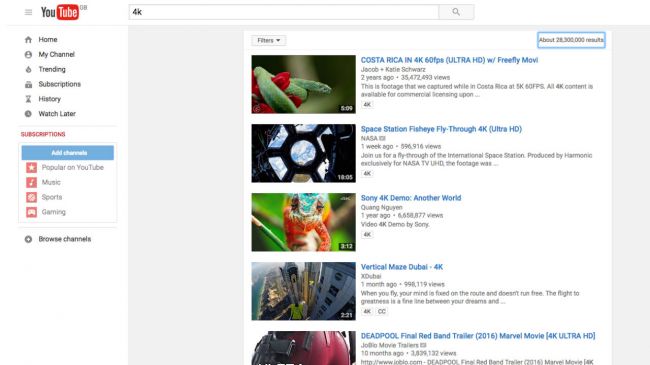
On the Youtube app in the console you will need to search for video with 4K. For example – game trailers 4K, you will get a lot of results in with 4K tag at the bottom. Just select it to play. 

get 4k on youtube


Part2: Play Netflix/Amazon 4K Videos on PS4 Pro

You'll obviously also want to make sure you get the full 4K experience, so make sure your in the Video Output Settings your resolution is set to 'Automatic'. There's step-by-step process for each video provider below, so have a glance at these screenshots if you get stuck. 

Getting 4K on PS4 Pro

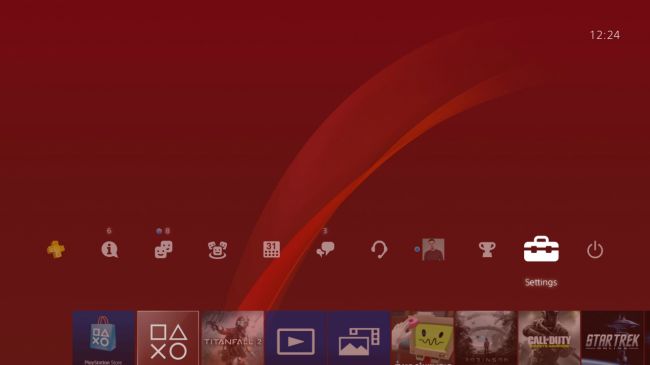
Step 1: Select the settings toolbox. 

step1

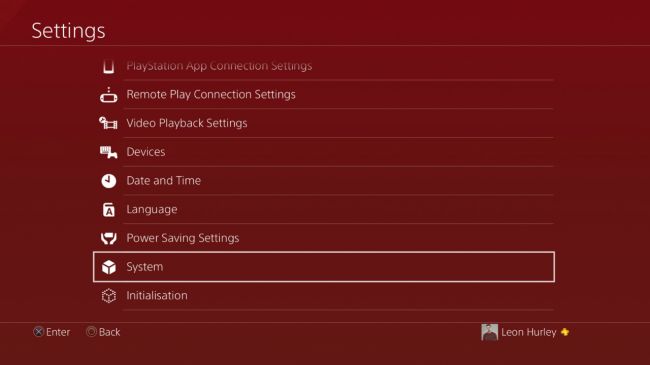
Step 2: Select the 'System' option. 

step2

Step 3: Make sure the HDCP option is ticked. 

step3

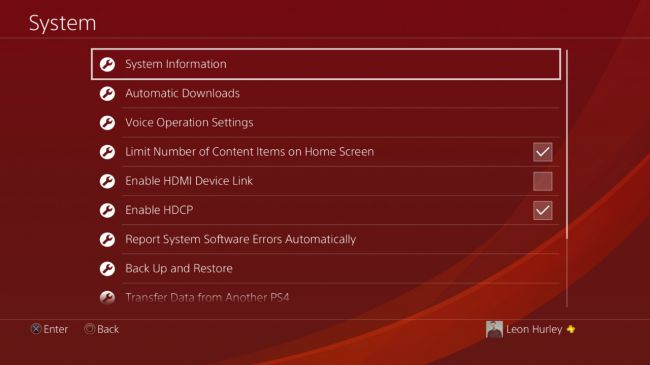
Step 4: Make sure your resolution is set to Automatic in the Video Output Settings. 

step4

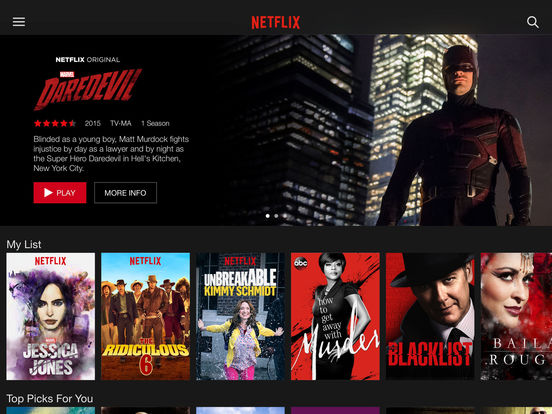
Getting 4K on Netflix

All you need to do is find the UltraHD 4K category and you're good to go!

netflix

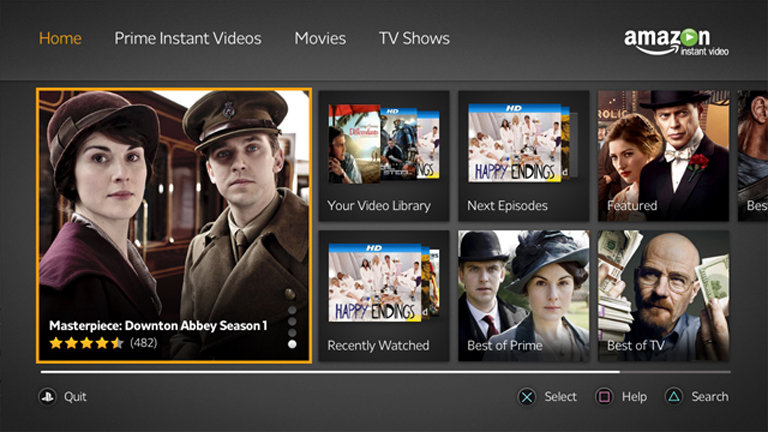
Getting 4K on Amazon Prime Video

Select the Ultra HD Movies and TV category. Yup, that's all you need to do. 

amazon prime video


Part3: Watch 4K Videos on PS4 Pro via USB

In this part, we gonna show you how to play local 4k video on PS4 Pro. Before you get started with it, two thing you need to prepare. One is to download the Media Player from PlayStation®Store, the other is to make clear with the Media Player on PS4 Pro Supported 4k video Format. Below is the information to make you to understand in depth.

Media Player on PS4 Pro Supported Format:

MKV

Video: H.264/MPEG-4 AVC High Profile Level 4.2

Audio: MP3, AAC LC, AC-3 (Dolby Digital)

AVI

Video: MPEG4 ASP, H.264/MPEG-4 AVC High Profile Level 4.2

Audio: MP3, AAC LC, AC-3 (Dolby Digital)

MP4

Video: H.264/MPEG-4 AVC High Profile Level 4.2

Audio: AAC LC, AC-3 (Dolby Digital)

After downloading the meida player, then you may go with the procedures below with us to start play video on PS4 Pro via USB.

Step 1. Select  (Media Player) from the content area. Connected USB storage devices or media servers that are on the same network as your system will be detected and automatically displayed.

Play Video on PS4

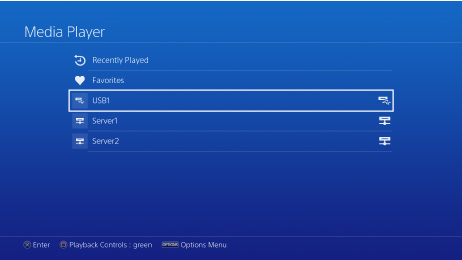
Step 2. Select the USB storage device or media server.

Step 3. Select the 4K video that you want to play.


Part4: Convert Local 4K Videos to PS4 Pro

As we all know, MP4, AVI, MKV, are just a container which could include various codec. From PS4 Pro supported formats, obviously, 4k video formats mustn't be limited in those several containers. In this case, you may find that most videos can't be played by PS4 Pro directly, such as Blu-ray disc, DVD disc, Blu-ray ISO, DVD ISO, VOB, MOV, WMV, M4V, FLV, MTS, etc. If your videos are not in the supported format, you will need to use video converter software to convert Blu-ray/DVD, 4k recordings and other 4k videos to PS4 Pro supported format.

On the market, a ton of 4K video converters are waiting for your exploration. After a long time test, finally, we get the ultimate one - Pavtube Video Converter/for Mac, which has the ability to convert any 4k video like 4K H.265/HEVC Video, 4K H.264/MPEG-4 AVC, 4K TS, 4K AVI, Youtube 4K, DJI Phantom 4 Pro 4K and more with 4096 x 2160 or 3840 x 2160 resolution to 4K H.264 MP4, 4K MKV for PS4 Pro.

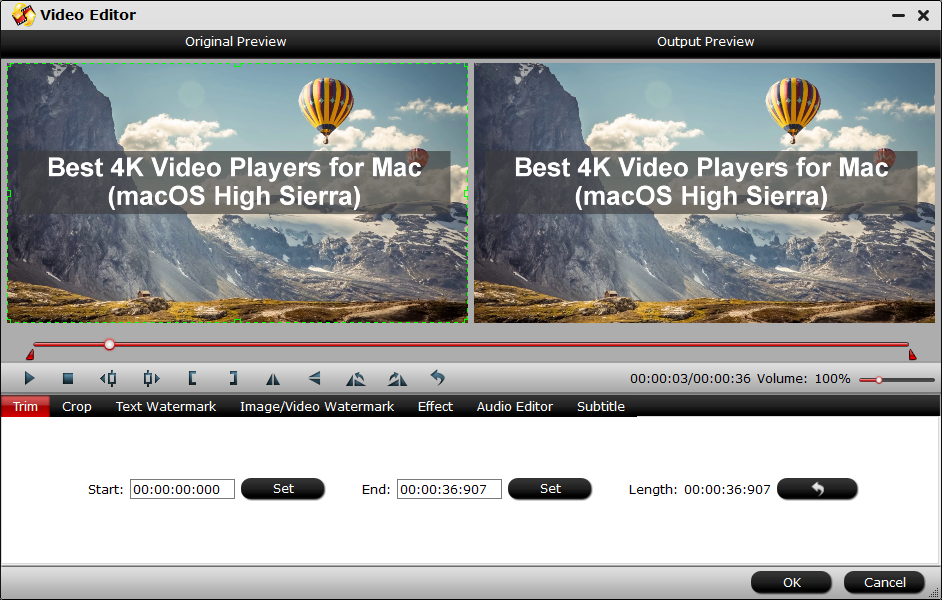
Moreover, this program is equipped with professional editing functions. With it, you can adjust video effect like brightness, saturation, contrast, and volume. Besides, you also can merge several cllips into one, or just split one video into several parts. Cropping, trimming vdieo, adding watermark, etc, many features, you can click this review to know more.

Step by Step to Convert Local 4K Videos to PS4 Pro

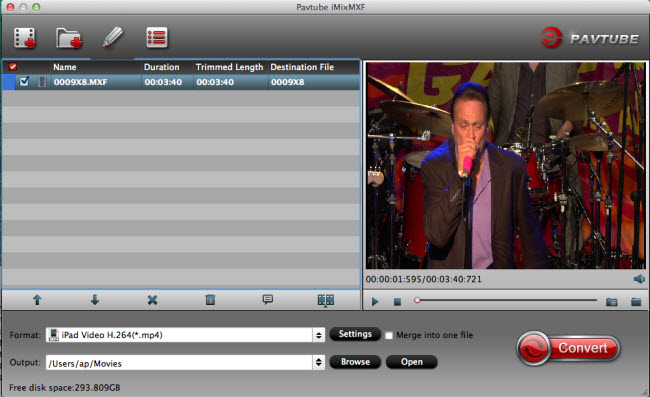
Step 1: Start the program on your computer, click "File" > "Load Video/Audio" or "Load from folder" button to import unsupported 4K video files into the program. 

load 4k video

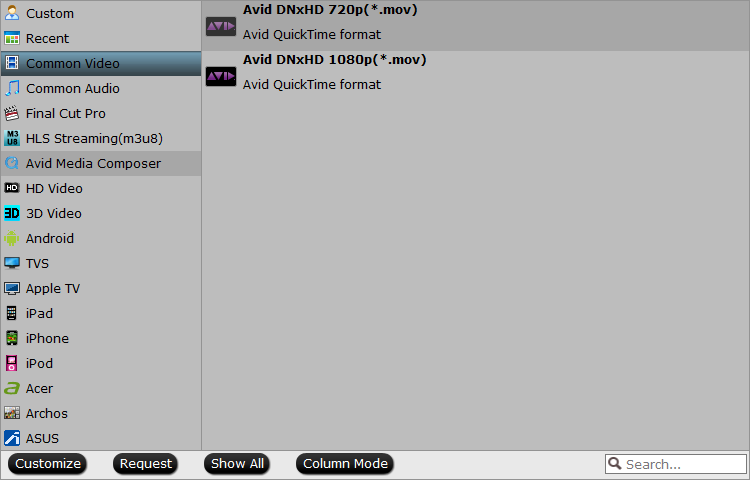
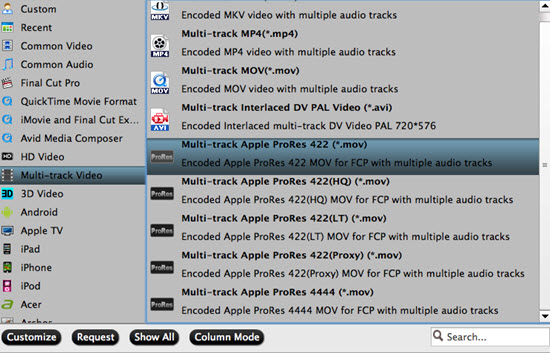
Step 2: Click "Format" bar, from its drop-down option, select H.264 HD MP4 from "HD Video" for PS4 Pro. PS4 Pro also supports MKV, AVI, so you also can choose HD AVI, HD MKV here.

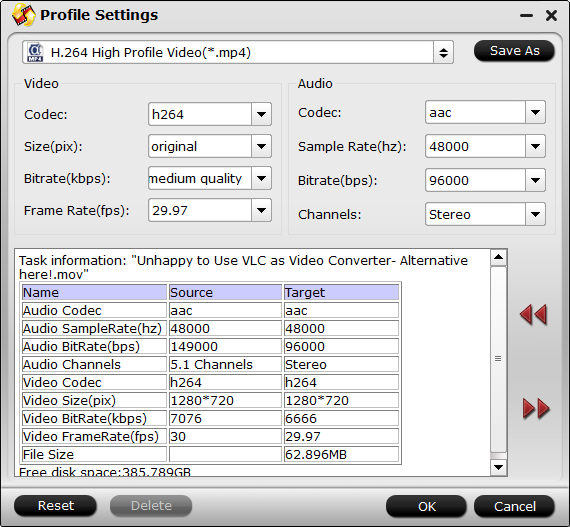
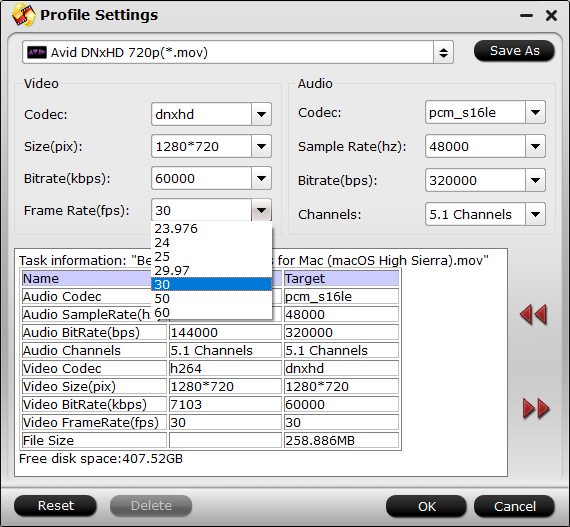
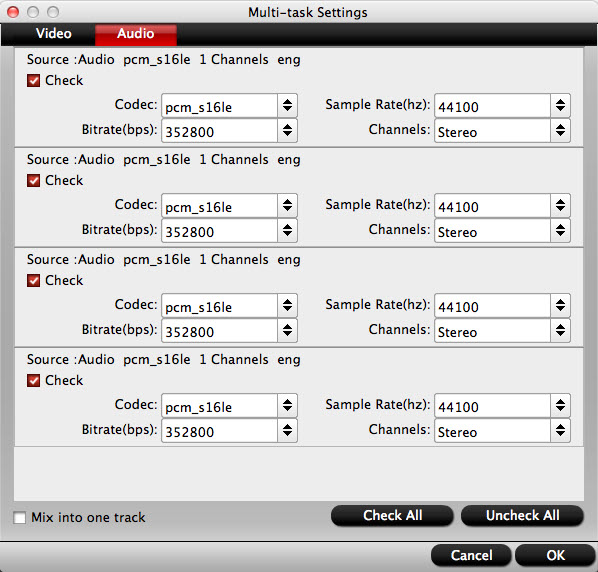
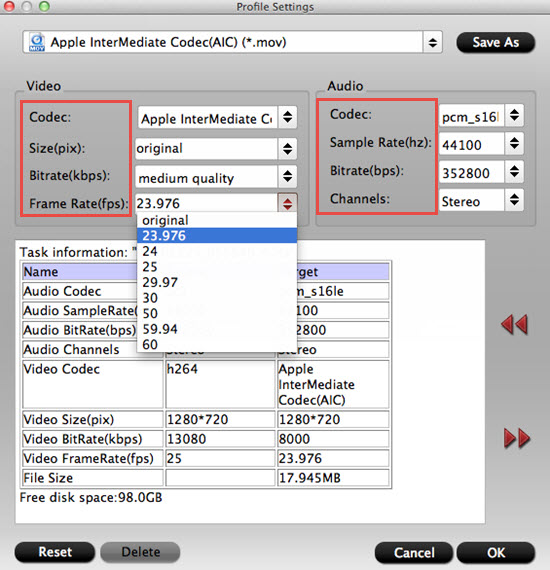
Tip: After you have selected the output format, click the "Setting" button, here, you can adjust parameters. To make sure the output file is 4k video just need to check pix is 3840 x 2160 or not.

HD MP4

Step 3: To convert unsupported 4k video for PS4 Pro by hitting the "Convert" button on the main interface.

When the conversion is completed, click "Open Output Folder" to popup the folder with converted files, then you can easily transfer and play converted 4K files on PS4 Pro via an external USB drive.

Friday, August 25, 2017

Play Any 4K Video on Plex Media Server

Watch how Plex makes it possible to enjoy all of your media, whether in your living room, the car, or on a boat in the South Pacific! Plex stands out of its class, which has completely overhauled its media streaming software for living room and replaces Plex Home Theater and delivers a host of new features such as 4K playback support. From Plex official website, we get this information:"Plex Media Player automatically detects the resolution of your screen and draws the interface accordingly. The app also supports playback of 4K video files using the H.264 (AVC) codec in most containers, so long as your computer is powerful enough to decode it. "

From above, to play 4k videos on Plex Media Server successfully, the premise is that 4k video must be encoded with H.264/AVC codec, besides that, you must have a powerful computer which can decode 4k smoothly.

In our daily life, there are many ways to get 4k videos, like 4k source from DJI drones, downloaded from YouTube, shot by 4K device recorders. All those 4k video could be in different container file formats such as 4K AVI/WMV/MP4/MOV/MKV/TS/MXF/XAV/ XAVC S or codec like H.264, H.265, Prores, etc. To play any 4k video on Plex Media Server, here we recommend you a shortcut -  transcoding the incompatible 4K video to Plex Media Player readable 4K H.264 codec. Pavtube Video Converter for Windows/Mac is a professional video transcoding software which can solve "play any 4k video on Plex Media Player" problem easily.

Analysis of Playing 4K on Plex Media Server

4K transcoding is a very intensive process, and it will be CPU comsuming when you running Plex Media Server to play 4k video. If your happens to run a slow computer, you can easily suffer video stuttering or lagging issue when using Plex Media Player to view the 4K video, unless you are running a powerful computer.

To solve this problem, it would be essential for you to perform a codec transcoding and format file size compression process. It would be a great hassle for you to do the codec transcoding and another program to do the file size compression process. Pavtube Video Converter could help you to compress video files size in just few clicks. Its all-round features are not limited to here, keep reading.

Features of Pavtube Video Converter

For fast computer with powerful CPU, Pavtube Video Converter has enhanced media compatiblity with all 4K container file formats and codec listed above. You can load 4k video into the program and then efficiently convert them to Plex Media Player readable 4K H.264 file formats for playback. By the way, batch conversion is also available.

For slow computer, the best way is to use Pavtube Video Converter to  compress 4K to 1080p, then you will get a higher level playback experience when wathcing 4k video on computer via Plex.

The place you need to compress 4k is not only on computer, if your TV doesn't support playing 4k video whereas you have shot some wonderful recordings, now you can perform 4k video compressing then play them on TV. Compression features also be applicable to massive device like iPhone, Samsung Galaxy Note8, Eve V, game console, and more.

Moreover, compare with compress, you are also able to upscale video by adjust video settings like changing 720p to 1080p. This program supports you to import 200+ kinds of video files and output hundreds of video/audio files for various devices, like AVI, WAV, MKV, MP4, MOV, etc.

Professional editing function allows you make your personal video by trimming, cropping, adding text/image/video images, inserting SRT/ASS/SSA subtitle into source video, etc.

What is worth mentioning, batch conversion and GPU acceleration can largely save your energy and time.

Step by Step to Convert and Compress 4K for Plex Media Server Smooth Playback

Step 1: Load 4K video.

Download the free trial version of the program. Launch it on your computer. Click "File" menu and select "Add Video/Audio" or click the "Add Video" button on the top tool bar to import 4K video files into the program.

Input 4K video

Step 2: Define the output format.

Clicking the Format bar, from its drop-down list, just output Plex Media Player playable 4K format ""H.264 High Profile Video(*.mp4)" under "Common Video" main category. Or you can select other formats as you like.

high profile h.264

Step 3: Adjust video settings

 Click "Settings" to open "Profile Settings" window, from "Size(pix)" drop-down list, select "1920*1080" to compress 4K to 1080p.

h.264

Step 4: Begin the conversion process.

After all setting is completed, hit the "Convert" button at the right bottom of the main interface to begin to convert and compress 4K to Plex Media Server compatible file codec and file size resolution.

When the conversion is finished, click "Open Output Folder" icon on the main interface to open the folder with generated files. Then add converted files to Plex for playing smoothly.

Thursday, August 17, 2017

Tips for Importing Canon EOS 6D Mark II Footage to Davinci Resolve for Editing

For superb performance on the go, the Canon EOS 6D Mark II camera puts full-frame performance into a compact, fully featured DSLR. Its 26.2 Megapixel CMOS sensor and DIGIC 7 Image Processor help deliver amazing results even at expanded ISO settings, making it great for challenging low-light situations as well as landscape, portrait and event photography. With the EOS 6D Mark II's speed to capture action and the versatility to create phenomenal photographs and Full HD 60p videos in numerous environments and lighting situations, the camera offers creative content makers a winning combination of advanced features in a portable package that's as fun as it is powerful. After you have got a 1080p MOV or MP4 footage from Canon EOS 6D Mark II, you may want to edit it with Davinci Resolve then share your work with thousands audience on Youtube. However, editing procedure sometime goes beyond your expectation.

As a professional non-linear editing program, Davinci Resolve is the world's most advanced color grading tools. It can support several different resolution: SD, HD. While the file formats work with Davinci Resolve including MOV, MP4, MXF, EXR and OTHERS.. Unfortunately, from some forum, we found some users have issues importing Canon EOS 6D Mark II recordings to DaVinci Resolve. What is the best Best Canon EOS 6D Mark II MOV/MP4 footage to DaVinci Resolve Workflow? Any solution for import/edit Canon EOS 6D Mark II MOV/MP4 footage in Davinci Resolve on Window/Mac? As we all know, Canon EOS 6D Mark II could ouput video formats like below:

Movie Resolution:

1920*1080 (60p/50p/30p/25p/24p)

1280*720 (60p/50p/30p/25p)

Movie File Format:

MP4 (Video: H.264 IPB/IPB Light, Audio: AAC)

MOV ((Video: H.264 All-I, Audio: Stereo Linear PCM, FHD time-lapse only), Motion JPEG (4K time-lapse only))

From Davinci Resolve supported fromats and codec, we have list 3 options for you to solve "can't import/eidt Canon EOS 6D Mark II MOV/MP4 footage in Davinci Resolve" problem.

Option 1: When you've got a 1080p MOV video with 60 frames shot by Canon EOS 6D Mark II, and want to edit it with Davinci Resolve, the truth is that it will be very choppy when you start to edit this footage. To solve this problem, we strongly recommend you a powerful assistant - Pavtube Video Converter/For Mac, which could help you downscale 60 frames video to 30p, or 25p for smooth editing on Davinci Resolve.

Option 2: For getting H.264 MP4 footage then importing into Davinci Resolve, if you don't care about the output formats after edititng on Davinci Resolve, you can skip this. Cause Davinci Resolve could decode H.264 MP4, but can't encode H.264 MP4 on Windows and Mac. For those people who care about the output format, you can take measures as following I will show you. To be frank, MP4 is not friendly to non-linear editing program, no matter Davinci Resolve, or other editing programs. To solve the video format incompatibility issues, we highly recommend you to convert H.264 MP4 to DNxHD MOV, which could be the best video format for non-linear editing program. You must want to know how to convert H.264 MP4 to DNxHD MOV, keep reading.

Option 3: If you have got H.264 MOVwith 30 frame, luckily, this kind of footage will be perfect when you edit with Davinci Resolve.

Below we will go with Pavtube Video Converter to show you the specific steps to convert Canon EOS 6D Mark II H.264 MP4 to Davinci Resolve for Editing on Windows, and its Mac version has the same operating procedure.

How to transcode Canon EOS 6D Mark II H.264 MP4 to Davinci Resolve for Editing?

Step 1: Add Canon EOS 6D Mark II H.264 MP4 with 30 frame video files.

Launch this assistant on your Windows, click the “Load file” or “Add Video” icon on the main interface to import Canon EOS 6D Mark II H.264 MP4 video into the program.

load H.264 mp4

Step 2: Choose DNxHD MOV as output file format.

Click "Format" bar, from its drop-down option, choose "Avid DNxHD 720p/1080p(*.mov)" best editing codec by selecting "Avid Media Composer".

ouput setting dnchd mov

Step 3: Downscale 60p to 30p(Optional).

If you worry about footage with 60p which can't be played on Davinci Resolve smoothly, you can click "Settings" on the main interface, and change "Frame Rate" from 60 to 30. you also can flexibly tweak video Codec, Size, Bitrate, Frame Rate, Audio Codec, Sample Rate as you like.

Tip: Generally, the higher the bitrate is, the bigger file size it will be.

60 to 30

Step 4: Edit video.

This program also supplies simple edition features, please click pen icon on the main interface, and enter the "Video Editor" interface, there are seven edit tabs: Trim, Crop, Text Watermark, Image/Video Watermark, Effect, Audio Editor and Subtitle for you to select. More feature you can check this review.

video editor

Step 5: Start the conversion process.

After all the setting is over, go back to the main interface and hit right-bottom "Convert" button to start Canon EOS 6D Mark II H.264 MP4 to Avid DNxHD 720p/1080p(*.mov) conversion process.

You can click "Open" and pop up the folder with converted file, then launch Davinci Resolve on your Windows/Mac to import Canon EOS 6D Mark II H.264 MP4 video to Davinci Resolve for editing.

Knowledge about Pavtube-An easy-to use, functional video converter and video editor

  • Convert almost all Canon HD/SD audio/video to 200+ audio/video formats like, MP4, MOV, MKV, AVI, WMV, etc.
  • Convert Canon 4k/HD/SD footage to massive non-linear editing programs, like iMovie, Adobe Promeire Pro, After Effects,Final Cut Pro and more.
  • Get footages of Canon/Sony/Panasonic series footage for free playback on popular devices like, Samsung Galaxy Note 8, iPhone, iPad, PS4 Pro, and more.
  • Powerful editing functions enables you to trim or cut unwanted parts of recorings, insert subtitles, add creator's watermark, etc.
  • GPU acceleration technology available.

Thursday, August 10, 2017

How to Transcode Canon MXF to Apple ProRes with Multi-track on Mac?

MXF is widely used in high definiton camcorders like Canon XF305, Canon C300, Panasonic P2, etc. If you are users of these camcorders, you could find the recorded footages are in .mxf format. Then you may want to transfer the MXF files to Final Cut Pro for editing. However, most of the time you may encounter importing and codec problems. As we all know, MXF is much more popular than before, it is not difficult. MXF is adopted by most professional video editing systems, such as Adobe After Effects, Adobe Premiere Pro, Avid and so on, but it is hard to edit the MXF file in any editor like iMovie, Final Cut Pro and more as MXF is not compatible with them. To break the limitation of MXF file and edit MXF file on your Mac, a professional MXF to ProRes Converter is badly needed.

We strongly recommend you Pavtube iMixMXF, which could turn MXF videos into virtually any formats for multiple purpose. This wonderful transcoder supports you to convert MXF files to H.264/MPEG-4 AVC, H.265/MPEG HEVC, MOV, M4V WMV, MKV files for playback on your media player. This software also supports Windows version - Pavtube MXF MultiMixer for you to choose from.

For those people who want to preserve the multi audio tracks, Pavtube iMixMXF has full support for all MXF files generated by Canon XF series, Sony XDCAM, Panasonic P2,and Avid Media Composer, and so on. iMixMXF supports import multi-track MXF, and under its "Multi-track video" category, you can output Multi-track MP4/MKV/MOV, and Multi-track Interlaced DV PAL video (.avi) for playback on massive media player. If you are a Mac user, here are 5 kinds of "Multi-track Apple ProRes" for you to select, then edit on iMovie, Final Cut Pro, and other Mac editing software without lossing any channel. Furthermore, for convenience, this professional assistant grants you to choose to mix the MXF multi track/channel audio into one or just keep them. Mixing the multi tracks/channel means you can get single audio with all channels, including the audios of background, interviewer, and interviewee.

How to Transcode Canon MXF to Apple ProRes with multiple audio channels on Mac?

Step 1: Load Canon MXF files with multiple audio tracks.

Launch Pavtube iMixMXF on your Mac, click the “Load file” or “Add Video” icon on the main interface to import Canon MXF files with multiple audio tracks into the program.

load canon mxf

Step 2: Output Multi-track video format.

Click the "Format" bar, swim in its drop-down list, navigate to "Multi-track video" main category, this program offers 5 kinds format of "Multi-track Apple ProRes" for editing on Mac.

Tip: And Apple Prores codecs under "Final Cut Pro" category cannot keep multi tracks. The only way to output multi-track Apple Prores is to chose them under "Multi-track Video" category.

output apple prores

Step 3: Adjust multi-track settings.

Click "Settings" window on the main interface and pop up the "Multi-task Settings", here you can ckeck or unckeck video/audio channels as you like.

Tip: Mix audio tracks: Check “Mix into one track” under the left bottom of “Multi-task Settings” interface, you can then mix the multiple audio tracks into one as we just talk above the article.

adjust multi track settings

Step 4: Convert Canon MXF files with multiple tracks.

Start Canon MXF files with multiple tracks conversion by hitting the "Convert" button. Just wait for a second, you can click the "Open" button of the main interface and that will pop up the folder with converted file.

After you have done all those settings, you can edit Canon MXF files in FCP, or other editing software. If you are confused about how to import Canon footage into Final Cut Pro, here is a guide for you.

Thursday, August 3, 2017

Edit DJI Zenmuse X4S 4K video in iMovie

The Zenmuse X4S is a powerful camera featuring a 20 megapixel 1-inch sensor and a maximum ISO of 12,800.  This 84° FOV, high resolution lens makes the Zenmuse X4S as powerful during aerial imaging as it is on the ground.Combined with CineCore 2.0, the Inspire 2’s powerful image processing system, it can record 4K/60 H.264 and 4K/30 H.265 videos at a 100Mbps bitrate, and oversample 5.2K video into 4K video in real-time, capturing fine image details. In Burst Mode, the Zenmuse X4S supports 14fps shooting at 20 megapixels in both JPEG and DNG formats. It is able to make the difficult balance between agility and image quality.

With such 4K camera in hands, you may think about editing the 4K material with iMove on your Mac when you have shot the landscape. However, the truth is that playback 4K material is a plain on the Mac. As we all know, the DJI Zenmuse X4S captures 4K video in MP4 or MOV (H.264 or H.265 codec) format, however, iMovie doesn't support H.264 video very well, since H.264 is an ideal video compression codec but not a good video editing codec. In addition, the 4K H.264 codec is very intense, it will be CPU consuming to decode the 4K footage and it also will take a lot of time to render the file and also potentially compromise the final effects, especially, color correction and compositing with gradients if you native edit this footage with iMovie.

How to edit DJI 4K video in iMovie without any obstacle? To solve this problem, the best panacea is to covnert DJI Zenmuse X4S 4K video to iMovie best editing format - Apple Intermediate Codec. Here we highly recommend you Pavtube Video Converter for Mac , which can help you directly convert DJI Zenmuse X4S 4K video to Apple Intermediate Codec with fast and smooth post-production workflow.

Pavtube Video Converter for Mac supports to Output Apple ProRes, DVCPRO, HDV, Avid DNxHD, Apple Intermediate Codec(AIC) for NLE software, like iMovie, FCP, After Effects CC 2017, Premiere Pro, Elements. With this smart assistant, you will have free access to watching SD videos, digital camcorder recordings (e.g. MXF, MTS AVCHD, MOV, MP4, MVI, etc), DVR videos , audio files on devices such as Apple, Android, Windows series, media players, game consoles, etc. Some DJI users complain that what's the best option for their Macbook limited hardware when they are out for traveling with DJI Zenmuse X4S in hands. Good news, Pavtube Video Converter grants you to downscale the 4K video to 1080p without lossing video quality for saving more storage space. Professional editing functions such as inserting SRT/ASS/SSA subtitle, setupping video effect, trimming and cropping video allows you to create splendid personal movie.

Part 1: How to transcode DJI Zenmuse X4S 4K video to iMovie AIC for Editing?

Part 2: Top 5 iMovie Converter for Mac

Part 1: How to transcode DJI Zenmuse X4S 4K video to iMovie AIC for Editing?

Step 1: Add DJI Zenmuse X4S 4K video files.

Launch this assistant on your Mac, click the “Load file” or “Add Video” icon on the main interface to import DJI Zenmuse X4S 4K video into the program.

load DJI Zenmuse X4S 4K

Step 2: Choose output file format.

Click "Format" bar, from its drop-down option, choose iMovie or FCE best editing codec by selecting "iMovie and Final Cut Ex..." > "Apple Intermediate Codec (AIC)(*.mov).

Set output file format

Step 3: Downscale 4K to 1080p(Optional).

If you worry about the Mac storage space, you can click "Settings" on the main interface, then change Video Size from "3840*2160" to "1920*1080". To make the video size smaller, you can lower the bitrate to get this goal.

4k to 1080p

Step 4: Edit video.

This converter offers simple video editing function. You can click the pen icon, and enter the "Video Editor" interface, there are seven edit tabs: Trim, Crop, Text Watermark, Image/Video Watermark, Effect, Audio Editor and Subtitle for you to select.

video converter mac editing interface

Step 4: Start the conversion process.

After all the setting is over, go back to the main interface and hit right-bottom "Convert" button to start DJI Zenmuse X4S 4K video to iMovie Apple Intermediate Codec conversion process.

Then you can click "Open" and pop up the folder with converted file, then launch iMovie on your Mac to import DJI Zenmuse X4S 4K video to iMovie for editing.

trail buy

Part 2: Top 5 iMovie Converter for Mac

Top 1. Pavtube Video Converter for Mac

Pros:
-Support to convert DJI Phantom 4 Pro, DJI MAVIC 4K video, Sony 4K Camera video, Panasonic 4 video, recording software export and normal MP4, MKV, etc video. 
-Rich editing functions (trim, crop, add watermarks, special effects, adjust audio, insert subtitle)
-Export video formats compatible with popular editing programs like iMovie, FCP, FCE, Adobe Premiere, Kdenlive, Keynote, Avid Xpress Pro, Adobe Creative Suite 6, etc.
-Support playback on different devices: iDevices (iPhone 7 Plus, iPad Pro, Apple TV 4, etc), Android devices (Samsung Galaxy Note 7, Sony Xperia Z6, Huawei Meta 8, etc), Windows devices, game consoles (PS4 Pro, Xbox One S, etc), HD media players (WD TV series, Seagate Media Player, etc)
-Batch conversion to save time and energy
-Optimize audio and video settings (size, bitrate, sample rate, frame rate, etc)

Top 2. Pavtube HD Video Converter for Mac

Pros:
-Support inputting and outputting a huge number of audio and video formats
- Rich editing functions: clip, flip, rotate, crop, add subtitle and watermark. 
-Support playback on different devices: iDevices (iPhone 7 Plus, iPad Pro, Apple TV 4, etc), Android devices (Samsung Galaxy Note 7, Sony Xperia Z6, Huawei Meta 8, etc), Windows devices, game consoles (PS4 Pro, Xbox One S, etc), HD media players (WD TV series, Seagate Media Player, etc)
- "Darg-and-Drop" feature and batch conversion are supported. 
-Split one file into several and merge several into one
-Optimize audio and video settings (size, bitrate, sample rate, frame rate, etc)

Top 3. WinX iMovie Video Converter for Mac

Pros:
-Can handle both HD and SD videos for iMovie
-Free of charge

Cons:
-Only output iMovie supported video format
-Limited output formats 
-Relatively fewer editing functions

Top 4. Bigasoft iMovie Converter for Mac

Pros:
-Support a lot of input files
(AVI, DivX, Xvid, ASF, WMV, MKV, MPEG, RM, RMVB, VOB, 3GP, FLV, MOD, TOD, MOV, AVCHD, MTS, M2TS, MP4, H.264, and more)

Cons:
-Limited output formats
-Only convert video files for the editing system iMovie

Top 5. iDealshare VideoGo for Mac

Pros:
-Support input and output considerable formats
-Download and convert online video in HD 1080p/720p, 3D or SD 360p/480p to any video or audio formats on Mac.