Tuesday, January 30, 2018

Work DJI Osmo+ 4K with Sony Vegas Pro

The Osmo+ features a 4K camera capable of capturing DCI 4K (4096 x 2160) resolution at 24/25 fps and Ultra HD 4K (3840 x 2160) at up to 30 fps. Some people try to load the Osmo+ 4K video to Vegas Pro, however, they often encounter crashing issues just as the condition listed below:

"My Sony Vegas Pro crashes when I try to import/load an Osmo+ 4K MP4 file with H.264/AVC codec (just that combination, AVIs with H.264 work fine), giving me a "Sony Vegas has stopped working" error, no matter what I do, and to make matters worse, it began to crash a couple of months ago - before that, I had no problems at all with MP4/H.264 files, they worked just fine."

Can Vegas Pro native import Osmo+ 4K video

The DJI Osmo+ record both UHD and DCI 4K MP4/MOV container with the MPEG-4 AVC/H.264 compression codec. After searching for Sony Vegas Pro supported file formats, we find no native importing support for DJI Osmo+ 4K H.264 MP4/MOV video.

Transcode Osmo+ 4K H.264 for Vegas Pro editing

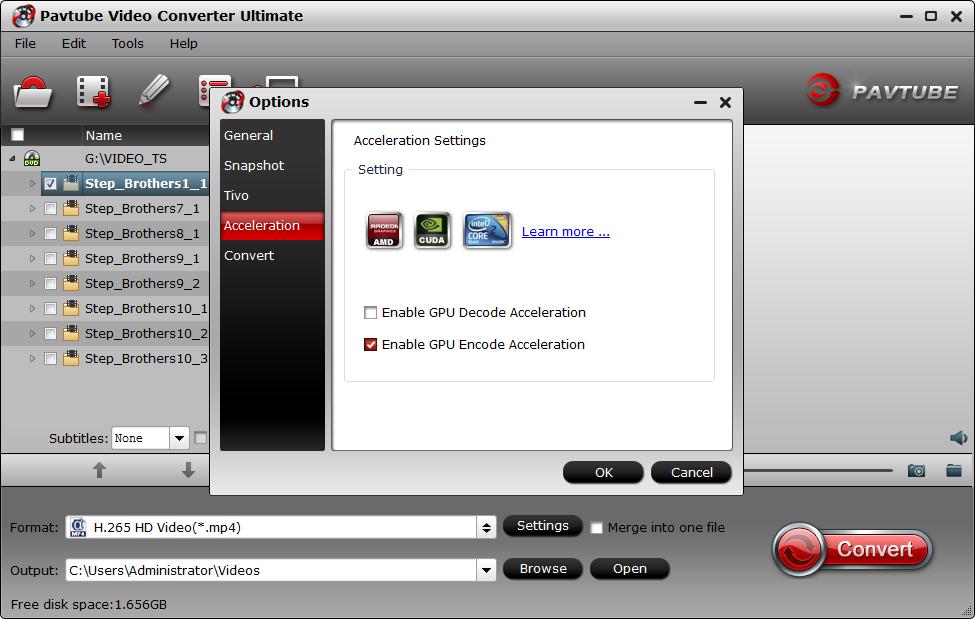
To load Osmo+ 4K H.264 to Vegas Pro, you will need to perform a format or codec transcoding process. Here, you can get the job easily done by downloading our best 4K Video Converter - Pavtube Video Converter, which has perfect importing support for the 4K H.264 MP4/MOV files shot wit DJI Osmo+ camera. Thanks to its batch conversion mode, you can load multiple Osmo+ 4K video into the application.

The program can assists you to directly decode Osmo+ H.264 MP4/MOV to Vegas Pro specially optimized MPEG-2 editing codec with the optimal editing experience. Besides that, it also works as a splendid DJI Osmo+ 4K video editor to assist you to complete some simple editing task such as trimming, cropping, merging, splitting, adding watermark, applying special effect, inserting external subtitles, etc.

Related article: Can FCP Support Osmo 4K Video | Workflow of Osmo with Davinci Resolve | Edit Osmo 4K with PPC 2015

Pavtube Video Converter is available on Windows 10, 8.1, 8 and 7. It is very easy to use, no matter experienced user or fresh could handle it very well. What's more, it supports to produce high quality conversion results with better video/audio quality.

How to Import and Edit DJI Osmo+ 4K Video with Davinci Resolve?

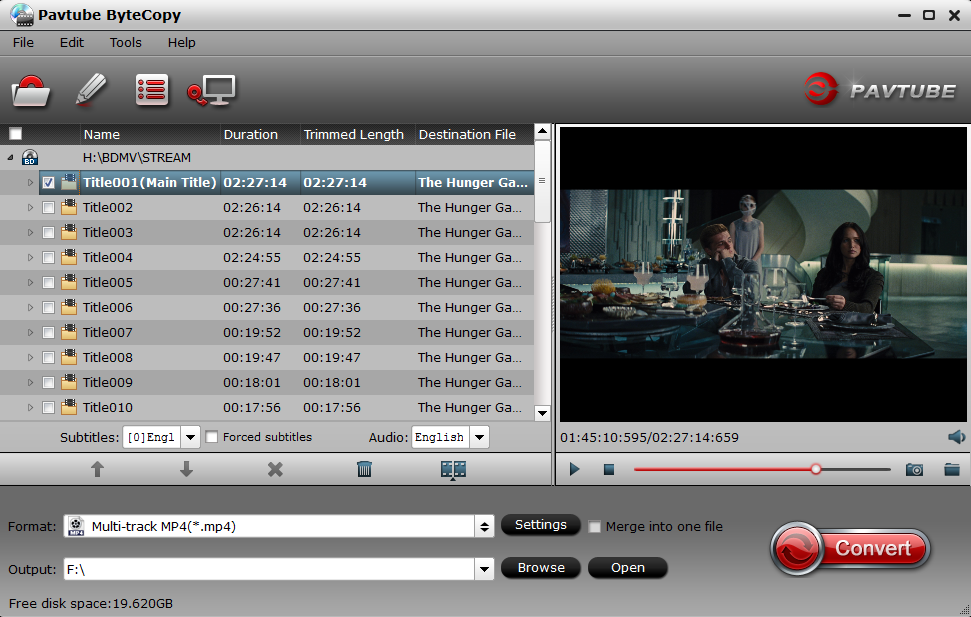
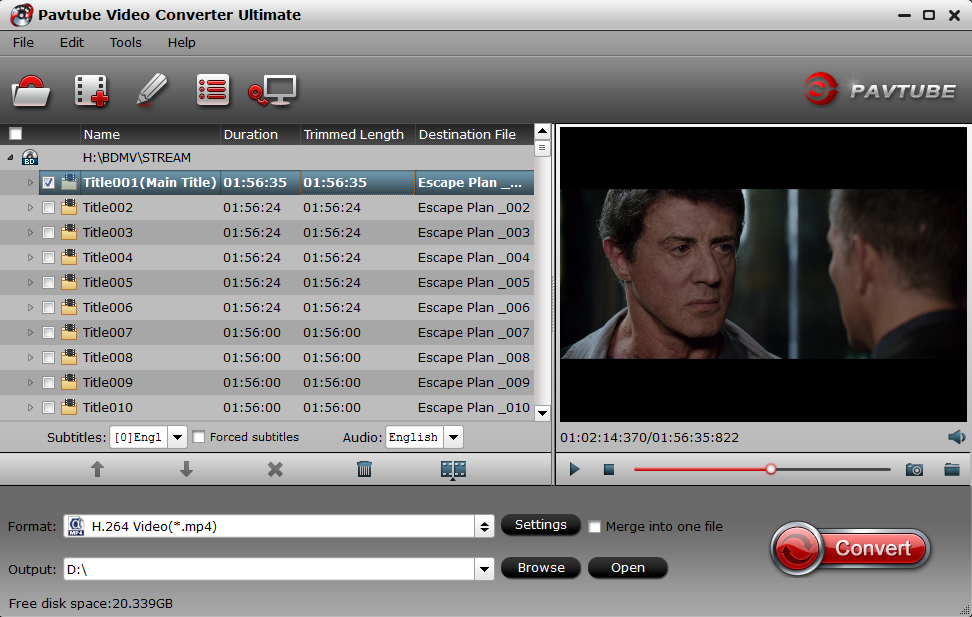
Step 1: Load DJI Osmo+ 4K video.

Download the free trial version of the program. Launch it on your computer. Click "File" menu and select "Add Video/Audio" or click the "Add Video" button on the top tool bar to import source DJI Osmo+ 4K video files into the program.

Load Osmo+ 4K video

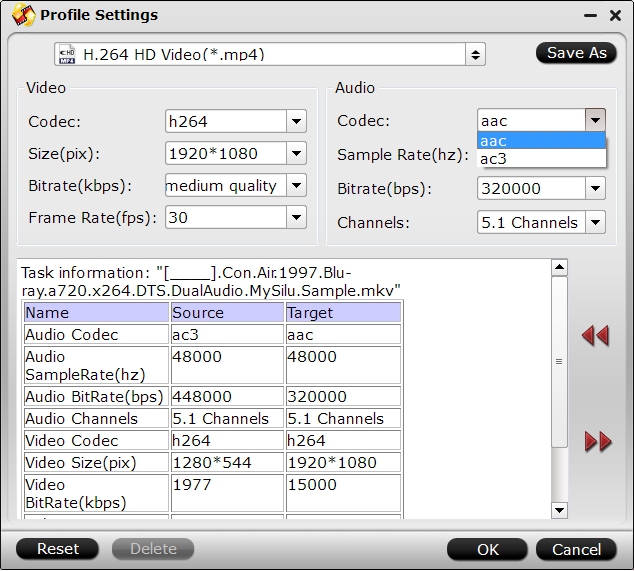
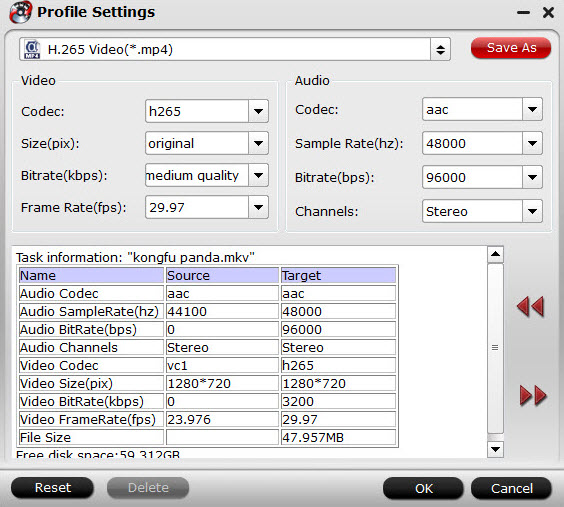
Step 2: Define the output format.

Clicking the Format bar, from its drop-down list, select Sony Vegas Pro specially optimized editing codec "MPEG-2(*.mpg)" under "Adobe Premiere/Son..." main category.

Output Vegas Pro specially optimized editing codec

Step 3: Start the conversion process.

After all settings are done, click right-bottom "Convert" button to begin to convert DJI Osmo+ 4K video to Sony Vegas Pro best compatible MPEG-2 editing codec.

When the conversion is completed, you will have no problem to import converted video to Sony Vegas Pro for smooth post video editing workflow.

Tuesday, January 23, 2018

Import Video_TS to iMovie

Simple introduction of Video_TS folder

When you insert a video DVD into your computer, you can open the DVD and view the contents just like a folder on your hard drive. Most video DVDs have two folders in the root directory - AUDIO_TS and VIDEO_TS. The VIDEO_TS folder contains all the DVD's video data and playback information. There are 3 different types of files under Video_TS folder. The VOB (video object) files contain the majority of the DVD data. The .IFO (information) files contain basic information about the DVD and the corresponding VOB files. While the .BUP (backup) files are exact copies of the IFO files.

How to copy Video_TS folder for iMovie?

When transferring Video_TS folder to iMovie, make sure to transfer all the contents of the Video_TS folder.

Rip Video_TS folder for iMovie editing

Obviously, Video_TS folder disk image formats that iMovie lacks the ability to handle, to fix the format incompatible issue, you will need to perform a Video_TS to iMovie supported file formats transcoding process.

Related article: Import XC10 MXF to iMovie | Convert XAVC MXF to iMovie | Export iMovie to WMV/AVI/FLV/MKV

Since the Video_TS folder are copied from DVD disc, here, you will need a DVD Ripper application. Sometimes, the VOB files in Video_TS folder are encrypted with CSS copy protection, therefore, a powerful DVD Ripper program that can assist you to bypass that protection. Here, we highly recommend you to download Pavtube ByteCopy for Mac. The program not only helps you to automatically bypass the CSS or also other copy protection from Video_TS folder in the background, but also assists you to directly rip Video_TS folder to iMovie most favorable high quality and high performance editing codec Apple Intermediate Codec (AIC) with perfect quality and super fast conversion speed.

Besides Video_TS folder, you can also use this application to Rip commercial DVD disc, DVD IFO/ISO image or Blu-ray disc, BDMV folder and Blu-ray ISO image file to iMovie most preferrable editing codec for best editing workflow.

Step by Step to Rip Video_TS folder for iMovie Editing

Step 1: Load Video_TS folder.

Run the Video_TS Converter Mac and you can load DVD Folder by clicking "File" > "Load from folder".

Load Video_TS folder

Step 2: Choose output file format.

Here, you can select "iMovie and Final Cut Ex..." -> "Apple InterMediate Codec (AIC)(*.mov)"as the best output format to get videos with optimized settings for iMovie.

Output iMovie best supported AIC format

Tips: If you like, you can click"Settings" to change the video encoder, resolution, frame rate, etc. Remember bitrate higher results in big file size, and lower visible quality loss.

Step 3: Start Video-TS to iMovie conversion.

When all the settings are fine, click the "Convert" button to start converting your Video_TS folder to optimized AIC .mov video files for iMovie.

When then conversion completes, click the Open button to get the ripped video files. Launch iMovie and click File > Import > Movies to import converted videos to iMovie for further editing.

Tuesday, January 16, 2018

Play M2TS Files with Plex

Does Plex support m2ts streams natively?

"I have several m2ts files in my movie/video folder, but they are not recognized by Plex. Is it required to convert these to an mkv or other supported format before Plex will pick them up and add them to my library? Based on a quick google search, it doesn't seem so, but I can't figure out why mine don't show up."

Although Plex can play nearly any media file you throw at it except image formats such as ISO, IMG, Video_TS, BDMV or other "disk image" formats, however, it's very likely that the M2TS is not supported by the Plex app that you are connected to a Plex Media Server. In that condition, the Plex Media Server will convert it on-the-fly. As the video transcoding will use a lot of CPU power, if you have a weak CPU, then it would much ideal for you to convert your media into a compatible format with your Plex app in order to reduce transcoding with the Plex Media Server.

Best tool to Convert M2TS for Plex playing

Here, you can easily fix the format incompatible issue by downloading a third-party M2TS Converter - Pavtube Video Converter. The application has perfect importing support for M2TS files produce from both Blu-ray disc and Sony AVCHD cameras.

Related article: Plex Supported File Formats | Play MP4 on Plex | Play 4K on Plex

With this powerful yet simple to use application, you can efficiently convert multiple M2TS files to various Plex client compatible file formats and parameters listed below:
Container: mp4
Resolution: 1920x1080 or lower
Video codec: H.264 (level 4.0 or lower)
Video Framerate: 30fps
Audio codec: AAC
Audio channels: 2
Bitrate: 20Mbps or lower

To get the compatible parameters, just click "Settings" to open "Profile Settings" window, then flexibly adjust the output video codec, bit rate, frame rate, resolution and audio codec, bit rate, sample rate, channels, etc to let them adapt with your Plex client.

For Mac users, you can switch to download Pavtube Video Converter for Mac to complete the conversion on macOS High Sierra, macOS Sierra, Mac OS X El Capitan, Mac OS X Yosemite, Mac OS X Mavericks, etc.

Step by Step to Convert M2TS Files for Plex Direct Playing

Step 1: Load M2TS files into the application.

After the successful installation, click "Load file(s)" or "Add video"to load M2TS files into the program.

Load M2TS files

Step 2: Set output file format.

Clicking the Format bar, from its drop-down list, select most Plex clients best compatible "H.264 HD Video (*.mp4)"under "HD Video" main category.

Output Plex client most compatible file formats

Step 3: Adjust output profile parameters.

Click "Settings" on the main interface to open "Profile Settings" window, here, you can flexibly adjust the output profile parameters including video codec, resolution, bit rate, frame rate, audio codec, bit rate, sample rate, channels, etc as you like to let them adapt with your Plex clients.

Adjust output profile parameters

Step 4: Begin the final conversion process.

At the end, just go back to the main interface and press the "Convert" button to start M2TS files to Plex client conversion process.

Within a few minutes, you can get the converted video files you want by clicking the Open button. Then feel feel to add converted files to Plex library for streaming and playing on any devices as you like.

Thursday, January 4, 2018

H.264 vs H.265 — Convert H.264 to H.265

Part 1. H.264 vs H.265

Do you still remember those frustrating times when you were watching a video or a movie online and all of the sudden you experienced a loss of quality? Now it can be possible to stream high-quality videos in congested network environments in a faster and virtuous way. High Efficiency Video Coding (HEVC), aka H.265, is a video compression standard designed to substantially improve coding efficiency when compared to its precedent, the Advanced Video Coding (AVC), or H.264.

With the development of video streaming on the Internet over popular website such as Netflix and Youtube, and with 4k cameras gaining new ground in the market, a considerable amount of storage and bandwidth is required. HEVC promises a 50% storage reduction as its algorithm uses efficient coding by encoding video at the lowest possible bit rate while maintaining a high image quality level.

I believe HEVC will revolutionize how video data is displayed, either online, on television and even in the surveillance industry. So, it won't long for HEVC to dominate the video date market, although now HEVC couldn't be accept by many device or media players, it's not too early for you to learn the way to convert H.264 to H.265.

Part 2. Convert H.264 to H.265

From above analysis, you may want to a way to convert H.264 to H.265, a super H.264 to H.265 converter you deserve. Pavtube Video Converter Ultimate | Mac comes as the winner from its competitors, which could convert non-H.265 videos ( MKV, MOV, MP4, AVI, H.264, MXF, MTS... ) to H.265 files and vice versa.

Moreover, it can convert 4k MP4, MOV, MKV, MXF, AVCHD and more to H.265 to save 50% storage space while keeping the original video quality. You can go to Settings window to keep the output video in 4k, or just compress 4k to 1080p or 720p. Fortunately, for those people who have a PC that are running with Nvidia GeForce Graphic Card, you can accelerate H.265 encoding speed with specific H.265 encoding software.

The rich-feature software also works as a video editor, you can personalize and retouch your video in clicks by trimming H.265 video length, cropping video ratio respect, adding external subtitles, removing or replacing audio, more feature here are waiting for you exploration.

Step by Step to Convert H.264 to H.265 video with ease

STEP 1. Add H.264 videos

Run the H.265 Video Converter program, go to the menu bar, select Add button to select the H.264 files you want to import. You can also directly drag the video files to the program for conversion. It supports batch conversion so you can import multiple files at a time.

load h264

STEP 2. Choose H.264 as output format

From the drop-down list of " Format" > "Common Video", you can select H.265 Video(*.mp4) as the target format.

h.265 as output formats

Tip: You can change the format parameters by click the Settings bar. The video size, video encoder, frame rate, bit rate, audio encoder, channel and more other parameters can be adjusted in this Settings option.

Note: Normally, the video size is based more on video bit rate than video resolution.

h.265 settings

STEP 3: Enable GPU Encode Acceleration.

Click "Tools" > "Options", in the opened "Options" window, click "Acceleration" menu, then check "Enable GPU Encode Acceleration" otpion so that the program will accelerate converion speed when encoding H.264 to H.265/HEVC codec.

Enable GPU Encode Acceleration

STEP 4. Start conversion

When all the settings are done, click the Convert button to start encoding H.264 files to H.265 with 30X speed. The conversion time depends on your video size, computer performance, output settings, etc. Generally, it won't take too long. After the conversion, you'll get resulted H.265(HEVC) videos for better usage.