As, we all know, AVI Format container typically uses less compression so it retains picture quality to great extents. But at the same time, AVI files usually have large file size, it brings lots of trouble in sharing and storing. For example, you'd like to upload the AVI video to Youtube, or other video sharing website, but it takes very long time for you to complete this process. One solution is to split AVI, if you want to keep the quality of the original videos, Pavtube Video Converter will be the best choice for you.
Best AVI Splitter For You
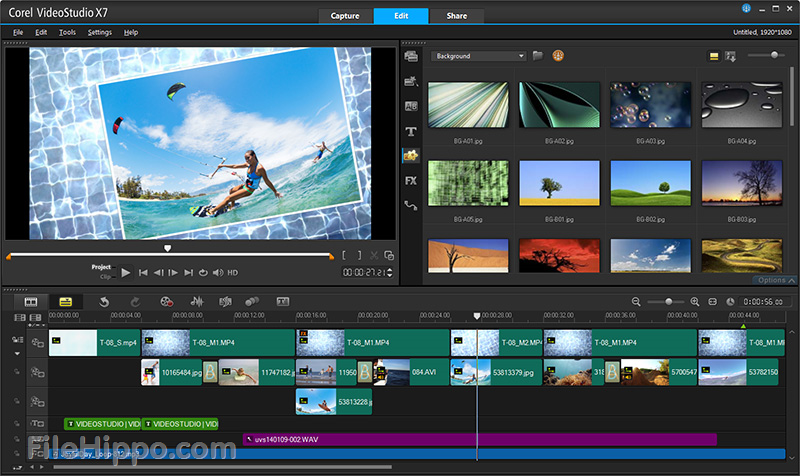
Pavtube Video Covnerter | Mac stands out from its class which you should not miss in you life which has an intuitive interface for easy use. This features-rich video splitter offers you massive video editing functions. We have listed the following features for you.
Offers 3 different way for you to split large video files into small parts: by file size, file count or time length.
This powerful software allows you to flip or rotate vdieo to get it displayed in the right angel, trim to cut the AVI file to remove the unwanted parts, crop video to cut the black bars, add image/text watermark, remove or replace audio in AVI file, moreover, it allows you to merge several parts into one.
Before you get to start to split the AVI video, it grants you to adjust video parameters, like video/audio codec, video resolution and bit rate, audio channels, and more. Here you can downscale the AVI file by compressing video bit rate.
Below we will go with Windows version to show you how to split AVI file, its Mac version has the same operating procedures.
Quick Guide: How to Split AVI Video Files
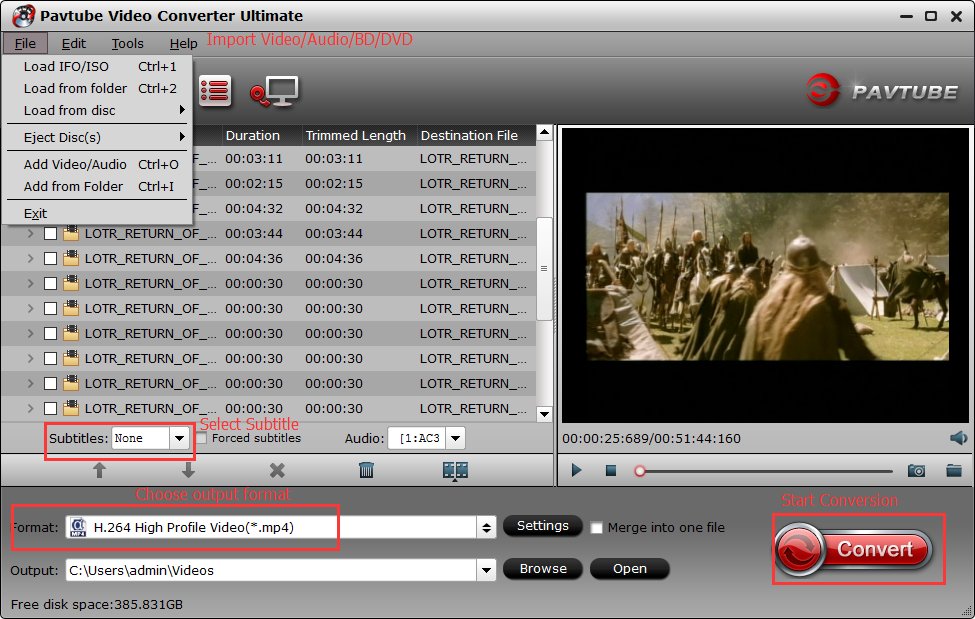
Step 1: Import AVI file for splitting
Select the AVI movie files for splitting and drag them to the program. You can also import file by clicking "File" > "Add Video/Audio" or "Add from folder" at the top of the AVI splitter program.
Step 2: Define output file format
This AVI Splitter also works as a video converter. From "Format" bar drop-down list, select one of your desired file format to output. If you don't want to loss any file quality, just select to output the same video as original file format.
Step 3: Begin to split
By clicking the "Split" buttonunder the file displaying list, checking "Enable" to enable it, and then you can split the file by file count, time length, or file size according to your own needs.
Step 4: Save the split AVI file
When you get your wanted AVI segment, click "Browse" button on main interface, you can choose the directory where you'd like to put the output files. Then return back to UI and press Convert to start the conversion. Wait for a while, go to click Open, it will locate at the folder with generated file.
Now you will be free to share your video with friends without any obstacles.
"The DeUHD application removes protection of Blu-ray 4K UHD automatically, without losing quality. This means that now you can keep safe and store your favorite movies on your computer in Blu-ray 4K UHD format, in the corresponding image quality 1:1..." This is how the DeUHD claims. However, is that really the case during the testing process? Are you curious about this software? Let's see how to use it.
How to Use DeUHD? Quick Guide
A. Installation
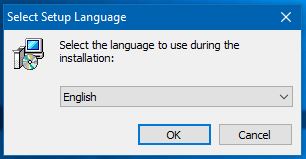
1. Choose language of installation.
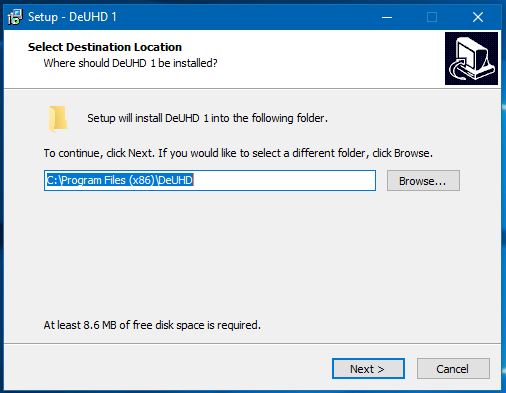
2. Choose direction ,where you want to save program files.
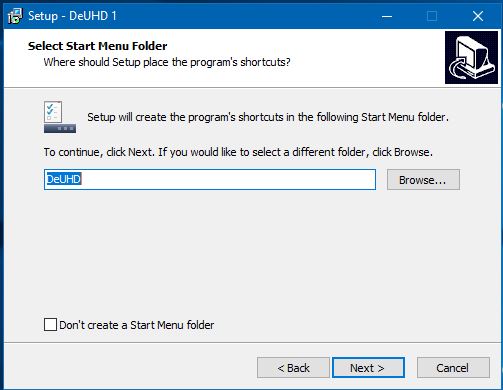
3. Here you can choose where to place shortcuts of DeUHD.
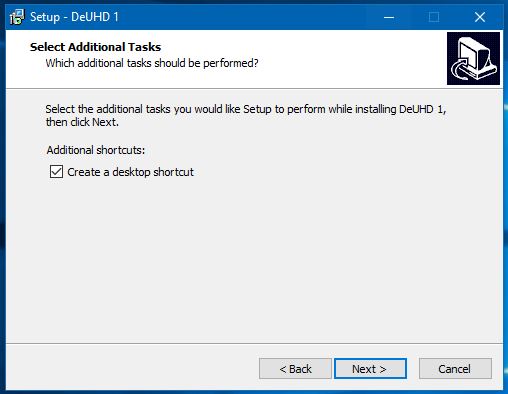
4. Select additional tasks.
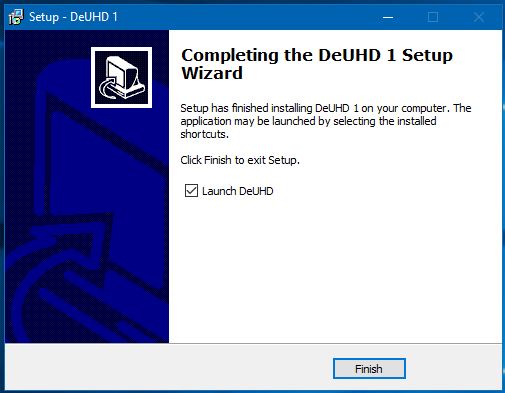
5. Here we are, you already installed DeUHD on your computer, now you can launch it, or just finish installation.
B. Launch and Activate
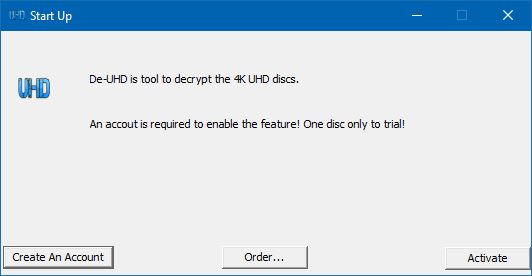
1). First you can launch DeUHD program with this icon on your desktop or shortcut menu.
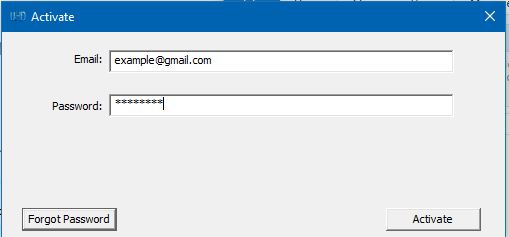
2). Here is the window, where you can create an account to use trial version, order our product or activate your registered and purchased account.
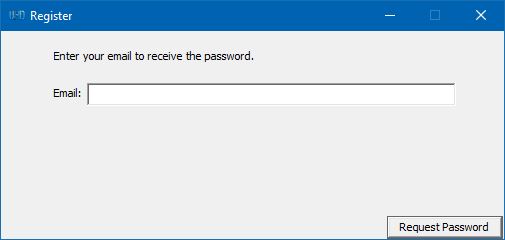
3). Please enter your email to get password, we will send password in entered email.
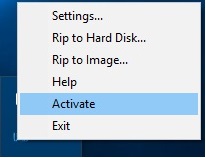
4). If you are satisfied with our product, you can purchase it and activate. Find the DeUHD icon in the tray and push right button on the mouse, choose Activate.
5). Here is your registered email and password, then click Activate button to activate the DeUHD, or if you are not registered yet, you can enter your email and push Activate, we will send password to your email.
C. How to use DeUHD
1).At the beginning, after you already launched and activated DeUHD insert 4K Blu-ray UHD disk in optical drive (which optical drive use you can see at the top of this page)
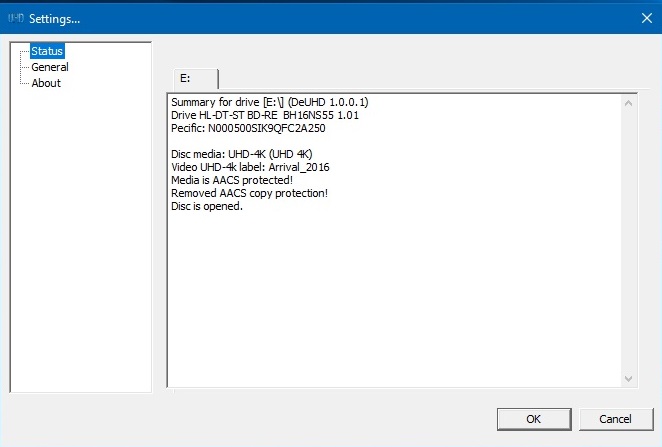
2). Wait until DeUHD will scan the disc. DeUHD will automatically rip inserted disc.
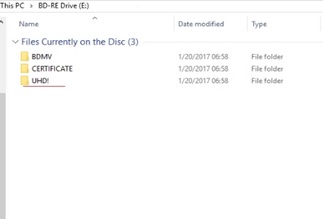
3). Ripping process is successfully completed, now status of disc will show you it (pic.1) and add DeUHD folder into the disc (pic.2).
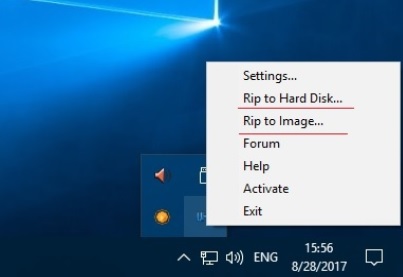
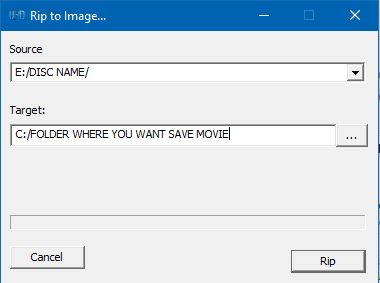
4). After that you can watch the movie on your computer or copy it to the Hard disk or to Image, just push right mouse button on the icon of DeUHD in tray.
5). Here is the window, where you can choose source of disc and final folder, where movie will be saved. And the last step is push “Rip” button, enjoy the movie!
Is DeUHD perfect? I am afraid not. Let's see somes Q&A to get more details about this DeUHD.
Q: Can I have a trial before purchasing?
A: Yes, you can, but logged in with an account is required, three UHD disc and 8~10 minutes is decrypted only in the trial period.
Q: Can I use it without network connection?
A: No, network connection is required when starting up and accessing the server.
Q: Does it support the regular DVD/Blu-ray discs?
A: No, DeUHD supports the UHD discs only.
Q: Can I get refund for my purchased?
A: No, DeUHD is offered as 'try-before-you-buy'. You can try it first in order to evaluate the software and the functions before you actually make a purchase. If you purchased DeUHD and they will not refund your money if you are not satisfied with it.
Q: What can I do if the disc does not support yet?
A: Contact them at their contact page with the essential information of the disc: Region, country.
Q: How long does it take to support the new UHD discs?
A: New UHD discs will be supported weekly, keep your eyes for the UHD support list.
Q: Can I play my UHD movie using DeUHD?
A: DeUHD can remove the protections on the UHD discs, you can rip the disc to your hard disc. To play your movie you need use media player.
Q: Which operating systems support DeUHD?
A: DeUHD supports Windows Vista, 7, 8, 8.1, 10
To sum up, although DeUHD could backup UHD Blu-ray movies, but not all of them. What's more, the software sells at €199 (about $233) and doesn't decrypt regular Blu-ray discs, once you regret purchasing it and want your money back. Oh, come on, no way. And DeUHD even hasn't provide an equivalent version for Mac users. Is it perfect? I believe that you have alreadly had your answer.
Best DeUHD Alternative
For those people who want to find a good DeUHD alternative, you are lucky today. We highly recommend you - Pavtube ByteCopy | Mac for the following reasons below. (review)
Versatile Reasons to Choose Pavtube ByteCopy
Powerful ability to bypass copy and region protection on a commercial 2D/3D Blu-ray/DVD disc. You also can import DVD folder, DVD IFO/ISO file, BD ISO image file.
Massive copy options for you. You can 1:1 full disc copy Blu-ray/DVD movies with all the subtitle languages, audio tracks and chapter information well preserved, or only copy the main title without unwanted extras.
Copy and convert Blu-ray/DVD to various video/audio formats for your target media player or devices, like H.264/H.265 MP4, MOV, AVI, WMV, MKV, and more.
Moreover, this software allows you to lossless copy Blu-ray to Multi-track MKV format to help preserve Blu-ray 5.1 or 7.1 surround sound or other popular multi-track formats such as MP4, MKV, MOV for viewing on HD media players with multiple audio tracks and channels.
Massive optimized device presets like iPhone X, iPhone 8, Samsung Galaxy Note series, Xbox One series, Apple TV series, Wii U, Adobe Affter Effects, Adobe Premiere, and more.
This feature-rich software also work as a proferssional video editor. With it, you can trim BD/DVD movies length, add external subtitles to it, replace or mute audio, and more.
Quick Guide to Backup Your Blu-ray/DVD with Pavtube ByteCopy
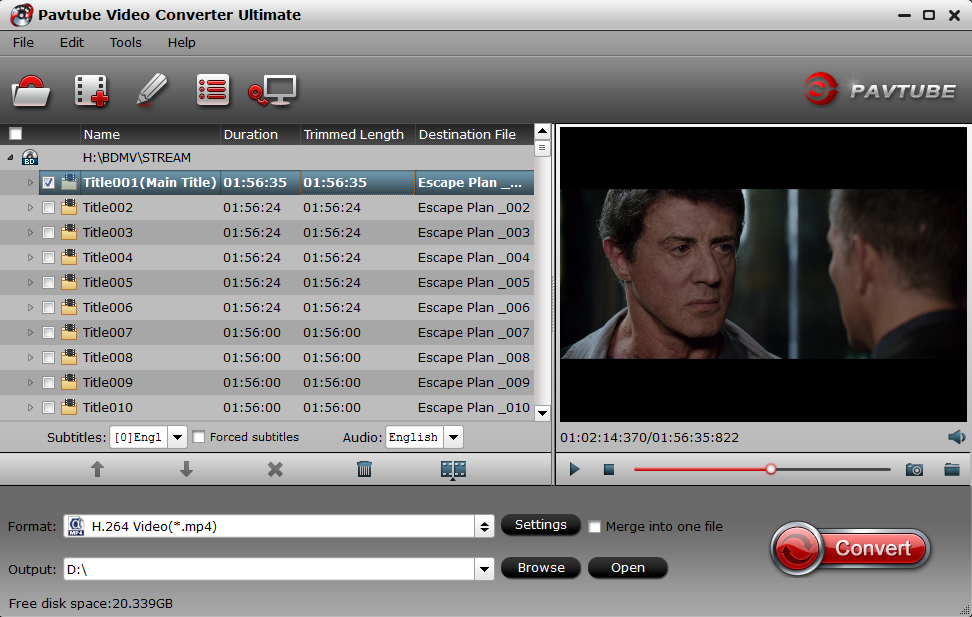
Step 1. Load BD/DVD at will
Install the best Blu-ray ripper on PC. then open it, click the "Load from Disc" icon to import the Blu-ray Disc. You also can load the BDMV folder by choosing the "Load from folder" from the dropdown list of "File", of course, you also can choose to load the ISO images too.
Step 2. Choose output format according to your own needs
Click "Format" bar, you will see hundreds of video formats here. You can navigate to "Common Video" and select "H.264 High Porfile MP4".
Tip: Navigate to "Multi-track Video" > "Lossless/encoded Multi-track MKV(*.mkv)" for output. You can get lossless audio streams without transcoding. At the video setting windows, you also can choose the chapters, audio tracks, and subtitles.
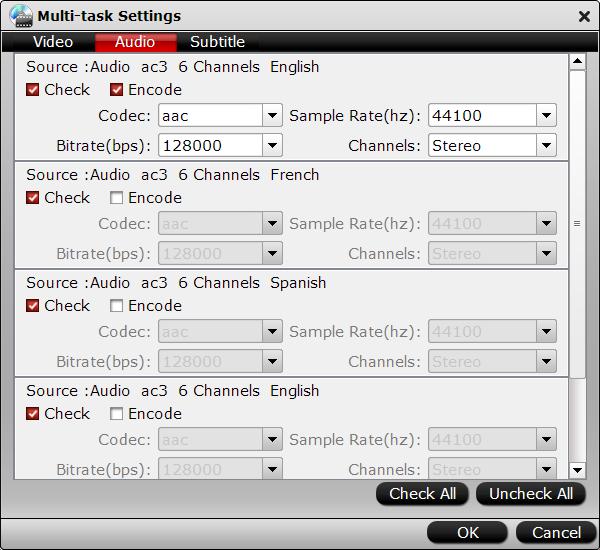
Click the Setting button and adjust the video. Here you can rip Blu-ray with Dolby 5.1 tracks, open "Multi-task Settings" window, click "Audio" tab, check "Encode" to get encoded MKV files with Dolby Digital 5.1 audio saved. In this way, you also can rip Blu-ray with original DTS-HD Master audio track.
Tip: Above step only appears when you choose output formats from "Multi-track Videos". If you'd like to select common video fomats, then click "Settings", you can adjust video parameters at will, like video resolution, video/audio bit rate, audio channels, and more.
Step 3. Start BD/DVD backup conversion
After all settings are done. Return back to main interface, and click convert, it will begin to copy your BD/DVD movies. Wait for a while, when it is over, click Open, and it will pop up a folder with generated files. Now you can transfer the covnerted movies to any devices for watching on the go.
Below there is a video to help you know more about this application. What are you waiting for? Go check.
Smartphone is a convenient camera you always carry. And if you haven't upgraded it in a few years, you'll be pleasantly surprised by how much phone camera performance (particularly low-light image quality) has improved. Today, we will discuss the top 5 camera phone 2017 with all of you. Firstly, let's take a look at two heads of mobile phone industry - Apple & Samsung comparison to see which one comes out on top there.
.
Phone makers always like to boast about specfications that are largely meaningless during the actual shoot. The latest trend in camera phones is the dual-lens main camera. Rear cameras have gotten simpler, and much better, in recent years. To make a long story shot, let us move to the most important part - featured camera phone reviews.
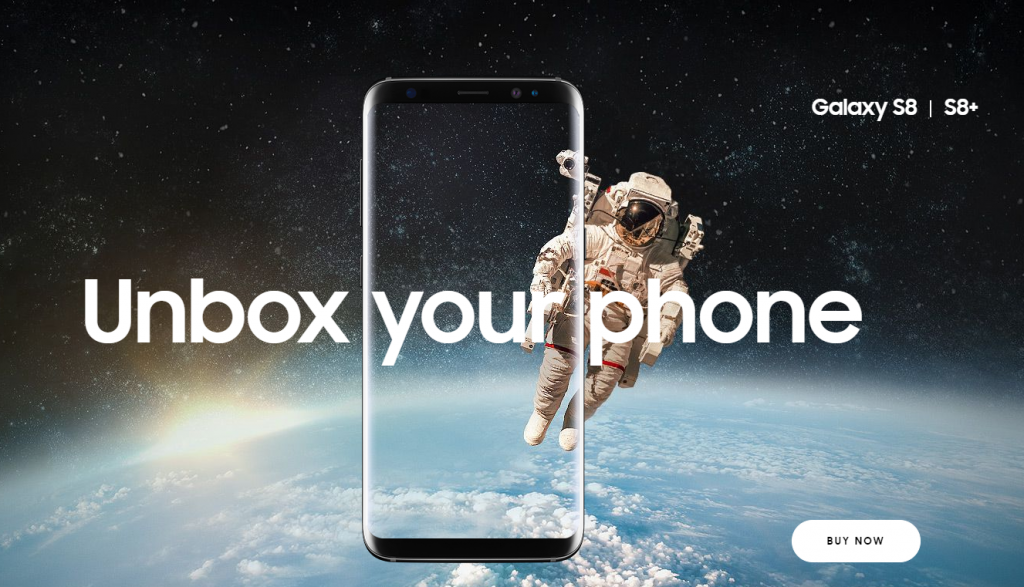
The Galaxy S8 has a 12-megapixel camera, just like the S7. But it's better. I took side-by-side images with the S7 and S8 in a variety of modes, and the S8's pictures are clearer and brighter, with more detail and less artifacting. While the S8 doesn't have dual main cameras, there's a software-based Selective Focus mode to create bokeh, and a pretty good Pro mode that includes Raw capture and manual shutter speed.
Low-light performance has taken a step up, too. Compared with the S7, shots taken in very low light show noticeably more detail on the S8. The S8 outpaces the Pixel in low light, too, with sharper detail, less artifacting, and slightly better colors.
Pros: Hand-friendly design. Gorgeous screen. Best processor and modem available.
Cons: Awkward fingerprint scanner placement. Average battery life.
Compared with the iPhone 7 Plus, the iPhone 8 Plus isn't much of an improvement. Now, the 7 Plus is already very, very good—that's sort of the point here. You have to go back to the Galaxy S7 generation, or the iPhone 6, to see a major jump in quality with the iPhone 8 Plus. The iPhone 8 Plus can also do Portrait Lighting, a filter that makes people look silhouetted on a dark background. I'm not a fan, but the feature already appears to be widely popular. If you want this feature, you need to get a Plus or an X, not the smaller iPhone 8.
In auto mode, the Pixel 2 XL takes the best photos of any camera we've tested this year. While the results are on par with the Galaxy S8 and Note 8 in good light, the Pixel 2 XL really shines in low light. It's able to gather a little more light, allowing it to raise shutter speeds and reduce blur, and its color balance is a bit truer than the S8/Note 8. While the Note 8 would judge some skin tones to be too bluish under streetlights, the Pixel made our test model look more human.
Pros: Excellent battery life. Terrific low-light camera performance. Elegant Google software. Great build.
Cons: No headphone jack or microSD card slot. Lacks Band 71 for expanded T-Mobile coverage. Screen quality has caused drama.
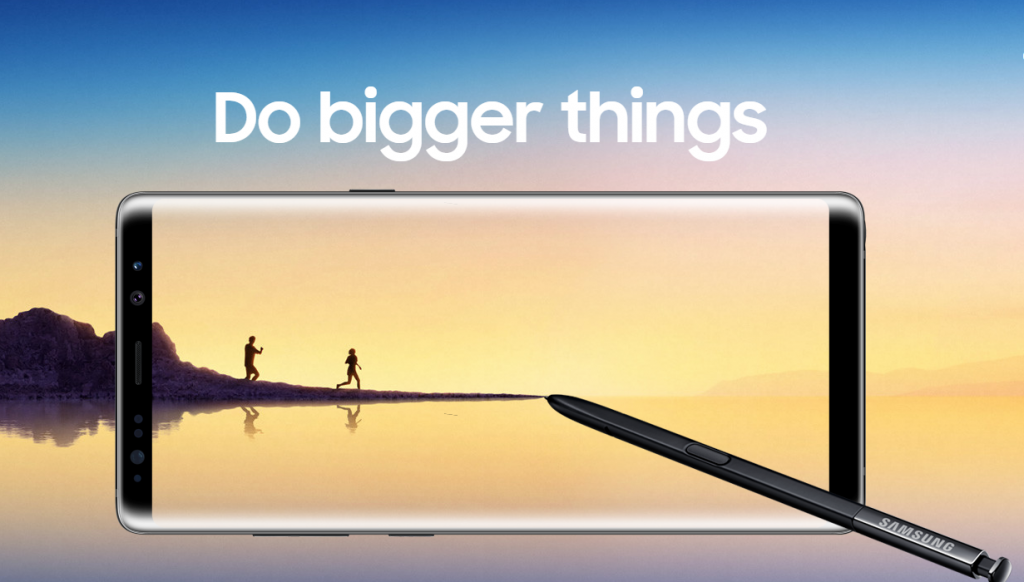
You don't need to worry about the basics here. The Note 8's camera is, like the Galaxy S8 camera it's based on, fast, with terrific exposure judgement and excellent low-light performance. The question is, what does the 2x optical zoom get you? Compared with the S8, it offers a noticeable improvement in sharpness, clarity, and texture, and considerably less artifacting.
The Note 8 is the pinnacle of smartphone technology right now. There is no better processor, no better screen, no better sound quality, no better reception, and no better camera. It costs a lot of money, but you're getting what you pay for.
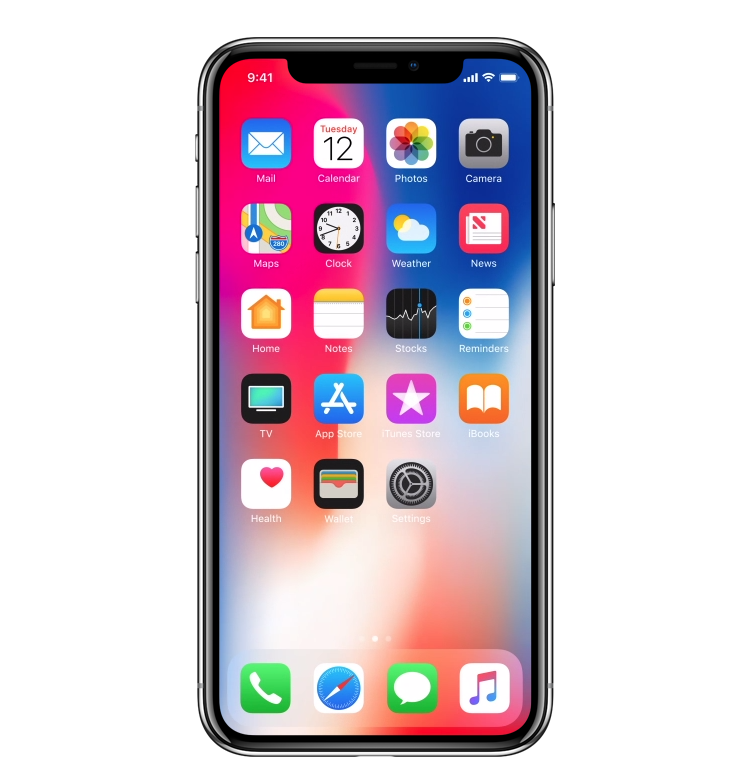
The iPhone X has very similar main cameras to the iPhone 8 and 8 Plus. The front-facing 7-megapixel camera is the iPhone X's most radical advancement. It uses a "dot projector" to throw invisible dots onto any object in front of it, and then uses an IR camera to map those dots, producing a live, 3D map of objects in space. Apple frames it as mostly for selfies, but this is also how to do augmented reality right; Qualcomm demonstrated a similar three-camera Spectra image module recently, which it said will come to Android phones in 2018. We suspect this 3D-mapping technology will come to the rear camera on the iPhone XI.
Pros: Updated design. Powerful processor. Excellent screen. First-of-its-kind augmented reality front camera. Animoji are really fun.
Cons: Very expensive. Apps need to be reprogrammed to take advantage of display. Not the fastest modem.
With the development of the smartphones, more and more phone manufacturers are attaching importance to front and rear cameras. You can choose and set the resolution of the video you want to shot independently. Most people have the dream of making Hollywood-style trailers by their own, therefore, video editing software is necessary. iMovie, Adobe Affter Effect, Adobe Premiere, Final Cut Pro, Sony Vega, etc are the most widely used by most movie makers.
But, during the process, you may meet many problems like these: the final render file is too large for uploading to Youtube or sharing with firends, or, it can't be supported by some media players. Many people are always looking for some solutions on some forums to solve video incompatibility issues when they can't import videos to the non-linear editing software, or failed to play output video on some devices. All those problems could be solved by this software.
Key Featurtes Of Pavtube Video Converter Ultimate
Convert iPhone X, Samsung Note 8, iPhone 8 Plus recorded videos to H.264, MP4, MOV, MKV, AVI, and more for playback on anywhere.
Allows you to convert your Galaxy S8/Note 8, iPhone 8/X recorded video to Adobe Premiere Pro, After Effects, Window Movie Maker, Window DVD Maker, etc supported video formats for further editing.
If you are familiar with video format, container and codec, you can directly choose video format, then adjust the video and audio bitrate, frame rate, resolution, channel and more parameters to make the outputed video more fit in your video players on your Samsung Galaxy S8/Note 8, Google Pixel 2 XL, iPhone 8/X.
It grants you to transcode Galaxy S8/Note 8, iPhone 8/X recorded video to Facebook, Youtube, Vimeo, Daily Motion or other vdieo sharing web supported vdieo formats. As everyone knows, most vdieo sharing website have limits on their uploaded vdieo.With above feature, you even can compress 4K to 1080p video or upscale lower resolution video to higher resolution video, or cut video length.
Convert iPhone X, Samsung Note 8, iPhone 8 Plus recorded videos to TVs, Macbook, Windows Computers, etc optimized video formats, so that you are free to play the videos on them without any obstacles.
Allows you to convert your Galaxy S8/Note 8, iPhone 8/X recorded video to Adobe Premiere Pro, After Effects, Window Movie Maker, Window DVD Maker, etc supported video formats for further editing.
Moreover, this program supports you to import SD/HD/4K, 3D/2D Blu-ray, Blu-ray Folder, Blu-ray ISO image file, DVD movies, DVD folder, DVD IFO file, DVD ISO image file and output H.264, MP4, MOV, MKV, etc for playback on your Samsung Galaxy S8/Note 8, Google Pixel 2 XL, iPhone 8/X.
Simple video ediitng functions for you to perfect your videos including: Trimming, Cropping, Adding text/image watermark, Inserting external subtitles, Adding video effects, more features here for you.
For half a century, Canon, one of the big names in photography world, remains an important force in SLRS, cameras, cameras and multi-function devices. Canon digital camera/camera provides clear image quality and performance. Most Canon camcoders could record AVCHD files today, so what is AVCHD file?
AVCHD - a variant of the H.264 format, this is a high definition video file format found on most Canon, Sony, and Panasonic HD camcorders (other manufacturers support it as well). AVCHD camcorders can capture very high-quality video and they can also burn HD video to a standard DVD disc, which can be played back on a Blu-ray disc player.
You can use your Canon camcoder on different occassion, for example, you can shoot a 4k footage on a wedding, after that, you will find this is only few minutes of video have a dozen or even more than 20GB. The question left is that how to play, edit, and share the footage without any obstacle. It is not easy to play such kind of video, and it is so big. If your computer is not powerful enough, all those are absolute nonsense. So today, this article aims to help you to play and edit Canon AVCHD video at will without any video formats imcompatibility issue or other issues.
But before we get to start, one thing you have to prepare - a powerful third-part software - Pavtube Video Converter Ultimate/for Mac. This program could convert the video recorded from Canon HD camcorder/camera AVCHD to H.264, MP4, MOV, AVI, MPEG, FLV, WMV etc. Moreover, for video editors, this program offers you dozens of optimized video formats for FCP X, iMovie, FCE, Avid Media Composer, Adobe Premiere Pro, After Effects, Kdenlive, Apple Aperture 3, DaVinci Resolve, iPhoto, etc.
Moreover, you can adjust the video and audio bitrate, frame rate, resolution, channel and more parameters to make the outputed video more fit in your video player and multimedia devices. More functions in this guide for you to make reference.
Below, we will go with Windows verison to show you how to work with Canon Video Converter to seamlessly convert, edit and transfer Canon footages. Its Mac version has the same operating procedures.
Step By Step To Convert Canon Footage For Playback & Edit & Share
Step 1: Import Canon AVCHD video sources
Free download this perfect Canon video converter on Windows, and then run it & click add video button to import Canon HD video footage to program or directly drag the files to main interface.
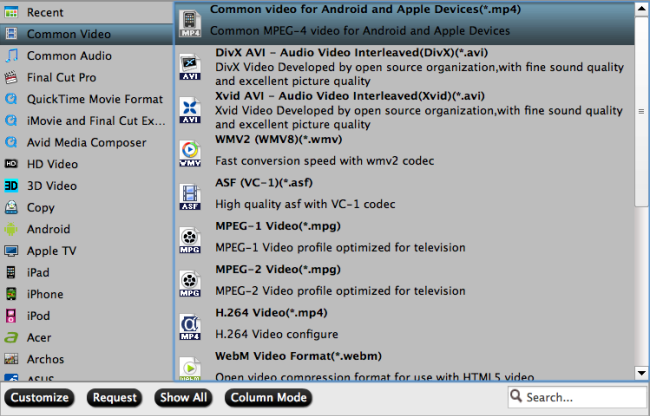
Step 2: Choose output format
This part is open, and depends on your heart. If you want to do further video edit, you can navigate to "Adobe Premiere" or other category as you like. Below are Windows & Mac version screenshot.
Windows Version
Mac Version
Tips: From the screenshot above, you can see that this program offers you hundreds of optimized device presets, like iPhone, Samsung, Game console, TVs, and more. If you have selected one, then you don't need do any change.
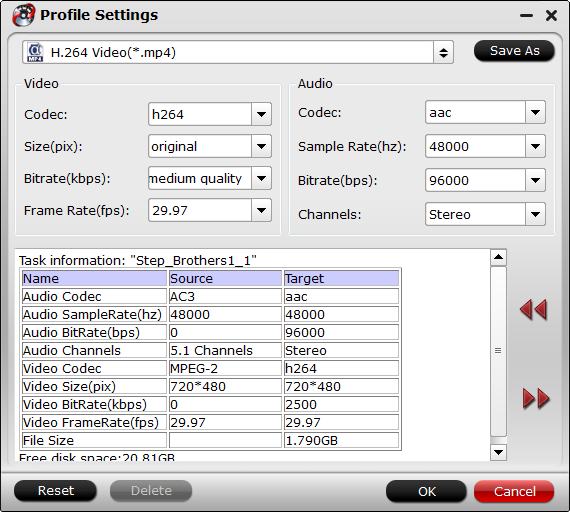
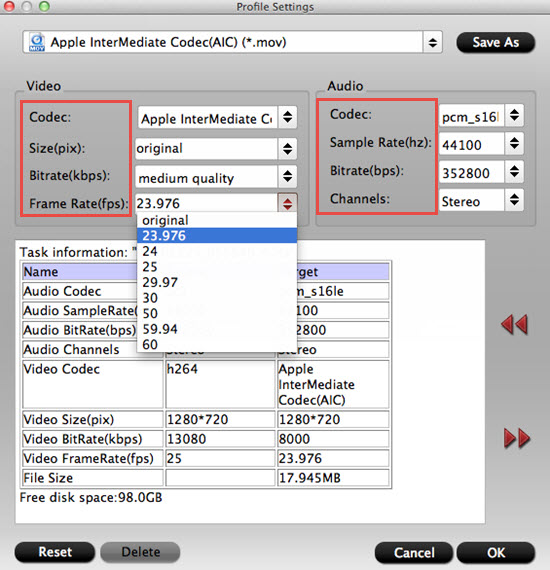
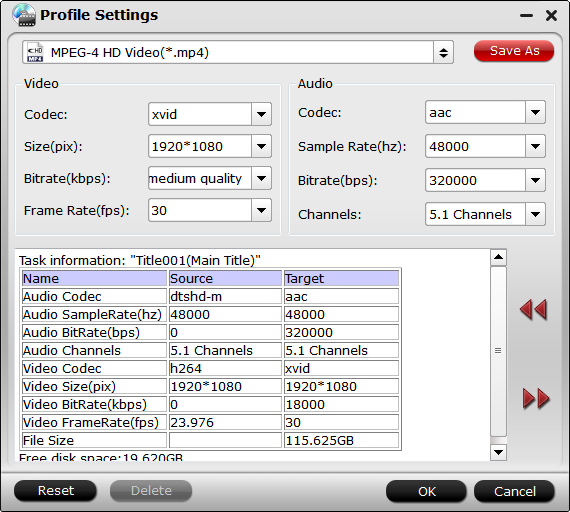
Step 3: Adjust output profile settings at will
Can you see the "Settings"
on the UI, click it and you will entre a window, here you can do any change to your Canon video. For example, you can lower video bit rate to get smaller video size. Normally, video size is based more on bit rate than resolution(pix).
Step 4: Start Canon Video Conversion Process
After you have done all setting, click "Convert" red button on the main interface. Wait for a while, then cilck open, it will pop up a folder with the converted file. By the way, this software supports you to import several files at a time.
More and more people are attracted to DJI drones which make our flying dreams to come ture. DJI has unveiled the Spark drone for a few month, the smallest model the popular Chinese dronemaker has released to date. DJI claims that Spark's camera can shoot 12 megapixel photos and record 1080p high-def videos at 30fps and 24Mbps. Although the footage from DJI Spark has lower resolution and bitrate/ frame rate than other DJI drones, which support 4K capture and higher video parameters, playing and editing HD, Full HD videos from Spark is still a difficult task. Why? Keep reading!
For Mac users, it will be so cool to turn the Spark video clips into more attractive ones for sharing or burning to DVD with the help of iMovie, Final Cut Pro X, or other non-linear editing software. As we all know, MP4 is the most common video format in this world, however it isn't friendly with non-linear eiditng software.
What's more, HD, Full HD videos from Spark is less compressed or uncompressed, that will end up with a large file size which will occupy a lot of space when storing them on your smartphone or tablet. Also, all video sharing websites like Vimeo, YouTube have limits for uploading large videos. These are the reasons why I say playing and editing HD, Full HD videos from Spark is a difficult task. To solve those issues above, you need a third-part assistant - best Spark video converter.
Find the Best Spark Video Converter for Mac
Pavtube iMedia Converter for Mac | Windows is highly recommend to you, which can solve these issues above and for all by transcoding Spark video to what you need. Following are the key features for you to know this software in depth.
Encode Spark Video to any video and audio format like AVI, WMV, MP4, MKV, MOV, M4V, VOB, DV, ASF, MPG, MP3, M4A, AAC, etc. for palyback on various portable device and media player, such as iPhone, iPad, Samsung smartphone, Windows Media Player, QuickTime media player, etc.
To acquire perfect playback effect on target smartphones, tablets, media players, etc. you can freely adjust parameters settings including video codes, video size, bitrate, frame rate, etc.
Convert 1080p Spark Video to 720p for smaller video size, then you can save more space for your smartphone or tablet when watching on them.
Various practical editing functions, such as trim, split, crop, add watermark and so on. For example, if your want to remove a few clips in your Spark video, you can use "trim" option to remove unwanted part quickly. Or merging several Spark video clips into one video is also very cool.
Able to read footage from Spark, Canon, Nikon, Sony, Pansonic, etc. And then output decent video format for further editing in Nonlinear Editor, including FCP, iMovie, Premiere Pro, etc.
Free lifetime technical support and upgrade service are available for every user. You can read this guide to get more details.
Below are the specific steps to show you how to encode Spark videos with this software. It Windows version has the same operating procedures.
How to Encode Spark Videos with the best Spark Video Converter on Mac?
Step 1. Load Spark Video files
Launch this best Video converter on your Mac. Click "Add Video" or directly drag and drop the Spark video file into the software.This Mac version software also supports batch conversion to encode your Spark Videos.
Step 2. Select output format
Click on "Format" bar, and you can freely select output format from its drop-down list. You can choose H.264 MP4 from "Common Video" or "HD Video" for common portable device and media players. If your media player or devices support HEVC codec, convert Spark video to H.265 MP4 will also be available. For further editing in NLE system, just go to "Final Cut Pro" "Avid Media Composer" or "iMovie and Final Cut Express" categories to choose the video formats you need.
This Spark video converter also allows you to choose format device. For example, if you want to convert videos to iPhone, you can simply go to "iPhone" category to select specific iPhone model.
Step 3: Customize Spark Videos
As we mentioned above, this Spark Video Converter provides a built-in video editor. You are allowed to adjust video and audio parameters if you are not satisfied with the default settings. Presets like size, bitrate, frame rate, audio channels, etc. can be customized in your own way.
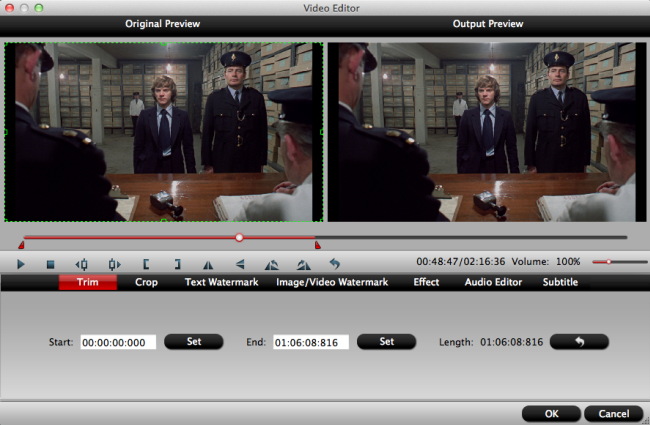
Click "Edit" button on the main interface to open the "Video Editor" window. Here, you can trim, crop, add subtitle, add watermark, replace/mute audio, adjust aspect ratio, adjust volume, rotate, flip, add special effect to video.
Step 4: Start encoding Spark Videos
Click "Convert" button to start converting Spark video. When the conversion process is finished, you can locate the generated video files in output folder. Then you can play, upload and share the Spark Videos wherever you like.
With the development of 4k technology, more and more people prefer more expuisite qicture and higher visual enjoyment. Almost everyone dreams to make the Hollywood-style trailers and gets a lot of fans. During this process, a professional 4k video editor is necessary which will help you a lot. In this post, you will see top 5 4k video editing software, some for Mac, some for Windows, hope you will find the best one you desire.
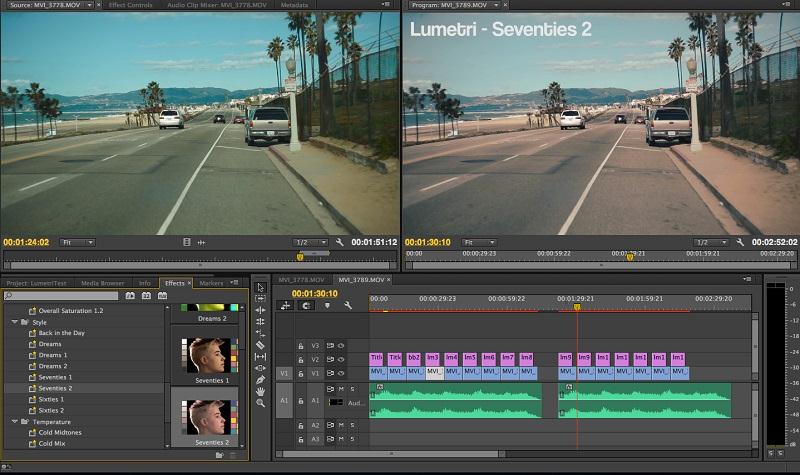
Adobe Premiere Pro deserves its place as the industry standard video editing software, thanks to its familiar nonlinear editing interface, unmatched ecosystem of tools, and powerful set of capabilities. Since my last look at the massive application, it has added support for 360 VR content, 4K (and higher) and HDR video, and the Lumetri Color tool. It has also added class-leading collaboration capabilities. All of this makes Premiere well worthy of an ditors' Choice award for professional-level video-editing software.
If you're a movie maker and you need to create some special effects, chances are you’re probably already thinking of Adobe’s After Effects. It’s been available for 24 years and under the stewardship of Adobe since 1995. Just like Premiere, it is a powerhouse for videographers and often the only app they need to transform shots, apply effects and create dazzling titles.
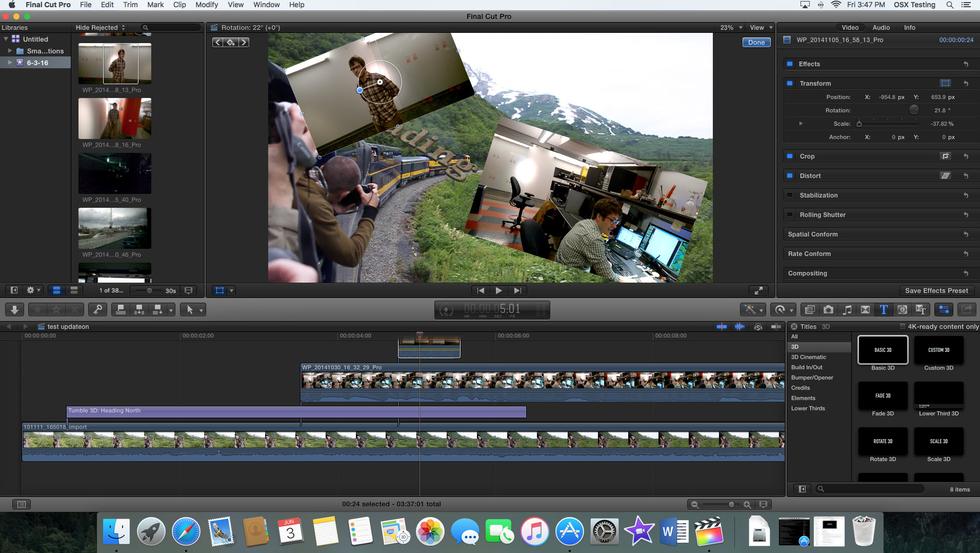
Apple Final Cut Pro X comes as a well known professoinal level video editing software for Mac users, treads a fine line between consumers who want more power for their video-editing projects than iMovie offers and professionals who create content for movies and TV. Used extensively in the professional movie industry, as well as amongst amateurs, the latest version comes with full support for full resolution 4K ProRes in multiple streams.
iMovie has a beautiful simple interface, it offers color matching for consistent movie looks, classy themes, and great chroma-keying tool. Unlike professional video editor, in the name of simplicity, some useful controls are missing. It lacks multi-cam or motion tracking capabilities. Apple iMovie has, however, added support for 4K video, and more sharing options. And it still maintains some of the best storyboard-based movie making tools for novices—Trailers and Movies—along with excellent green-screen and soundtrack capabilities.
This program helps beginners learn the basics of video editing without sacrificing the needs of more advanced users. This latest edition of PowerDirector supports 64 bit processors for faster editing, and of course, new support for 4K resolution videos. At under $100, CyberLink PowerDirector 16 Ultra comes amazingly close to being as advanced and capable as software that is priced multiple times more than it; making it an ideal choice for the budget conscious video editing enthusiast.
No matter which 4k video editor you choose, I still recommend you this 4k video editor assistant. Why? Okey, let me ask you some questions. Did you find the final render file size is very large, especially 4k files, although you have adjusted the basic video settings? Is it a little difficult to upload those 4k video to massive video sharing website, like Youtube, cause most of them has limitation to uploaded files? Have you meet video formats incompatibility issues when you fail to import into those video editing software, or you fail to upload the output file to some communities?
I believe that there are many other issues that I don't mention above, but don't mind, all those are nothing to Pavtube Video Converter Ultimate. This video converter offers you hundreds video format like MOV, MKV, WMV, AVI, H.264/H.265 MP4, etc, so you don't have to worry about video format incompatibility anymore. Moreover, you can add the final 4k trailer to this application and output massive optimized device presets for your target device. If you are puzzled about large video size, with it, you can lower the bit rate to get smaller video file without video quality loss. Furthermore, this video also support you simple video editing features, including trimming, cropping, adding text/image watermark, inserting external subtitles, more functions in this guide.
There are countless software options for video editing, but not all are created equally. Many of them do not yet have support for 4K editing. Below, we have listed top 5 4k video ediitng software that do support 4k videos which widely used throughout the film making community.
Another video editing application that is considered to be at the highest end is Adobe's Premier Pro. As with most of Adobe's software, Premiere Pro is now part of the Creative Cloud plan. This requires paying a monthly fee to use the application via Adobe's cloud service.
The sheer number of features within Premiere Pro CC is extensive. But the latest version has been designed to provide a faster workflow during editing, which will be appreciated by both new and seasoned users alike. New features that are worth noting in the CC version include live text templates, which integrates seamlessly with After Effects, native support for a range of new formats, automatic backing up to the Cloud, improvements to masking and tracking, and the ability to export in new industry standard formats.
Apple's professional and prosumer-level video editing software, Final Cut Pro X, treads a fine line between consumers who want more power for their video-editing projects than iMovie offers and professionals who create content for movies and TV. It does a remarkable job of bridging these two worlds, and though pros may complain about its nontraditional trackless timeline and amateurs may scratch their heads over some of its wealth of sophisticated options, it's a magnificent tool for both. The competition just can't match Final Cut Pro X, so it's our Editors' Choice.
Corel VideoStudio Pro X7 is a low cost video editing application that features 64 bit processing speed and support for 4K editing. It has a focus on a simple working environment with Corel's own FastFlick editing mode, which provides a three step method of creating videos and slideshows.
Another stand out feature is the 4K Smart Rendering enhancement, which makes generating 4K videos considerably faster than in the previous version of the software. Other important features in VideoStudio Pro X7 include QuickTime alpha channels, subtitle editor, stop motion animation, multi-monitor support, and controls for time-lapse effects and variable speed control.
If you are a Mac user and has iMovie 10.1 or version above, you can now edit 4K videos on your Mac. You can also import movies and trailers from iMovie for iPhone and iPad.
With iMovie for iOS and macOS, you can enjoy your videos like never before. It’s easy to browse your clips and create Hollywood-style trailers and stunning 4K-resolution movies. You can even start editing on iPhone or iPad, then finish on your Mac. And when you’re ready to premiere your movie on all your devices, iMovie Theater rolls out the red carpet.
It should be noted that 4K video editing requires a Mac from 2011 or later with at least 4GB of RAM. To play back 4K video in full resolution, you'll need an iMac with Retina display or Mac Pro connected to a 4K display.
This Program stands out from its class which comes as all-in-one 4k video editor. It allows you to import 4k/SH/HD/2D/3D video/ BD/DVD movies and output massive video format like, MOV, MKV, AVI, WMV, and more for your iDevice and Andorid device, PC, game console, and more. If you are familiar with video format, container and codec, you can directly choose video format, then adjust the video and audio bitrate, frame rate, resolution, channel and more parameters to make the outputed video more fit in your video player and multimedia devices. With this feature, you even can compress 4K to 1080p video or upscale lower resolution video to higher resolution video.
It also can fulfill all the needs of making a professional video for public consumption or simple creativity trying. With it, you can merge separate video clips into one, insert external subtitles to video, add transparent text watermark/image watermark to video, crop black bars around the video frame, split large video files into small parts, adjust video color brightness, contrast, saturation, remove audio from a video or replace audio in video, trim video footage, crop unwanted area from video, etc.
You've been on the holiday to end all holidays, captured hours of stunning footage and now it's time to do something with it. Great, the boring bit. While GoPro Hero6 are brilliant bits of kit, turning all that raw footage into something shareable, memorable and entertaining can be a bit of a chore. For Mac users, iMovie would be a good choice for you to edit your video and share with family and friends. However, have you met some issues when you try to import GoPro Hero6 footages to iMovie for further editing? Don't worry, you will find solid answer from this article.
As we all know, GoPro records in MPEG-4 and outputs its files as .MP4 files (the container). GoPro Hero6 pumps up its video and photo cred by adding a brawnier processor chip which unlocks 4K video shooting at 60p, or 60 full frames per second. Moreover, in order to pull off these new shooting modes, GoPro's leveraging the new-school video codec, High-Efficiency Video Coding (aka H.265). That's great since HEVC is, as its name implies, a high-efficiency way of recording video. Now, we have already had a rough idea of what we can get form GoPro Hero6, now we have to discuss about what video format and codec does iMovie use.
iMovie is a Mac OS X or iOS based video editing software application created by Apple Inc. iMovie supports multiple video formats and allows you to create projects that are tailored to your specific video format. You can use the following formats in iMovie: DV, HDV, AVCHD, Apple Intermediate Codec, Apple Animation Codec, Apple ProRes, Motion JPEG/A, iFrame, h.264, some, but not all, varieties of MP4, MOV. As .mov or .mp4 is a container, if it contains video codec in one of the above, it will import to iMovie, or it will fail to import to iMovie.
Up to now, I believe that you may be clearer about what we will talk about next. As we all know, MP4 is not friendly to non-linear editing software. So you need to find a more compatiable format to iMovie. Here comes MOV. A MOV file is a common multimedia container file format developed by Apple and compatible with both Macintosh and Windows platforms. And MOV file extension is one of the most used video container format in video editing softwares.
So converting GoPro Hero6 MP4 to MOV will be the best choice, however, you need a third software which can help you ahieve this goal. Pavtube Video Converter/for Macis highly recommend to you which will never let you down by converting GoPro Hero6 MP4 to QuickTime(*.mov), H.264 HD Video(*.mov), iMovie native format - Apple InterMediate Codec(AIC)(*.mov), Apple ProRes for Final Cut Pro, and more.
Although Apple has cliamed that macOS High Sierra could support play HEVC files, if you worry about if GoPro Hero6 h.265 files will be imported into iMovie or not, you can convert GoPro HEVC to h.264 for successfully editing via iMovie. Moreover, GoPro Hero6 will shoot 4k video at 60p, if you have got such kind of video then edit it with iMovie but it is very jerky, now it is time to use Pavtube Video Converter to change 4k video at 60p to 30p for smooth edit. Follwing we will go with Mac version to help you convert GoPro Hero6 footage to iMovie for perfect edit.
Step By Step to Convert GoPro Hero6 to iMovie for Edit
Step 1: Download Mac version and import GoPro Hero6 4K HEVC footage
Download Mac version on your Mac, open it, you can click the "Load file" or "Add Video" icon on the main interface to import 4K HEVC files into the program. Or you can directly drag or drop GoPro 4k HEVC into it.
Step 2: Output iMovie supported video format.
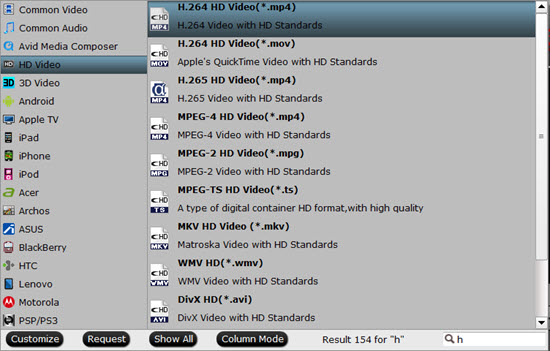
Here are 3 options for you to choose. Click "Format" drop-down list, scroll down the main menu on the left, select "iMovie and Final Cut Express", from its extended otpion list, choose "Apple InterMediate Codec(AIC)(*.mov)". Or you can select "H.264 HD Video(*.mov)" from "HD Video", "QuickTime(*.mov)" from "Common Video".
Step 3: Adjust video parameters
You are allowed to adjust video and audio parameters if you are not satisfied with the default settings. Presets like size, bitrate, frame rate, audio channels, etc. can be customized in your own way. Here you can change 4k at 60p to 30p to prevent jarky edit.
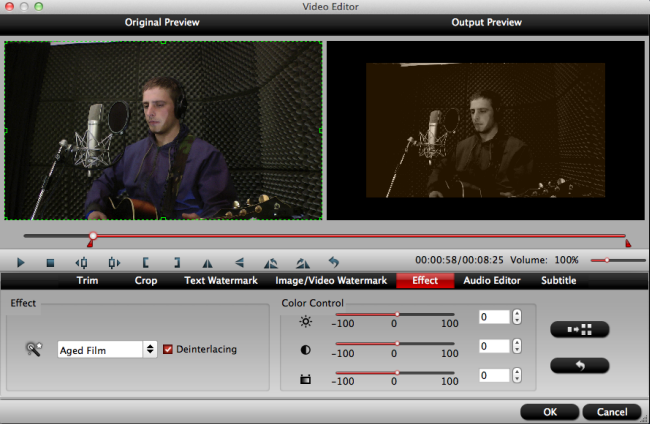
Step 4: Edit video
This software also works as a professional video editor. Click pen icon on the main interface, and entre "Video Editor", here are 7 main tabs for you, including: Trim, Crop, Text Watermark, Image/Video Watermark, Effect, Audio Editor, Subtitle.
Step 5: Start GoPro Hero6 4k HEVC conversion
Up to now, you may have finished all settings, now, you can hit "Convert" button to convert GoPro Hero6 HEVC to iMovie. Just wait for a second, click "Open" and it will pop up a folder with the generated files. Now you can import the file to iMovie and do some editing work without any obstacle.
"I have the Apple iPad mini 4 that I use as the display while flying the Mavic Pro. Today I put the SD card from the Mavic Pro into the Apple SD card reader for my iPad mini 4. The iPad Photos app recognized the 4K video as content that it could import, and it did the import when I selected the 4K video.The iPad Photos app would not play the 4K video, saying it did not recognize the video format."
"I have the same problem with my iPad Pro and trying to play .mov 4K video files."
"I just got the same results on my iPhone 7 Plus."
"I have the same problem with my ipad air 2 and my iphone 7 plus. From camera roll is not compatible the 4k video."
...
I believe a lot of DJI Mavic Pro users have met the same problem above. Before giving the solution, let's find out the reason to the problem. As we all know, we can get .mov,.mp4 from DJI Mavic Pro, MP4 comes as the most pupolar video format in this world, meanwhile, MOV is for iOS Apple products. Usually, DJI MOV file can be played well on iPad, iPhone, but 4k MOV may be an exception. In addition, MOV, MP4 are just containers, which cover various and different video/audio code, it is common and sad if your DJI 4k MOV, MP4 files can't be recognized by your iPad, iPhone. After searching and testing the methods, I have listed 3 solutions for you to make reference.
3 Methods to Play DJI Mavic Pro 4K Video on iPad Successfully
Method 1:
If you meet this issue that you can't play DJI Mavic Pro 4k on iPad and know nothing about the reasons, you can download the third app on your iPad to help you achieve this goal. During the test, I have found several apps which may help you to play 4k footage instead of using Apple photo app: DG Player, Oplayer HD and more. If you still fail to play 4k footage, you can try more apps. Not sure if it downscale or what it does, but it plays them.
Method 2:
One reason that you can't play 4k on iPad is 4K resolution footage from DJI Phantom 4 can’t be supported well. To solve this issue, you can downscale 4k to 1080p, or 2k with a professional 4k compressor. This method also can help you successfully import converted 4k to Final Cut Pro, iMovie for editing without any obstacle.
Method 3:
Since MOV, MP4 container include different video/audio codec, you needn't to know depth about how to solve this, you just need to get a all-in-one converter which can convert DJI Mavic Pro 4k to iPad acceptable format without video quality loss.
When you search on Google, you will find tons of 4k compressors and 4k video converters, you don't have to try one by one, cause you will find the best one in this article you will never regret meeting it. Pavtube iMedia Converter for Mac combines a video compressor and video converter into one software.
Firstly, it can transcode 4K video in any format such as 4K MKV, 4K MTS, 4K XAVC, 4K AVCHD, even 4K Blu-ray to iPad series supported .mp4 .mov .m4v formats. Secondly, you can compress 3840×2160 and 4096x2160 4K video to 2048 x 1536 or 1092x1080 video for the iPad series. Thirdly, you can freely adjust the video size as you want in "Settings" and you also can configure the video and audio encoder, bitrate, etc. Fourthly, you can trim the 4K video length, merge 4K footages into one file, add subtitles to your video and more before output video for iPad.
Step-by-Step to Convert and Compress 4K video for iPad
Step 1: Import DJI Mavic Pro 4K Footages
Launch and start the 4K VideoConverter program on your computer, click "File" > "Add Video/Audio" or "Add from Folder" to import source files to the program. You also can directly drag and drop your multiple 4K clips into the 4K video converter. Batch conversion is supported here.
Step 2: Choose iPad acceptable format
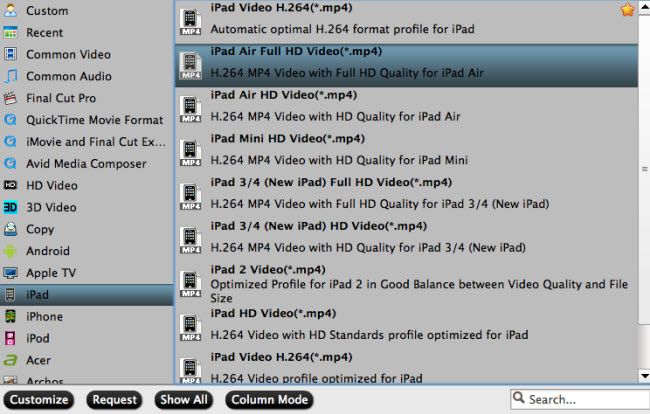
To choose iPad supported video format, you just need to click "Format" to open the profile window. You can use the program to output iPad supported H.264 HD video or MPEG-4 video, here, we choose to output H.264 HD video as the screenshots below:
You can also directly choose to output iPad preset profile format for direct playback. Here, you can choose to output "iPad" > "iPad Air Full HD Video(*.mp4)".
Step 3:Compress 4k video for iPad (Optional)
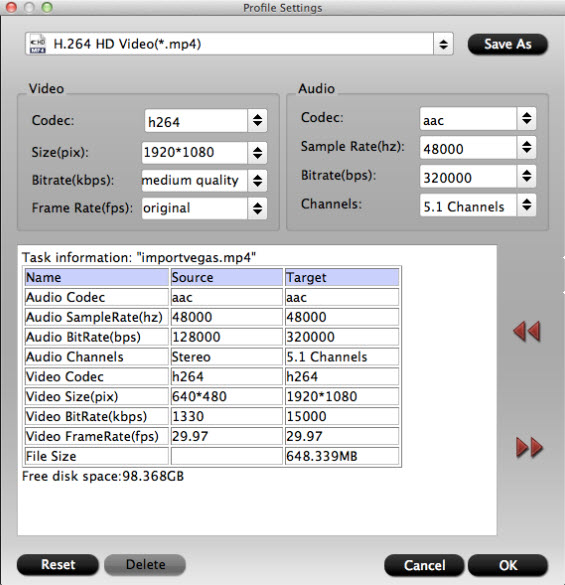
iMedia for Mac allows users to configure video and audio encoder codec, bitrate, frame rate, resolution, etc to make the output video more compatible with iPad. You just need to click "Settings" to open the profile window then change 4K resolution to 2048 x 1536 for iPad in "Video Size". You also can compress 4K to 1080p for iPad.
Step 4: Start 4K to iPad conversion
After all setting is completed, hit right-bottom convert button to begin the 4K UHD videos to iPad accepted video format. Ticking off shut down computer after conversion option, you can leave the program running and do other things instead of waiting around for the conversion. After the conversion, you can locate the converted video in the output folder then you can transfer the converted 4K video to the iPad via iTunes.

 under the file displaying list, checking "Enable" to enable it, and then you can split the file by file count, time length, or file size according to your own needs.
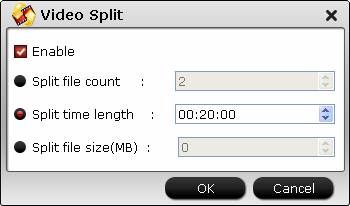


 .
.