Tuesday, February 14, 2017

Best Video Editing Softwares for GoPro videos

Want to edit your GoPro video before sharing the footages to Instagram, YouTube and Facebook to shine off your friends? Depending upon your skill level, you can choose from basic, intermediate and advanced level video editing software. Below, we have listed some popularvideo editing tools for editing GoPro videos easily.

Best 5 Video Editing Softwares for GoPro videos

1. Media Magician

Pavtube Media Magician is a nice camcorder assistant manager, lossless camcorder including GoPro (GoPro Hero5, GoPro Hero4, GoPro Hero3 etc) video joiner, MTS/ M2TS/ MXF/ MOV/ MKV/ TiVo/ WMV/ AVI/ MPG converter and editor, and efficient camcorder video uploader for YouTube.

The smart camcorder wizard helps organize, backup and import camcorder videos with ease. And timeline-oriented editing tools help accurately trim and cut clips frame by frame. Format presets provide you the easiest way to output the right format with the best recommended settings. The output task manager also helps create multiple tasks in different formats for Andoid/iOS/Windows tablets and phones like Galaxy Tab/ Amazon Kindle Fire HD/ iPad/ AppleTV/ Microsoft Windows Surface RT, editing software such as Adobe Premiere/ Sony Vegas/ Cyberlink PowerDirector, or upload to YouTube at the same time. What’s more, It's a useful and easy tool helping you make better use of either GoPro videos, but also common videos.

Mac version get Media Magician for Mac

2. GoPro Studio

Many drone pilots will probably have some experience with GoPro and the company's range of action cameras. With this software GoPro has provided its customers an ability to create amazing videos on their own without much fuss. The software has an ability to create videos in just one swoop. You do not need to have own a GoPro to use GoPro studio. With this software, you can create professional quality videos and carry out incredible fast edits.

3. Windows Movie Maker

Windows Movie Maker is a video editing software by Microsoft. It is a part of Windows Essentials software suite and offers the ability to create and edit videos from drones as well as to publish them on OneDrive, Facebook, Vimeo, YouTube, and Flickr. After capture, any clip can be dragged and dropped anywhere on the timeline. Once on the timeline, clips can be duplicated, split, repositioned or edited.

4. Animoto

With Animoto, you can create amazing videos online. No matter type of system you use, you can easily access all the features of the program anywhere. You can also access its free IOS and android application. The free version of the program is Lite version, with which you can create high quality videos, which are 30 seconds long. But the down side of the free tool is you cannot download the video you have created. To access the advanced features, you would require purchasing it.

5. Adobe Premiere Pro

This is the advanced version of the Adobe and is not suited for the first time users. You can get this tool at $19.99 per month and can be used for a wide range of video editing including work related and home movies. This is the best video editing software, if you are looking for a professional grade program. You can stop paying monthly charges, as soon as you realize it is not best for you.

Tips: How to solve can't import GoPro video into Editing software?

Finding the right editing software for your drone photography isn't going to be easy, but is an incredible amount of material out there to help you make an informed decision. Because transforming raw footages into a captivating video is a time-consuming task that requires great attention to detail, that’s why Pavtube Video Converter Ultimate/Pavtube Video Converter Ultimate for Mac is highly recommended here to help you have a leaner and meaningful editing tool to lighten up and hasten the workload if Media Magician can’t solve your issues, so that you don't need to evaluate every editing software by yourself.

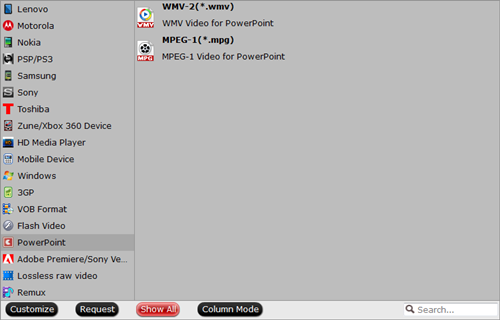
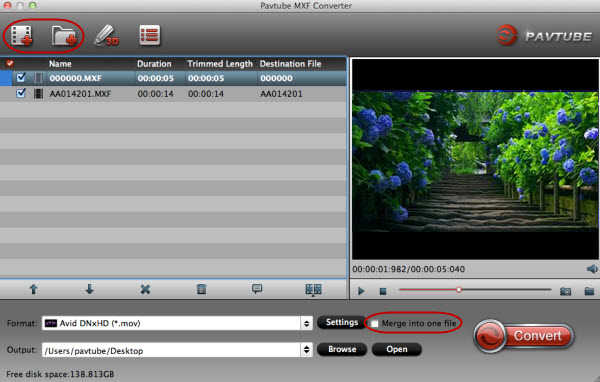
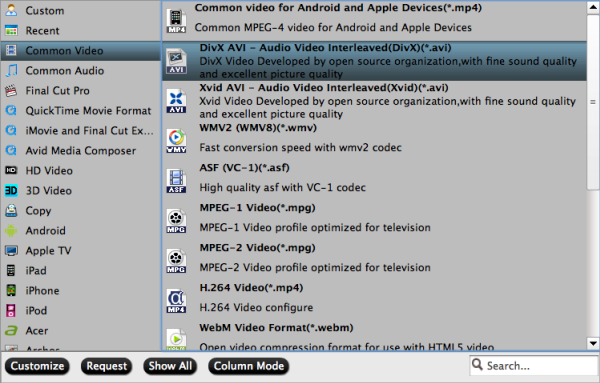
With its help, you can easily convert any GoPro footages or other camera/camcorder/drone like DJI Phantom 4 Pro to above free video editors or media players for editing/viewing without limits any more, plus to break the exporting files limitation of your drone editor as well to common used video formats like MP4, MOV, AVI, MKV, 3GP, WMV, etc with the best quality. Plus, it provides suitable format for Final Cut Pro, DNxHD MOV for Avid Media Composer and Davinci Resolve, MPEG-2 for Adoble Premiere Pro, MP4 for any mobile or PC video players/TV etc, and more formats for better editing, playing. You can download the right version to help you.

Free download this GoPro video converter for Windows

Free download this GoPro video converter for Mac

Related Arcticles:

Monday, February 6, 2017

Import Canon EOS M5 video to Pinnacle Studio for editing

Adept in both stills and video arenas, the EOS M5 from Canon is a versatile mirrorless camera featuring a 24.2MP APS-C CMOS sensor and DIGIC 7 image processor. Combined, these technologies afford a wide sensitivity range, from ISO 100-25600, along with quick performance for up to 9 fps continuous shooting and Full HD 1080p/60 video recording. The sensor's design also provides Dual Pixel CMOS AF, which offers quick and accurate phase-detection autofocus for multimedia use. This focusing system is particularly well-suited to subject tracking, and pairs with Digital IS 5-axis image stabilization for steadier, shake-free video recording.

Canon EOS M5 can record 1080p MP4 and MOV video. After recording video, you can import them to popular editors like Pinnacle Studio for better watching. But you may failed sometimes.

Actually, Pinnacle Studio only supports some MP4 video and MOV video. If your Canon EOS M5 video files contain other video codecs, you would encounter the video codec incompatibility issue. Fortunately, there is an easy solution for you to solve the issue. Get a professional converter app - Pavtube Video Converter and transcode Canon EOS M5 video files to Pinnacle Studio most compatible MPEG-2, which will save you both time and trouble, and all you need is to drag the result videos for prompt editing.

With this excellent converter, you can easily change Canon EOS M5 video to Pinnacle Studio friendly video format while keeping the excellent media quality. More than that, it also supports other popular video formats including MOV, MKV, MPEG, WMV... to seamlessly suit for Premiere Pro, Avid Media Composer, Windows Movie Maker, Sony Vegas Pro, etc to satisfy your diverse editing demands.

Free download this Pinnacle Studio video converter

Other Download:
- Pavtube old official address: http://www.pavtube.com/video_converter/
- Cnet Download: http://download.cnet.com/Pavtube-Video-Converter/3000-2194_4-75734821.html
- Softonic Download: http://pavtube-video-converter.en.softonic.com/

How to convert and import Canon EOS M5 video files to Pinnacle Studio

Step 1. Download, install and run the Pinnacle Studio Converter; click "Add Videos" icon to load your source .mp4/.mov movies.

Step 2. Click "Format" bar and choose "Adobe Premiere/Sony Vegas > MPEG-2 (*.mpg)" as output format on the drop-down menu. Of course, you can also choose AVI, WMV from "Common Video" as the output format.

Tip: Click "Settings" button if you'd like to customize advanced audio and video parameters like Video Codec, aspect ratio, bit rate, frame rate, Audio codec, sample rate, audio channels.

Step 3. Hit the convert button under the preview window, the converter will start encoding Canon EOS M5 MP4/MOV for importing to Pinnacle Studio immediately. Soon after the conversion is finished, just click "Open" button to get the generated files for edit in Pinnacle Studio 14/15/16/17 perfectly.

Read More:


Friday, February 3, 2017

Best AVI to Poewerpoint Video Converter - Playing AVI on Poewerpoint (2016) smoothly

Audio Video Interleave (AVI) is a file format for storing synchronized video and audio data. Digital cameras commonly use AVI to record video. PowerPoint is a popular presentation software included in the Microsoft Office package. Converting an AVI clip into a PowerPoint file allows you to play the movie during the presentation. Use the PowerPoint program toolbar to insert the AVI file and then save it in the presentation format.

Any AVI to PowerPoint 2016 video converter?

To accomplish the task, you need to seek help from a AVI Video converter that supports the VOB video input and WMV, MPEG-1 output. Here Pavtube Video Converter is highly recommended to help you achieve your task.

The program can help you change almost any popular file format including AVI, VOB, MKV, MOV, MP4, WebM, etc. to PowerPoint compatible video format with fast encoding speed and excellent output quality. After the conversion, you can easily use your movie files in any version of PowerPoint Presentation including PowerPoint 2016, 2013, 2010, 2007, 2003, 2000, 2002, 2005 or even PowerPoint 95, 97. If you're using a Mac, please turn to Pavtube Video Converter for Mac Just get the right version and follow the guide below to convert AVI to PowerPoint supported video formats. Now just get the right version and follow the guide below to convert AVI to PowerPoint supported video formats.

Hot search: MKV video into PowerPointMP4 to PowerPointMP4 to PowerPoint 2016, MPG to PowerPoint

More features of Pavtube Video Converter
Powerful Video Converter: Converts almost every video format to or from H.265 video filess rapidly in high quality.
Wide Selection of Formats Supported: Converts any video files to MKV, AVI, MP4, MOV, 3GP, WMV, and a lot more.
Fast-Speed Video Converter: Converts videos faster than any other video convert software programs.
Lossless Conversion: Convers any video files without the risk of losing its original quality.
Compatible with Windows 10, Windows 8.1, Windows 8, Windows 7, Windows XP.

Free download the AVI to PowerPoint 2016 video converter for Windows

Free download the AVI to PowerPoint 2016 video converter for Mac (Mac version)

Step-by-step-guide to Convert AVI to PowerPoint supported video formats for Playing

Step 1. launch the AVI to PPT converter. Click the Add Files button on the main interface to import AVI files to the app. The AVI Video converter supports batch conversion, so you can add a pile of videos to enjoy the fast conversion speed.

load-files

Step 2. Click on “Format” bar, and Choose PowerPoint compatible format WMV or MPEG-1 from “PowerPoint”.

Tips: For some advances users, you can go to adjust video and audio parameters like bitrate, resolution, channels, etc. Click "Settings" button you can go to check and change them as you like.

Step 3. Press on “Convert” to start encoding AVI Videos to Microsoft PowerPoint Presentation compatible video. When conversion completes, press on “Open” to locate converted videos.

Before starting adding video to PowerPoint, you need to create a folder and put both your converted video and your PowerPoint presentation in this folder. Then open the PowerPoint in this folder to insert the converted video file which is just located in this folder.

Read More:

Source: http://mediaconverting.blogspot.com/2017/02/insert-avi-video-to-powerpoint.html

Tuesday, January 31, 2017

Import all MXF videos to Premiere Pro CC 2017 on Mac for editing

Adobe Premiere Pro CC 2017 makes sense for the application to come ready for a broad range of cameras that consist of many brands that are leading in the market such as Sony, Canon, Nikon, etc. to import video with an equirectangular projection, and allow you to stitch and edit it in a very professional approach, so that You can publish video directly to the web from Premiere Pro to sites such as YouTube or Facebook or Instagram. However, we found some users found some MXF videos like Canon C500 MXF video cannot be imported and edited smoothly:

“I've seen the Red Frame "Read Error" for MXF files in the past.  previously updates seem to have resolved.  HOWEVER I just installed CC 2017.0.1 and...

Yep, Getting the MXF read error in...

I have literally thousands of MXF files that I need to begin editing (whole year worth of footage).  It really is NOT practical to re-render or convert EVERY file. There has got to be an easier fix. Anyone else seeing this happen? Any suggestions are extremely appreciated.

Thanks”

This problem may causes of the Premiere limitation of video formats, resolution etc. Now worry, here we mainly discuss how to import MXF video files into Adobe Premiere Pro CC 2017.

To use MXF video in Adobe Premiere Pro CC 2017 smoothly, a good suggestion is to either change the MXF clips to something Adobe Premiere Pro CC 2017 could natively handle, and a mpeg2 codec was usually ideal.

Hot search: MOV to Premiere Pro CC 2017 ǀ MP4 to Premiere Pro CC 2017 ǀ iPhone video to Premiere Pro CC 2017

Luckily a powerful third party tool- Pavtube MXF Video Converter for Mac is able to do both of the above conversion: convert MXF into MPEG-2 or MP4 file type for Premiere Pro CC on Mac (macOS Sierra included) maintaining whole audio & video information. Besides, this software can help you turn more videos like MKV, AVI, MP4, FLV, VOB, MTS into other NLEs with professional codecs, like Apple ProRes for FCP, DNxHD for Avid, AIC for iMovie and more. Just download it and follow the tutorial below to convert MXF into MPEG-2 for working in Premiere Pro CC 2017.(Read Review)

Free Download or purchase Pavtube MXF Video Converter for Mac:

Step-step-guide to Convert MXF to Adobe Premiere Pro CC 2017 editable format

Step 1. After downloading, install and run this Mac MXF to Premiere Pro CC 2017 Converter, just import the MXF files to the software for converting.

Step 2. Click "Format" bar to choose the output format. Click and choose "Adobe Premiere/Sony Vegas" > "MEPG-2(*.mpg)". The setting seamlessly fits Premiere Pro CC 2017, CC 2015.3 and CS4/CS5/CS3/CS6.

Step 3. Finally, hit the "Convert" button at the bottom right corner and the conversion from MXF to Adobe Premiere Pro CC 2017 will begin immediately on your Mac.

Tips & Tricks:

1. Adjust audio and video settings (optional)

The Mac MXF converter for Adobe Premiere enables users to adjust audio and video settings before transcoding MXF files to MPEG-2. Click "Settings" button, then you will enter the following interface, on which you are allowed to customize size, bit rate, frame rate, sample rate, and audio channel to your required ones.

2. Basic video editing (optional)

This Mac video converter has some simple edit functions like cropping, splitting, adding effects etc. so you can touch up the video with basic video editing functions.

After the conversion is complete, get the resulted files via clicking the Open button and then you can import converted MXF files to Adobe Premiere Pro CS4/CS5/CS3/CS6/CC 2017 in Mac for further editing without any hassle. Wait no more, just have a try!

Related Posts:

Source: http://mediaconverting.blogspot.com/2017/01/premiere-pro-cc-2017-mxf-solution.html

Friday, January 27, 2017

Solve Can't Play MP4 on Blu-ray Player

Have you tried to make a Blu-ray copy of MP4 but failed to play on Blu-ray player after finishing a short film, or recording an unforgettable parties video to share with your family or friends on TV? However, it is really a embarrassed thing when you tried to play common video formats like MP4 on Blu-ray player, only to find your Blu-ray can't read the MP4 file. What’s the matter? How to solve “can’t play MP4 on Blu-ray player”? Read on to get the solution.

In fact, MP4/MPEG-4/H.265 MP4 is not coded in many Blu-ray players including Samsung Blu-ray player, Sony Blu-ray Player etc including some of its successors like HD Blu-ray players, Blu-ray disc players and HD/3D DVD players. So to make Blu-ray Player support MP4 format, On this situation, converting your MP4 to Blu-ray Player natively supported MP4 format is the fastest solution.

Try the MP4 to Blu-ray Player Video Converter

So make your MP4 files read by Blu-ray player without hassles, Pavtube Video Converter is highly recommended to help you convert all videos from MP4, VOB, FLV, MKV, MOV, FLV, and 150 more formats into all sorts of other regular Blu-ray-compatible video formats. Besides, this all-in-one video converter can also help you convert MP4 to any decent format you want. And it offers fast conversion speed like a breeze without any quality loss. So what exactly is Pavtube Video Converter?

As the name suggests, it is a program that lets you convert videos into different formats. But that is just the tip of an iceberg.Pavtube Video Converter lets you do a lot more than that. With the software, apart from converting various video formats into dozens of other formats, you can also convert audio files and online videos on Windows (10, 8.1, 8, 7, XP, etc). Moreover, the software allows you to edit videos with beasic editing functions.

Pavtube Video Converter also can help you

MP4 to DVD Player
MKV to Blu-ray Player
MP4 to LG TV
MP4 to Samsung TV
MP4 to Sony TV
MP4 to Panasonic Viera


For Mac users, please turn to Pavtube Video Converter for Mac. It is compatible with macOS Sierra, Mac OS X 10.11 El Capitan, 10.10 Yosemite, 10.9 Mavericks, 10.8, 10.7, 10.6, 10.5.

Now free download the MP4 to Blu-ray Converter

Other Download:
- Pavtube old official address: http://www.pavtube.com/video_converter/
- Cnet Download: http://download.cnet.com/Pavtube-Video-Converter/3000-2194_4-75734821.html
- Softonic Download: http://pavtube-video-converter.en.softonic.com/

Now follow guide to directly convert MP4 to Blu-ray player supported format for smooth playing

Step 1. Add MP4 files

Click "File" button to import MP4 videos which you want to play on Blu-ray player, or you could just dragging files into the main interface of this tool.

Step 2. Select Blu-ray player compatible format

Click "Format" and set "AVI" or "MPEG-2" as the output format from "Common Video" drop-down menu, if you want to play HD MP4 on Blu-ray disc or DVD Player, choose "HD AVI" from the "HD Video" menu. From "Setting" on the right-bottom of the window, it can allow you to customize output video parameters and the file size such as video resolution to 720*400, video bitrate, audio channels and so on depending on your needs.

Note: If you want to edit your MP4 video files before watching it on Blu-ray player, just click on the "Edit" button. you can trim or crop the unwanted parts and then merge them into the new one, transform video effects and add watermarks. And more, you can also set the aspect ratio at 16:9 or 4:3 as per your video needs to avoid any black bar.

Step 3 Convert MP4 to Blu-ray supported DivX or MPEG-2

Click "Convert" to convert MP4 file to AVI or MPEG-2 the compatible file format to Blu-ray player. Then click "Open Folder" button to locate the converted MP4 files when your conversion is done,

Read More:

Source: http://mp4gear.over-blog.com/2017/01/play-mp4-on-blu-ray-player.html