Showing posts sorted by date for query vlc. Sort by relevance Show all posts

Wednesday, May 23, 2018

Top 5 Best 4K Camera Phone You Should Know

More and more often you can see 4K technology everywhere. More and more devices, monitor add support of 4K playback, 4K enables people to pursue the extremely audiovisual enjoyment. Nowadays, you can even shot video in 4K resolution with the smart phone in your hand. The following article will give you top 5 best 4K camera phones for you.

1. Sony Xperia XZ Premium

Sony Xperia XZ Premium

In terms of photography, Sony is one of those respected names in the industry. The Sony Xperia XZ Premium has everything you want when paying top dollar for a phone, with its 4K display and slow motion camera two standout party pieces. It will please Sony fans around the world. The camera has an amazing feature that we loved: it is able to record slo-mo video at only 980 frames per second. With this kind of camera, you can even film a nature documentary because it will catch all the details. However, we also need to tell you this up-front: you do need a good light.

2. Huawei P10

Huawei P10

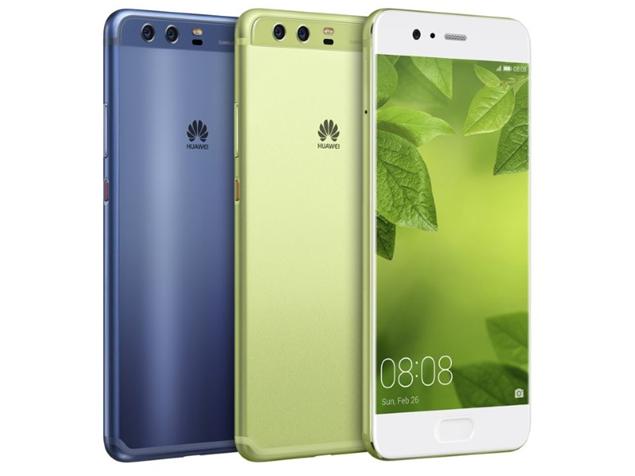
The Huawei P10 comes with one front camera with 8Mp and two back cameras: one with 12MP and another one with 20MP. Just like it already happened with the previous Huawei models, you can use the 20MP one to take black-and-white photos. However, when you use both rear cameras, your photos will have a better clarity. Although the Huawei P10 comes with the feature that allows you to shoot 4K videos, the fact is that it doesn't offer any stabilization when you're recording at this resolution. As if this wasn't enough, if you use Windows, you won't be able to open them by using Windows's 10 Photos app, VLC, and you won't even be able to upload it directly to YouTube. 

3. Samsung Galaxy S9

Samsung Galaxy S9

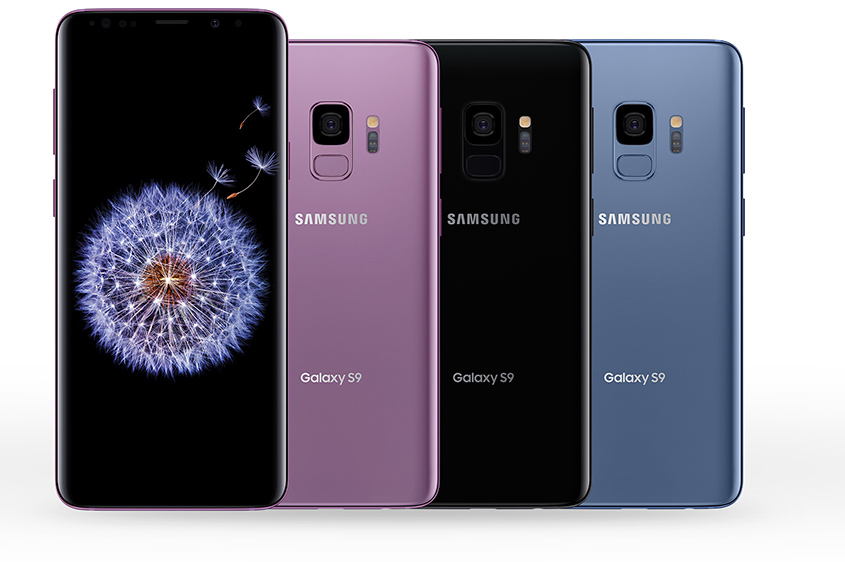
The Samsung Galaxy S9 is a great phone, but one that hasn't really kicked on from the Galaxy S8, bringing a very similar design and screen to 2017's version. The improved biometrics were sorely needed, and the camera is a leap forward, but the amazing low light capabilities have resulted in sacrifices elsewhere. Samsung Galaxy S9 comes with a front camera with 8Mp and a rear camera with 12Mp. In case you're serious about shooting 4K videos, you need to know that the sound quality is not the best in the market and that you might have a few problems with the hybrid stabilization system. 

4. iPhone X

iphone x

iPhone X comes with a 7Mp camera in the front and 2 back cameras, both with 12Mp. Losing the home button and altering the design was a dangerous move, but one that was sorely needed after years of similarity and the premium design, extra power, all-screen front mix together to create - by far - the best iPhone Apple's ever made. It's impossible to give a perfect score to something that costs this much - but this is the closest to smartphone perfection Apple has ever got. iPhone X allows you to shot 4K videos at 24/30/60 fps steadily. What's bad is that it is the most expensive flagship phone around.

5. MOTO Z2 Play

MOTO Z2 Play

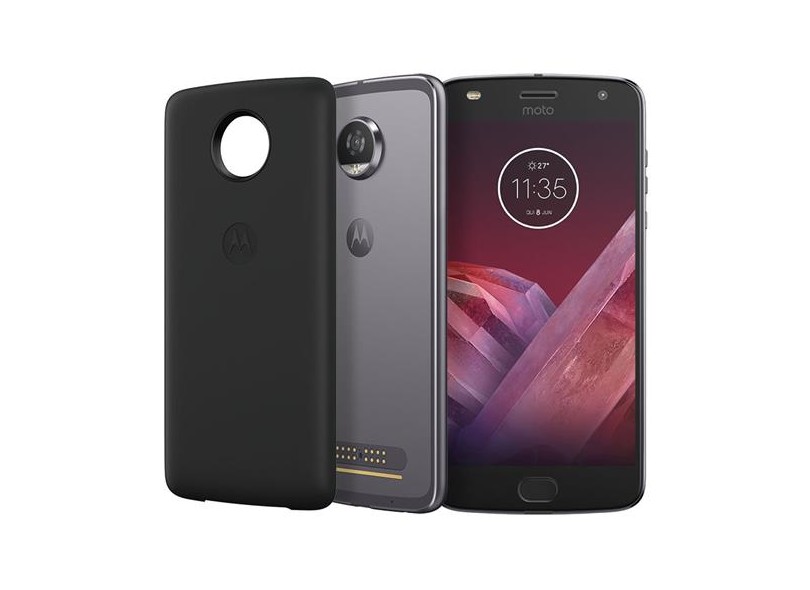
Featuring a 5MP camera on the front and a 12Mp camera on the back, we can say that the photos taken with the MOTO Z2 Play are among average. While the rear camera includes phase detection autofocus, dual-pixel autofocus, laser autofocus, and a dual-tone LED flash, this should imply that low light photos would have an awesome quality. In what concerns video capabilities, the MOTO Z2 Play allows you to shoot using Full-HD or 4K. Although the videos could be a lot better, they are quite ok. Besides, one of the things that you can easily do is to use the Go Live mode and go live directly on YouTube.

Best 4K Camera Assistant

Convert Any Phone Recorded Video to Non-linear Editing Software

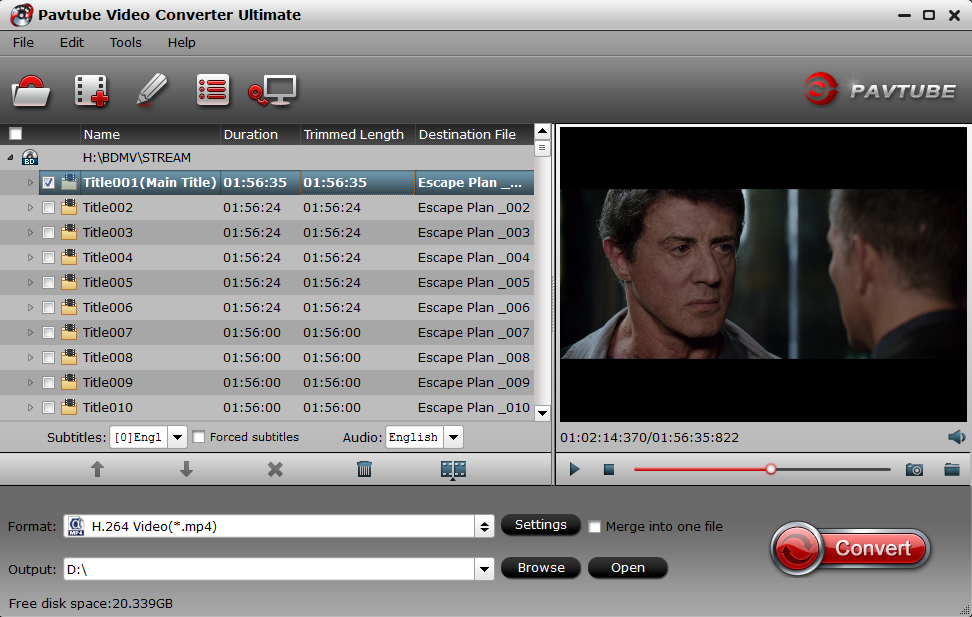
Some day, 1080p will be the past, since the 4K will dominate the market. Finally you made the 4K videos, the next thing you want to do is to edit and enhance video and upload it to social network for sharing. Here we strongly recommend you a 4K editing software and covnerter for you which is called Pavtube Video Converter Ultimate (to get Mac version). It allows you to convert 4K video to iMovie, Final Cut Pro, Adobe Premiere optimized presets with the best settings. It also can upscale SD/HD to 4K video, and compress 4K to 1080p if you need.

As we know, when you import 4K video into non-linear editing software and the exported file in 4k resolution will has a large size. You will spend a lot of time to upload the render file to Youtube, Vimeo, Facebook. Don't worry, this software also allows you to customize the video codec, bit rate, frame rate, channels, etc to make the most suitable video for your media player, devices. Know more here(guide).

Pavtube Video Converter Ultimate

Thursday, March 22, 2018

Compress DJI Mavic Air 4K to 1080p for After Effects Editing

A marvel of engineering and design, the Mavic Air was built to go wherever adventure takes you. Inheriting the best of the Mavic series, this ultraportable and foldable drone features high-end flight performance and functionality for limitless exploration. The Mavic Air is the most portable DJI drone to house a 3-axis mechanical gimbal, with its angular vibration range reduced to 0.005°. Set in a triangular formation, gimbal dampeners help create even steadier shots. Best of all the Mavic Air shoots video at an incredible 4K 30 fps, recording at 100 Mbps to capture every second with UHD quality.

It is a wonderful idea to input the DJI Mavic Air captured 4K footage into Adobe After Effects for further editing. However, it will be CPU comsuming if you load DJI Mavic Air 4k into After Effect and try to render the final file. If you say you have owned a very power computer and can get this job done, okey, how about the final render file? It can be very easy to say that its size will be very very large after adding vdieo effects to it. So today what we are gonna discuss is how to compress DJI Mavic Air 4k to 1080p for better postproduction, and compress the large render files for better sharing.

Part 1. How to Compress DJI Mavic Air 4K to 1080p before After Effects Editing

To compress DJI Mavic Air captured 4k footage before inputting into After Effects, you have a good choice - finding a smart assistant which comes as a super compressor. Pavtube Video Converter Ultimate always stands out from it competitors will never let you down. It allows you to input 4K MOV, 4K MP4, 4K AVCHD, 4K MKV and output MKV, MOV, MP4, AVI, M4V etc with 4K/2K/SD/HD resolution, moreover, customizing video parameters like video/audio codec, resoluiton, bit rate, frame rate, channels etc are available here. Apart from video rosolution, video file size also depends on video bit rate, get smaller video size by lowering the bit rate.

Quick Guide to Compress DJI Mavic Air 4K to 1080p before After Effects Editing

Step 1: Load DJI Mavic Air 4K video into the program.

Start the program on your computer, click "File" menu and select "Add Video/Audio" or "Add from folder" to import DJI Mavic Air 4K video.

Load DJI Mavic Air 4K video

Step 2: Define output video format

Click "Format" bar, from its drop-down options, choose the best compatible uploading format from "Common VIdeo" > "H.264 High Profile Video(*.mp4)". You also can choose other video formats according to your needs.

Output YouTube best uploading 4k formats

Step 3: Compress DJI Mavic Air 4K to 1080p

Hit "Settings" to open the "Profile Settings" window, here you can adjust the output video codec, resolution, bit rate, frame rate and audio codec, bit rate, sample rate and channels. To compress 4k to 1080p, just type 1920*1080 in Size blank. If you prefer smaller video size, lower the video bit rate can help you achieve this goal.

Output YouTube best uploading settings

Step 5: Start the conversion.

Start to compress DJI Mavic Air 4K video to 1080p conversion by hitting the right bottom convert button, when the conversion is over, you will have no limitation to upload DJI Mavic Air 4K video to After Effects. You will be surprise about the smooth editing process.

Part 2. How to Compress After Effects render file size for sharing

Above is the tutorials to help you compress the DJI Mavic Air 4k to 1080p for smooth editing. Almost all After Effects moive making lovers know that, although the file you input into Adobe AE is very small, the render file will be larger larger larger than what you input, cause you have done the footage's postproduction. So how to reduce the render file size? Here are two ways to help you solve the problems.

Method 1. How to reduce the render file size in Affter Effects

To reduce render file size in Affter Effects is to change the format to H.264, but how? Keep reading.

To render H.264 it's actually very easy.

  1. From your Project window, select the sequence you wish to render.
  2. Right click->Export Media (or File->Export Media)
  3. In the Video tab, select H.264 for format

Then, in the basic video settings below, you can change to smaller-than-original resolution, low bit rates, etc.

Method 2. How to reduce the Affter Effects render file size via Pavtube tool

If you are not faniliar with the operation by reducing in After Effects, this method will be very easy for you. Open Pavtube Video Converter Ultimate and load the render file into it, then define the output format you like just like we just do above, then click Settings on the UI, screenshot like below.

Output YouTube best uploading settings

Now you are able to adjust the output video codec, resolution, bit rate, frame rate and audio codec, bit rate, sample rate and channels. Apart from changing video resolution, you also can lower the bit rate to make the render file smaller.

Up to now, you may have no trouble to play the DJI Mavic Air 4k with any devices, or upload to Youtube Facebook, Twitter for sharing with thousands of net friends.

Thursday, December 7, 2017

Best Canon Footage Converter To Convert AVCHD To MP4 MKV MOV

For half a century, Canon, one of the big names in photography world, remains an important force in SLRS, cameras, cameras and multi-function devices. Canon digital camera/camera provides clear image quality and performance. Most Canon camcoders could record AVCHD files today, so what is AVCHD file?

AVCHD - a  variant of the H.264 format, this is a high definition video file format found on most Canon, Sony, and Panasonic HD camcorders (other manufacturers support it as well). AVCHD camcorders can capture very high-quality video and they can also burn HD video to a standard DVD disc, which can be played back on a Blu-ray disc player.

You can use your Canon camcoder on different occassion, for example, you can shoot a 4k footage on a wedding, after that, you will find this is only few minutes of video have a dozen or even more than 20GB. The question left is that how to play, edit, and share the footage without any obstacle. It is not easy to play such kind of video, and it is so big. If your computer is not powerful enough, all those are absolute nonsense. So today, this article aims to help you to play and edit Canon AVCHD video at will without any video formats imcompatibility issue or other issues.

But before we get to start, one thing you have to prepare - a powerful third-part software - Pavtube Video Converter Ultimate/for Mac. This program could convert the video recorded from Canon HD camcorder/camera AVCHD to H.264, MP4, MOV, AVI, MPEG, FLV, WMV etc. Moreover, for video editors, this program offers you dozens of optimized video formats for FCP X, iMovie, FCE, Avid Media Composer, Adobe Premiere Pro, After Effects, Kdenlive, Apple Aperture 3, DaVinci Resolve, iPhoto, etc.

Moreover, you can adjust the video and audio bitrate, frame rate, resolution, channel and more parameters to make the outputed video more fit in your video player and multimedia devices. More functions in this guide for you to make reference.

Below, we will go with Windows verison to show you how to work with Canon Video Converter to seamlessly convert, edit and transfer Canon footages. Its Mac version has the same operating procedures.

Step By Step To Convert Canon Footage For Playback & Edit & Share

Step 1: Import Canon AVCHD video sources

Free download this perfect Canon video converter on Windows, and then run it & click add video button to import Canon HD video footage to program or directly drag the files to main interface.

load canon source

Step 2: Choose output format

This part is open, and depends on your heart. If you want to do further video edit, you can navigate to "Adobe Premiere" or other category as you like. Below are Windows & Mac version screenshot.

Windows Version

ultimate premiere

Mac Version

mac version

Tips: From the screenshot above, you can see that this program offers you hundreds of optimized device presets, like iPhone, Samsung, Game console, TVs, and more. If you have selected one, then you don't need do any change.

Step 3: Adjust output profile settings at will

Can you see the "Settings" on the UI, click it and you will entre a window, here you can do any change to your Canon video. For example, you can lower video bit rate to get smaller video size. Normally, video size is based more on bit rate than resolution(pix).

adjust settings

Step 4: Start Canon Video Conversion Process

After you have done all setting, click "Convert" red button on the main interface. Wait for a while, then cilck open, it will pop up a folder with the converted file. By the way, this software supports you to import several files at a time.

Thursday, November 30, 2017

Best DJI Spark Video Converter for Mac

More and more people are attracted to DJI drones which make our flying dreams to come ture. DJI has unveiled the Spark drone for a few month, the smallest model the popular Chinese dronemaker has released to date. DJI claims that Spark's camera can shoot 12 megapixel photos and record 1080p high-def videos at 30fps and 24Mbps. Although the footage from DJI Spark has lower resolution and bitrate/ frame rate than other DJI drones, which support 4K capture and higher video parameters, playing and editing HD, Full HD videos from Spark is still a difficult task. Why? Keep reading!

For Mac users, it will be so cool to turn the Spark video clips into more attractive ones for sharing or burning to DVD with the help of iMovie, Final Cut Pro X, or other non-linear editing software. As we all know, MP4 is the most common video format in this world, however it isn't friendly with non-linear eiditng software.

What's more, HD, Full HD videos from Spark is less compressed or uncompressed, that will end up with a large file size which will occupy a lot of space when storing them on your smartphone or tablet. Also, all video sharing websites like Vimeo, YouTube have limits for uploading large videos. These are the reasons why I say playing and editing HD, Full HD videos from Spark is a difficult task. To solve those issues above, you need a third-part assistant - best Spark video converter.

Find the Best Spark Video Converter for Mac

Pavtube iMedia Converter for Mac | Windows is highly recommend to you, which can solve these issues above and for all by transcoding Spark video to what you need. Following are the key features for you to know this software in depth.

  • Encode Spark Video to any video and audio format like AVI, WMV, MP4, MKV, MOV, M4V, VOB, DV, ASF, MPG, MP3, M4A, AAC, etc. for palyback on various portable device and media player, such as iPhone, iPad, Samsung smartphone, Windows Media Player, QuickTime media player, etc.
  • To acquire perfect playback effect on target smartphones, tablets, media players, etc. you can freely adjust parameters settings including video codes, video size, bitrate, frame rate, etc.
  • Convert 1080p Spark Video to 720p for smaller video size, then you can save more space for your smartphone or tablet when watching on them.
  • Various practical editing functions, such as trim, split, crop, add watermark and so on. For example, if your want to remove a few clips in your Spark video, you can use "trim" option to remove unwanted part quickly. Or merging several Spark video clips into one video is also very cool.
  • Able to read footage from Spark, Canon, Nikon, Sony, Pansonic, etc. And then output decent video format for further editing in Nonlinear Editor, including FCP, iMovie, Premiere Pro, etc.
  • Free lifetime technical support and upgrade service are available for every user. You can read this guide to get more details.

Below are the specific steps to show you how to encode Spark videos with this software. It Windows version has the same operating procedures.

How to Encode Spark Videos with the best Spark Video Converter on Mac?

Step 1. Load Spark Video files

Launch this best Video converter on your Mac. Click "Add Video" or directly drag and drop the Spark video file into the software.This Mac version software also supports batch conversion to encode your Spark Videos.

load video

Step 2. Select output format

Click on "Format" bar, and you can freely select output format from its drop-down list. You can choose H.264 MP4 from "Common Video" or "HD Video" for common portable device and media players. If your media player or devices support HEVC codec, convert Spark video to H.265 MP4 will also be available. For further editing in NLE system, just go to "Final Cut Pro" "Avid Media Composer" or "iMovie and Final Cut Express" categories to choose the video formats you need.

This Spark video converter also allows you to choose format device. For example, if you want to convert videos to iPhone, you can simply go to "iPhone" category to select specific iPhone model.

h.265 mp4

Step 3: Customize Spark Videos

As we mentioned above, this Spark Video Converter provides a built-in video editor. You are allowed to adjust video and audio parameters if you are not satisfied with the default settings. Presets like size, bitrate, frame rate, audio channels, etc. can be customized in your own way.

profile settings

Click "Edit" button on the main interface to open the "Video Editor" window. Here, you can trim, crop, add subtitle, add watermark, replace/mute audio, adjust aspect ratio, adjust volume, rotate, flip, add special effect to video.

edit

Step 4: Start encoding Spark Videos

Click "Convert" button to start converting Spark video. When the conversion process is finished, you can locate the generated video files in output folder. Then you can play, upload and share the Spark Videos wherever you like.

Thursday, November 2, 2017

How to Play DJI Mavic Pro 4K Video on iPad

"I have the Apple iPad mini 4 that I use as the display while flying the Mavic Pro. Today I put the SD card from the Mavic Pro into the Apple SD card reader for my iPad mini 4. The iPad Photos app recognized the 4K video as content that it could import, and it did the import when I selected the 4K video.The iPad Photos app would not play the 4K video, saying it did not recognize the video format."

"I have the same problem with my iPad Pro and trying to play .mov 4K video files."

"I just got the same results on my iPhone 7 Plus."

"I have the same problem with my ipad air 2 and my iphone 7 plus. From camera roll is not compatible the 4k video."

...

I believe a lot of DJI Mavic Pro users have met the same problem above. Before giving the solution, let's find out the reason to the problem. As we all know, we can get .mov,.mp4 from DJI Mavic Pro, MP4 comes as the most pupolar video format in this world, meanwhile, MOV is for iOS Apple products. Usually, DJI MOV file can be played well on iPad, iPhone, but 4k MOV may be an exception. In addition, MOV, MP4 are just containers, which cover various and different video/audio code, it is common and sad if your DJI 4k MOV, MP4 files can't be recognized by your iPad, iPhone. After searching and testing the methods, I have listed 3 solutions for you to make reference.

3 Methods to Play DJI Mavic Pro 4K Video on iPad Successfully

Method 1:

If you meet this issue that you can't play DJI Mavic Pro 4k on iPad and know nothing about the reasons, you can download the third app on your iPad to help you achieve this goal. During the test, I have found several apps which may help you to play 4k footage instead of using Apple photo app: DG Player, Oplayer HD and more. If you still fail to play 4k footage, you can try more apps. Not sure if it downscale or what it does, but it plays them.

Method 2:

One reason that you can't play 4k on iPad is 4K resolution footage from DJI Phantom 4 can’t be supported well. To solve this issue, you can downscale 4k to 1080p, or 2k with a professional 4k compressor. This method also can help you successfully import converted 4k to Final Cut Pro, iMovie for editing without any obstacle.

Method 3:

Since MOV, MP4 container include different video/audio codec, you needn't to know depth about how to solve this, you just need to get a all-in-one converter which can convert DJI Mavic Pro 4k to iPad acceptable format without video quality loss.

When you search on Google, you will find tons of 4k compressors and 4k video converters, you don't have to try one by one, cause you will find the best one in this article you will never regret meeting it. Pavtube iMedia Converter for Mac combines a video compressor and video converter into one software. 

Firstly, it can transcode 4K video in any format such as 4K MKV, 4K MTS, 4K XAVC, 4K AVCHD, even 4K Blu-ray to iPad series supported .mp4 .mov .m4v formats. Secondly, you can compress 3840×2160 and 4096x2160 4K video to 2048 x 1536 or 1092x1080 video for the iPad series. Thirdly, you can freely adjust the video size as you want in "Settings" and you also can configure the video and audio encoder, bitrate, etc. Fourthly, you can trim the 4K video length, merge 4K footages into one file, add subtitles to your video and more before output video for iPad.

Step-by-Step to Convert and Compress 4K video for iPad

Step 1: Import DJI Mavic Pro 4K Footages

Launch and start the 4K VideoConverter program on your computer, click "File" > "Add Video/Audio" or "Add from Folder" to import source files to the program. You also can directly drag and drop your multiple 4K clips into the 4K video converter. Batch conversion is supported here.

load 4K video

Step 2: Choose iPad acceptable format

To choose iPad supported video format, you just need to click "Format" to open the profile window. You can use the program to output iPad supported H.264 HD video or MPEG-4 video, here, we choose to output H.264 HD video as the screenshots below:

Output iPad Pro supported H.264 HD format

You can also directly choose to output iPad preset profile format for direct playback. Here, you can choose to output "iPad" > "iPad Air Full HD Video(*.mp4)".

Output iPad preset profile format

Step 3:Compress 4k video for iPad (Optional)

iMedia  for Mac allows users to configure video and audio encoder codec, bitrate, frame rate, resolution, etc to make the output video more compatible with iPad. You just need to click "Settings" to open the profile window then change 4K resolution to 2048 x 1536 for iPad in "Video Size". You also can compress 4K to 1080p for iPad.

4K to 2K

Step 4: Start 4K to iPad conversion

After all setting is completed, hit right-bottom convert button to begin the 4K UHD videos to iPad accepted video format. Ticking off shut down computer after conversion option, you can leave the program running and do other things instead of waiting around for the conversion. After the conversion, you can locate the converted video in the output folder then you can transfer the converted 4K video to the iPad via iTunes.

Thursday, October 19, 2017

Top 5 Free Online MTS to MOV Converter

iMovie comes as an easy-to-use editing software for Mac users. An MTS file is a video file saved in the high-definition (HD) MPEG Transport Stream video format, commonly called "AVCHD." You will get MTS files from Blu-ray Disc, JVC, Canon, Panasonic, Sony Camcorders, etc. Sometimes, you may want to edit MTS files in iMovies, however, iMovie can't recognize MTS well, in this case, the best method is to convert the MTS fiels to a Mac native format, MOV. Then you can easily edit the converted file in iMovie. This article aims to tell you top 5 free MTS to MOV online video converters and one professional alternative desktop converter. What are you waiting for? Go check!


Part 1: Best and Free Online MTS to MOV Converter

Part 2: Best Online MTS to MOV Converter Alternative


Part 1: Best and Free Online MTS to MOV Converter

Convertio

Convertio is an easy tool to convert files online. More than 223 different document, image, spreadsheet, ebook, archive, presentation, audio and video formats supported invluding MTS files. You can choose to upload the MTS video from your computer, Dropbox etc. for your convenience. Maximum file size is 100 MB, while there are advanced tools to make use of. It helps convert MTS to MOV, FLV, MKV, MP4,VOB and more.

convertio

Convertfiles

Convertfiles supports converting video, audio, image, document, presentation, and etc. For converting mts to mov online, your source video should be less than 250 MB. It allows for more than 330 combinations of input and output file formats. With this free online mts to mov converter, you can convert almost any video.

convertfiles

Apowersoft Video Converter

Apowersoft is absolutely a free online mts to mov video converter. It is a free web-based tool that provides many audio and video formats for converting. It can convert MTS files into MOV, MP3, WMA, AVI, MP4, WMV, etc. Also, this program comes with a quick editor that provides some options to customize resolution, trim video clips, adjust channel and stereo rate.

APOWESOFT

Online Convert

In this page, you can see 17 choices about MTS online converters:

  1. MTS to 3G2
  2. MTS to 3GP
  3. MTS to AVI
  4. MTS to FLV
  5. MTS to MKV
  6. MTS to MOV
  7. MTS to MP4
  8. MTS to WEBM
  9. MTS to WMV
  10. MTS to MP3
  11. MTS to MPG
  12. MTS to M4A
  13. MTS to PNG
  14. MTS to WMA
  15. MTS to ZIP
  16. MTS to GIF
  17. MTS to WAV

See, there are so many choices for you. When you select MTS to MP4 online converter,  you can upload MTS files into the online MTS converter or paste a URL address to convert MTS to MOV. It also  provides additional features like subtitle conversion (subtitles are preserved during conversion) or the conversion from a presentation format like Powerpoint to MP4.

online video converter

BenderConverter

Benderconverter supports the conversion of MP3, Avi, Mpeg, Flash video, iPod / iPhone, iPad, Gif, Jpeg and other popular formats. This free online mts to mov converter lets you convert videos less than 100 MB. If your mts file is beyond the limitation, you will need to register it to get more benefits. Then the max file size would be 500 MB.

benderconverter


Part 2: Best Online MTS to MOV Converter Alternative

As we all know, there is no free lunch in this world. Free means that those online video converters have many flaws. For many online video covnerter users, they always ask many questions on some forums. Such as, their online vdieo converter doesn't work anymore, jerky conversion online, and more. If you have the same problem, Pavtube Video Converter Ultimate/ For Mac will be your best choice.

This program is specially designed for Sony, Canon, JVC and Panasonic AVCHD Camcorder/camera owners to convert recorded AVCHD MTS videos to MOV, like DVCPRO HD (*.mov), HDV (*.mov), Avid DNxHD(*.mov) for easily editing in editing software, like iMovie, Final Cut Pro, Adobe Premiere, Sony Vegas, Windows Movie Maker and so on. Moreover, here are 200+ video output formats for you to select, so that you can get your desired target format for playback on iDevice, Android devies, TVs, tablets, and more.

Quick Guide to Convert MTS to MOV with Best Alternative on Windows

Step 1: Import MTS videos

Click "Add File" button to open the file browser window and navigate to the MTS files you would like to convert. Or drag-and-drop files stored on your computer to the interface of this MTS converter. It supports batch conversion, which allows you to import and convert multiple video files at a time.

load mts

Step 2: Choose output format

Click "Format" and navigate "iMovie and Final Cut Express", here is the best output format for you to output for editing in iMovie and Final Cut Express. Moreover, just click "Settings" on the main interface to open "Profile Settings" window, here all the profile parameters including video codec, resolution, bit rate, frame rate, audio codec, bit rate, sample rate, channels, etc are adjustable to facilitate you to get the best output video and audio quality.

Image result for pavtube video converter h.264 mov imovie

Otherwise, you are free to choose any video format to fit in your devices and Video players. Just click "Format" bar, from its drop-down list, select H.264 file format by following "HD Video" > "H.264 HD Video(*.mp4)" or you can choose HD MOV, HD WMV, H.265 video. 

Output format for HD TV

Step 3: Edit MTS video before conversion

If there is a need, you can edit your MTS video files by clicking the "Edit" image button. You can trim, crop, add effect, watermark and subtitle to your videos.

TrimDrag the two sliders to select the segment you want, and then click scissor icon and OK button. In this way, you can cut off any clip you don't want.
Crop: Drag and drop a dotted rectangular box to choose any screen area of the video. Immediately, the selected video area will be enlarged in the preview window.
EffectOffer you a lot of cool effects that you can apply to the video.
Watermark: Add image or text watermarks to personalize your video.
SubtitleAdding subtitle files is available in this program.

edit mts

Step 3: Convert MTS to MOV with high quality 

After all the settings, now, just click the "Convert" button to start converting .mts to .mov file. After the conversion, you can locate the generated files in the output folder.

Now, you can play your AVCHD MTS files on VLC, KMPlayer, iPhone, iPad or edit your MTS files in iMovie, Final Cut Pro, Premiere Pro, Sony Vegas Pro, etc.

Thursday, October 12, 2017

3 Professional Methods to Solve "DJI 4K Don't Play on VLC"

DJI drones has claimed a market share of half or more rescently. Some models of drones such as DJI Phantom 4 Pro, DJI Inspire, can shoots DCI 4K (4096 X 2160) video and UHD 4K (3480 X 2160) video compressed with MPEG-4 AVC/H.264 codec in MOV wrapper, however finding a proper media player to play is a head-scratching task and turn into an agony when you lack a super computer. Here you will find the way to solve this problem, read on.

When we search on Google, we found that "DJI 4K vdieo don't play on VLC" would be a common problem. Even quite powerful i7 SSD PC don't play DJI Inspire / Phantom 4K 100Mbps bitrate video properly. A practicable way is to slow speed to 0.67, Media Player Classic (k-lite codecs) runs and play those 4k footage smoothly. However, for VLC fans, they give up this way.


Why VLC Can't Play DJI 4K Footage?

3 Method to Play DJI 4K Footage on VLC Smoothly

Method 1: Update VLC to 2.2.6 version

Method 2: Enable Hardware Acceleration in VLC to Play DJI 4K Video

Method 3: Downscale DJI 4K Video to 1080p for VLC Smooth Playback


Why VLC Can't Play DJI 4K Footage?

In fact, the 4K video playback including DJI 4K recordings with VLC has strict requirements on the computer's processor and graphics chip. Sometimes, even if your computer meets the requirements, you may find that DJI 4K video plays back choppy. This is due to the immense processing power required to play 4K. You can try the below 3 methods to handle the problems.

3 Method to Play DJI 4K Footage on VLC Smoothly

Method 1: Update VLC to 2.2.6 Version

With preparation for Ultra-HD video and a special care to support more formats, 2.2 is a major upgrade for VLC. Download it here and re-open your DJI Phantom 4 4K videos in VLC Player for 4K video playback.

Note: Although version 2.2.6 of VLC offers 4K playback support, it still does not support 4K video from DJI Phantom 4 playback perfectly: there is stutters, not showing audio, etc issues.

Method 2: Enable Hardware Acceleration in VLC to Play DJI 4K Video

If you ungrade VLC verison but still fail to play DJI 4k on VLC, you can try the second method. You can fix this issue by enabling the GPU accelerated decoding feature in VLC, this feature in theory uses the processing power of the graphic card to lighten the load on the processor of the system.

However, according to VLC's GPU decoding page, this feature is only available for H.264 streams. In addition, as the data is decoded in the GPU at the decoding stage and then transferred back to the player so that the other stages, filtering and streaming for instance, can be processed, this process can under under circumstances be slower than without GPU acceleration enabled. What's more, the VLC GPU decoding is only available for select operating systems. While Windows Vista and newer versions of the Microsoft operating system are supported, Windows XP is not at this point in time. The majority of graphic cards should support hardware acceleration just fine. Make sure you have installed the latest drivers though.

How to enable hardware acceleration in VLC?

Open VLC Media Player and click on Tools > Preferences or press Ctrl-P to open the settings window of the program. If you are using the simple settings interface, click on Input & Codecs on the left sidebar and check the Use GPU accelerated decoding box there.

VLC Enable GPU Acceleration

If you are using the "all" interface select Input/Codecs > Video Codecs > FFmpeg > Hardware decoding instead to enable acceleration this way.

Click on the save button afterwards and restart the media player to work with the new setting. Try playing several video files to see if hardware acceleration makes a difference in terms of playback. If it does, keep the setting enabled. If it does not, just go back to the settings to uncheck the option again.

Method 3: Downscale DJI 4K Video to 1080p for VLC Smooth Playback

It will be GPU consuming and very jerky if you play DJI 4k footage on VLC media player, and if you don't possess a powerful computer, that will be worse. So how about compressing your DJI 4k to 1080p that will be compatible with most devices, like smartphone, tablets, labtops, or game console. By the way, this way has lower requirements on the computer's processor and graphics chip than 4K video.

To downscale DJI 4k to 1080p, what you need is to get a professional 4k to 1080p compressor. Pavtube Video Converter Ultimate/ For Mac stands out from it calss just like it name. It can convert DJI Phantom 4 Pro 4K video, DJI Mavic 4K video, DJI Phantom 4K video, DJI Phantom Professional 4K video, DJI Inspire 2/1 4K video to 4K H.264 MP4 or compress DJI 4K video to 1080p for VLC. 

Moreover, based on testing and VLC playback feedback, we found 1080p MKV, AVI, MOV, MP4 are more compatible with VLC and can be played by VLC more simply. All those container, you can find by click "Settings" button.

To get a better virtual experience, you can edit video with this smart assistant. You can flexible to adjust vdieo parameters, including video and audio bitrate, frame rate, resolution, channel and more. With it, you can merge separate video clips into one, insert external subtitles to video, add transparent text watermark/image watermark to video, crop black bars around the video frame, adjust video color brightness, remove audio from a video or replace audio in video, trim video footage, crop unwanted area from video, etc. More funtions here.

Step By Step to Convert DJI 4K Video to VLC

Step 1: Add 4K videos

Open the 4K video converter program, click “File” menu, from its drop-down option, select “Add Video/Audio” to load DJI 4K video to the program. If you have Blu-ray and DVD that want to playback on VLC, you also can load them to rip to VLC.

load 4K video

Step 2: Choose output file format

From “Format” bar drop-down list, choose the formats that you want to output for later use. For compatibility consideration, it is idea for you to choose “HD Video” > “H.264 HD Video (*.mp4)” as output file format.

output mp4

Open “Profile Settings” window, click “Size(pix)” to select 1920*1080 as the final resolution for output video. In this way, the DJI 4K video can be downscaled to 1080p then you can play it with VLC smoothly.

mp4 settings

Step 3: Convert DJI 4K video to VLC

After all the settings is completed, hit right-bottom “Convert” button to start to convert and downscale DJI 4K video to 1080p format videos. When the conversion is finished, click “Open Output Folder” icon on the main interface to open the folder with generated HD DJI video files. 

Now, try to play DJI video files with VLC on your computer. It should be smooth now. 

Wednesday, October 4, 2017

Useful Tips for Uploading DJI Phantom 4 Pro 4k to Youtube

DJI Phantom 4 Pro+ stands out from its class, which is capable of shooting H.264 videos at 60fps or H.265 4K video at 30fps, both recorded in a 100 Mbps bitrate. When the shooting is completed, you may want to upload the 4k video to Youtube and share with thousands audiences. It easy to get this goal, cause Youtube has already added 4K video streaming support. However, what really matter here is how to smoothly upload DJI Phatom 4 Pro+ 4K video to YouTube with the best quality. Before you get start, you have to know the  best 4K format and settings for YouTube as folllowing.

Best 4K upload format and settings for YouTube

Container: MP4 


Video codec: H.264 
Progressive scan not interlacing 
High Profile 
2 consecutive B frames 
Closed GOP. GOP of half the frame rate. 
CABAC 
Variable bitrate, no bit rate limit required, though we offer recommended bit rates below for reference, 
Chroma subsampling: 4:2:0


Audio codec: AAC-LC 
Channels: Stereo or Stereo + 5.1 
Sample rate 96khz or 48khz


Frame rate and bit rate to view 4K uploads on 4K TV with YouTube

SDR uploads

24/25/30 fps standard frame rate - 35-45 Mbps 
48/50/60fps High Frame Rate - 53-68 Mbps

HDR uploads

24/25/30 fps standard frame rate - 44-56 Mbps 
48/50/60fps High Frame Rate - 66-85 Mbps


Resolution and aspect ratio 

YouTube uses 16:9 aspect ratio players. If you're uploading a non-16:9 file, it will be processed and displayed correctly as well, with pillar boxes (black bars on the left and right) or letter boxes (black bars at the top and bottom) provided by the player.


Time and file size limitations for YouTube video upload

Size: Up to 2GB 
Length: By default, you can upload videos that are up to 15 minutes long, but you can upload longer videos by following the steps below to verify your account. 
1. go to the upload page at youtube.com/upload
2. At the bottom of the page, click Increase your limit. You can also go directly to https://www.youtube.com/verify
3. Follow the steps to verify your account. You can choose to receive a verification code through a text message on a mobile phone or an automated voice call. 
4. Once you've verified your account, you can upload videos that are longer than 15 minutes long.

How to Convert DJI Phantom 4 Pro+ 4K for YouTube

From above official information, we know that to upload DJI Phantom 4 Pro+ 4k H.264 at 60 fps with 100Mbps video to Youtube, you have to adjust uploaded 4k video bit rate to 66-85 Mbps which is more suitable for Youtube. And if you are uploading DJI Phantom 4 Pro+ 4k H.265 at 30fps with 100Mbps video to Youtube, transcoding the H.265 to H.264 High Profile video codec and adjut 100Mbps to 66-85 Mbps could be better for Youtube.

Pavtube Video Converter Ultimate for Windows/Mac enables you to convert DJI Phantom 4 Pro+ 4k H.265 to H.264, with adjusting bit rate to 66-85. Furthermore, for those people, who want to transfer the 4k video to iPhone X, Samsung Galaxy Note 8, or other tablets, you can downscale 4k to 1080p, in fact, you will not see the difference between 4k and 1080p, so to save more storage space, you can compress 4k for massive devices.

Moreover, this program also works as a professional video editor, which enables you to trim the 4k vdieo to cut your unwanted part. With it, you can merge separate video clips into one, insert external subtitles to video, add transparent text watermark/image watermark to video, crop black bars around the video frame, split large video files into small parts, adjust video color brightness, contrast, saturation, remove audio from a video or replace audio in video, trim video footage, crop unwanted area from video, etc. More functions in this guide.

Quick Guide to Upload DJI Phantom 4 Pro+ to Youtube

Step 1: Load DJI Phantom 4 Pro+ 4K video into the program.

Start the program on your computer, click "File" menu and select "Add Video/Audio" or "Add from folder" to import DJI Phantom 4 Pro+ 4K video.

Load DJI Phantom 4 Pro+ 4K video

Step 2: Output Youtube best uploading format for 4K video.

Click "Format" bar, from its drop-down options, choose YouTube best compatible uploading format from "Common VIdeo" > "H.264 High Profile Video(*.mp4)".

Output YouTube best uploading 4k formats

Step 3: Tweak encoding settings for YouTube upload.

Click "Hit "Settings" to open the "Profile Settings" window, here you can adjust the output video codec, resolution, bit rate, frame rate and audio codec, bit rate, sample rate and channels to let them fit them YouTube.

Tip: Video size are based more on bit rate than resolution.

Output YouTube best uploading settings

Step 4: Trim video file.

If the 4K video is longer than 15 minutes, you can shorten the video length with the trimming function to set the start time and end time to remove unwanted clips from the video.

Trim video

Step 5: Start the conversion.

Start DJI Phantom 4 Pro+ 4K video to YouTube best format conversion by hitting the right bottom convert button, when the conversion is over, you will have no limitation to upload and share DJI Phantom 4 Pro+ 4K video on YouTube with fast speed and perfect quality.

Thursday, September 28, 2017

Jerky DJI Spark Video in iMovie? Fixed!

DJI Spark, a mini drone that features all of DJI's signature technologies, allowing you to seize the moment whenever you feel inspired. With intelligent flight control options, a mechanical gimbal, and a camera with incredible image quality, Spark empowers you to push your creative boundaries. Many people would like to transfer DJI Spark footage from SDcard to iMovie for editing then upload to Youtube, Twitter, Facebook and share with thousands of audiences. But the feedback unveiled that when it would be smooth to play the videos in QuickTime Player and VLC while it is choppy using the DJI Spark videos in iMovie.

When we are visiting DJI forums, we found that this problem is not unique. But few people can know the exact reason. One speculation is that whether DJI is reporting the frame rate incorrectly in its files or it a software issue on the desktop cause while importing video clips in Final Cut Pro, if you change the default frame-rate of 29.97 to 30fps, the video plays smoothly. Using the 'mediainfo' utility, the only difference we can see between DJI videos and videos from other cameras is the following:

DJI: Frame rate : 29.970 (30000/1001) fps
iPhone: Frame rate : 30.000 fps

Some people tried to adjust 29.97fps to 30fps when importing DJI Spark video to iMovie and succeeded, but others got failure. To play DJI Spark vdieo in iMovie choopy, you can convert DJI Spark video to iMovie most compatible AIC codec MOV video in that MP4 video is not a friendly video format to NLE software with a video converter.

Here we highly recommend you Pavtube iMedia Converter for Mac which can convert DJI Spark 1080p MP4 video to iMovie best editing codec Apple Intermediate Codec video in MOV format with most compatible video and audio settings. It not only works for DJI Spark, but also for DJI Phantom 4/4 Pro, DJI Mavic Pro, DJI Inspire. It can transcode DJI 4k video/HD video to iMovie and Final Cut Pro and other NLE software friendly video formats for editing without any issues.

By the way, this program also performs as a video editor, which offers professional editing functions. You can trim video length to remove unwanted parts from DJI Spark video, crop video file size, adjust output file aspect ratio, add text/image/video watermark to DJI video, apply special rendering effect, insert external ASS/SSA/SRT subtitles to videos, etc. You can learn more about this video converter in the review.

Quick Guide to Convert DJI Spark Video to iMovie on macOS High Sierra

Step 1. Load Spark Video files

Launch this best Spark Video converter on your Mac. Click "Add Video" or directly drag and drop the Spark video file into the software.This Mac version software also supports batch conversion to encode your Spark Videos. It still has Windows version, its operating procedures are as the same as its Mac version.

load video

Step 2: Select output format for iMovie

When the files are loaded, you can simply choose "iMovie and Final Cut Express"> "Apple InterMediate Codec (AIC) (*.mov)" as the output video format, in this option all the key specs like video resolution, frame rate, bitrate has been optimized for using in iMovie. Then hit "Browse" to decide where to locate the output files. Otherwise, they will be exported to a default folder specified by the application itself.

iMovie

If you are not satisfied with the default settings, click "Settings" button, then you will enter the following interface, on which you are allowed to customize size, bit rate, frame rate, sample rate, and audio channel to your required ones.

settings

Step 3: Start DJI Spark video to iMovie conversion

Click the big red Convert button on the main interface to start to convert your DJI Spark MP4 video to AIC MOV for iMovie.

After the conversion, click "Open" to locate the encoded videos and then launch iMovie, choose File > Import > Movies..., to import the converted video into iMovie; prepare for editing. You will find that it's just a piece of cake to edit DJI Spark files in iMovie.

Thursday, September 14, 2017

Convert MTS to M4V for Playback on iPhone 8/ iPhone X

MTS is a file extension for an AVCHD video clip format for high-definition video which is used by Sony, Panasonic, and other HD camcorders; based on the MPEG-2 transport stream and supports 720p and 1080i HD video formats. When you record video footage on an AVCHD digital camcorder, the captured footage appears as an MTS video file, a format most media players and video-editing programs don't recognize.

mts to m4v

When you try to play or watch .mts files on iPhone 8 or iPhone X, changing it to M4V would be a good idea as  M4V is a standard file format for videos for iPhone 8/X and other devices developed by Apple. M4V is based on the MPEG-4 AVC video codec, and it is also used by QuickTime. You could use M4V file freely in the Apple world, even from iPad, iPhone, to its apps. To convert MTS to M4V, Pavtube Video Converter Ultimate plays a leading role in ripping camera MTS video files to video formats natively supported by Apple devices.

Pavtube Video Converter Ultimate/Mac works as a professional MTS to M4V converter, which not only could convert MTS to M4V, MOV for playing on iPhone 8 or iPhone X, but also convert MTS to 200+ formats, MP4, AVI, MKV, WMV, etc for almost all devices, like Android smartphone, tablets, laptops, game consoles, TV box, NAS, and more. You also could convert captured footage to M4V for editing with iMovie, after that, upload to Instagram, Youtube, Facebook and share with thousands of audiences. By the way, Pavtube Video Converter Ultimate offers you 7 main editing functions, you can trim to remove unwanted parts, add your own watermark, crop video aspect ratio, more features you can explore by yourself.

How to convert MTS videos to M4V for iPhone 8/X?

Step 1. Import captured MTS videos

Download and open up recorded HD MTS videos to this MTS to M4V converter by clicking “File” > “Add Video/Aideo.”

add mts video to mts converter

Step 2. Choose M4V as output video format

Just click "Format" bar, navigate to "Common Video", then select "M4V MPEG 4 Video(*.m4v)".

output iTunes M4V format

Step 3. Edit recorded HD MTS videos (Optional)

Go to “Video Editor” window to create your personal videos by trimming, cropping, adding watermarks and special effects.

edit mts video

Step 4. Convert MTS to M4V for iPhone 8 / iPhone X

One click on the red button “Convert” to start to convert recorded HD MTS videos to iPhone 8/iPhone X compatible video format - M4V.

After conversion, transfer the converted MTS videos to your devices for playback or editing at will without worring about video format issues.

Thursday, August 3, 2017

Edit DJI Zenmuse X4S 4K video in iMovie

The Zenmuse X4S is a powerful camera featuring a 20 megapixel 1-inch sensor and a maximum ISO of 12,800.  This 84° FOV, high resolution lens makes the Zenmuse X4S as powerful during aerial imaging as it is on the ground.Combined with CineCore 2.0, the Inspire 2’s powerful image processing system, it can record 4K/60 H.264 and 4K/30 H.265 videos at a 100Mbps bitrate, and oversample 5.2K video into 4K video in real-time, capturing fine image details. In Burst Mode, the Zenmuse X4S supports 14fps shooting at 20 megapixels in both JPEG and DNG formats. It is able to make the difficult balance between agility and image quality.

With such 4K camera in hands, you may think about editing the 4K material with iMove on your Mac when you have shot the landscape. However, the truth is that playback 4K material is a plain on the Mac. As we all know, the DJI Zenmuse X4S captures 4K video in MP4 or MOV (H.264 or H.265 codec) format, however, iMovie doesn't support H.264 video very well, since H.264 is an ideal video compression codec but not a good video editing codec. In addition, the 4K H.264 codec is very intense, it will be CPU consuming to decode the 4K footage and it also will take a lot of time to render the file and also potentially compromise the final effects, especially, color correction and compositing with gradients if you native edit this footage with iMovie.

How to edit DJI 4K video in iMovie without any obstacle? To solve this problem, the best panacea is to covnert DJI Zenmuse X4S 4K video to iMovie best editing format - Apple Intermediate Codec. Here we highly recommend you Pavtube Video Converter for Mac , which can help you directly convert DJI Zenmuse X4S 4K video to Apple Intermediate Codec with fast and smooth post-production workflow.

Pavtube Video Converter for Mac supports to Output Apple ProRes, DVCPRO, HDV, Avid DNxHD, Apple Intermediate Codec(AIC) for NLE software, like iMovie, FCP, After Effects CC 2017, Premiere Pro, Elements. With this smart assistant, you will have free access to watching SD videos, digital camcorder recordings (e.g. MXF, MTS AVCHD, MOV, MP4, MVI, etc), DVR videos , audio files on devices such as Apple, Android, Windows series, media players, game consoles, etc. Some DJI users complain that what's the best option for their Macbook limited hardware when they are out for traveling with DJI Zenmuse X4S in hands. Good news, Pavtube Video Converter grants you to downscale the 4K video to 1080p without lossing video quality for saving more storage space. Professional editing functions such as inserting SRT/ASS/SSA subtitle, setupping video effect, trimming and cropping video allows you to create splendid personal movie.

Part 1: How to transcode DJI Zenmuse X4S 4K video to iMovie AIC for Editing?

Part 2: Top 5 iMovie Converter for Mac

Part 1: How to transcode DJI Zenmuse X4S 4K video to iMovie AIC for Editing?

Step 1: Add DJI Zenmuse X4S 4K video files.

Launch this assistant on your Mac, click the “Load file” or “Add Video” icon on the main interface to import DJI Zenmuse X4S 4K video into the program.

load DJI Zenmuse X4S 4K

Step 2: Choose output file format.

Click "Format" bar, from its drop-down option, choose iMovie or FCE best editing codec by selecting "iMovie and Final Cut Ex..." > "Apple Intermediate Codec (AIC)(*.mov).

Set output file format

Step 3: Downscale 4K to 1080p(Optional).

If you worry about the Mac storage space, you can click "Settings" on the main interface, then change Video Size from "3840*2160" to "1920*1080". To make the video size smaller, you can lower the bitrate to get this goal.

4k to 1080p

Step 4: Edit video.

This converter offers simple video editing function. You can click the pen icon, and enter the "Video Editor" interface, there are seven edit tabs: Trim, Crop, Text Watermark, Image/Video Watermark, Effect, Audio Editor and Subtitle for you to select.

video converter mac editing interface

Step 4: Start the conversion process.

After all the setting is over, go back to the main interface and hit right-bottom "Convert" button to start DJI Zenmuse X4S 4K video to iMovie Apple Intermediate Codec conversion process.

Then you can click "Open" and pop up the folder with converted file, then launch iMovie on your Mac to import DJI Zenmuse X4S 4K video to iMovie for editing.

trail buy

Part 2: Top 5 iMovie Converter for Mac

Top 1. Pavtube Video Converter for Mac

Pros:
-Support to convert DJI Phantom 4 Pro, DJI MAVIC 4K video, Sony 4K Camera video, Panasonic 4 video, recording software export and normal MP4, MKV, etc video. 
-Rich editing functions (trim, crop, add watermarks, special effects, adjust audio, insert subtitle)
-Export video formats compatible with popular editing programs like iMovie, FCP, FCE, Adobe Premiere, Kdenlive, Keynote, Avid Xpress Pro, Adobe Creative Suite 6, etc.
-Support playback on different devices: iDevices (iPhone 7 Plus, iPad Pro, Apple TV 4, etc), Android devices (Samsung Galaxy Note 7, Sony Xperia Z6, Huawei Meta 8, etc), Windows devices, game consoles (PS4 Pro, Xbox One S, etc), HD media players (WD TV series, Seagate Media Player, etc)
-Batch conversion to save time and energy
-Optimize audio and video settings (size, bitrate, sample rate, frame rate, etc)

Top 2. Pavtube HD Video Converter for Mac

Pros:
-Support inputting and outputting a huge number of audio and video formats
- Rich editing functions: clip, flip, rotate, crop, add subtitle and watermark. 
-Support playback on different devices: iDevices (iPhone 7 Plus, iPad Pro, Apple TV 4, etc), Android devices (Samsung Galaxy Note 7, Sony Xperia Z6, Huawei Meta 8, etc), Windows devices, game consoles (PS4 Pro, Xbox One S, etc), HD media players (WD TV series, Seagate Media Player, etc)
- "Darg-and-Drop" feature and batch conversion are supported. 
-Split one file into several and merge several into one
-Optimize audio and video settings (size, bitrate, sample rate, frame rate, etc)

Top 3. WinX iMovie Video Converter for Mac

Pros:
-Can handle both HD and SD videos for iMovie
-Free of charge

Cons:
-Only output iMovie supported video format
-Limited output formats 
-Relatively fewer editing functions

Top 4. Bigasoft iMovie Converter for Mac

Pros:
-Support a lot of input files
(AVI, DivX, Xvid, ASF, WMV, MKV, MPEG, RM, RMVB, VOB, 3GP, FLV, MOD, TOD, MOV, AVCHD, MTS, M2TS, MP4, H.264, and more)

Cons:
-Limited output formats
-Only convert video files for the editing system iMovie

Top 5. iDealshare VideoGo for Mac

Pros:
-Support input and output considerable formats
-Download and convert online video in HD 1080p/720p, 3D or SD 360p/480p to any video or audio formats on Mac.