This is a detailed guide to help you extract Blu-ray/DVD movie, convert it to ProRes 422 HQ with 5.1 surround sound in FCPX with a clean edit.
Why I am missing 5.1 surround sound after converting Blu-ray/DVD to ProRes? Why FCP X log and transfer does not work with Blu-ray/DVD? Can I obtain all the languages without losing surround sound in my digitized Blu-ray/DVD movies?
You may have tried some blu-ray ripping tools and run into problems above. To be fair I have not tried many of them but also have problems like this. Hereby, with a successful trial, I'd like to share my experience here.

Firstly, you need a tool which is capable of rolling off Blu-ray/DVD disc protection, then convert them to multi-track ProRes 422 HQ with surround sound for editing in FCPX. On this step I recommend Pavtube ByteCopy for Mac because it’s quite easy to use and work reliably.
How to rip BD/DVD to ProRes 422 HQ with 5.1 sound for FCP X?
Step 1. Download and install this Pavtube ByteCopy for Mac, load disc.
Note: you need an external Blu-ray drive to make your Mac recognize Blu-rays firstly. Insert your discs, launch Pavtube and click the top left icon, you will find it detects your disc and shows the name automatically. Just click it to load.
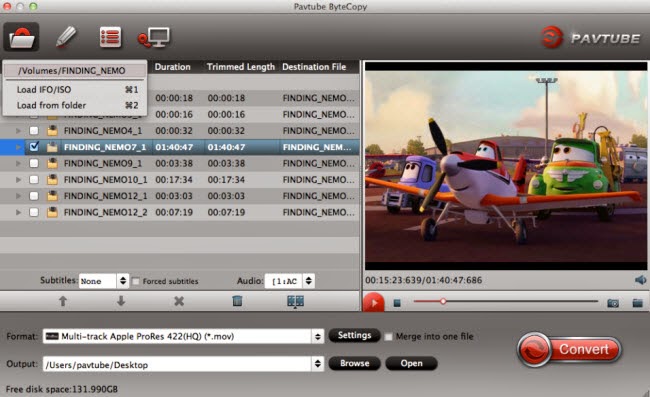
Step 2. Choose format for editing on FCP X.
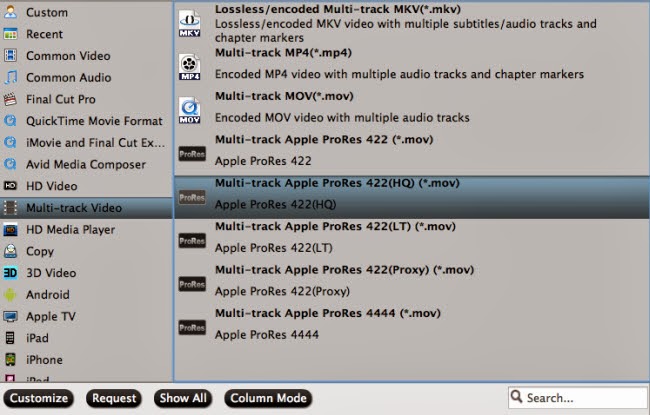
Click the “Format” icon; you may notice there’re two options of ProRes 422HQ. One is inside the “Final Cut Pro” the other is inside >Multi-track Video”. The only difference between these two presets is that the former is common one-track preset while the later could keep all your audio tracks (languages). I’d prefer the Multi-track one.
Okay choose “Multi-track Video>Multi-track Apple ProRes 422(HQ)(*.mov).
Step 3. Customize V&A settings.
Let’s move to “Settings” icon (right besides “Format”), you will find two tabs one for Video and the other for Audio. On Video tab, you can change target video quality as there are three levels for you to choose.
In the Audio tab, we can check the audio tracks we need as below:
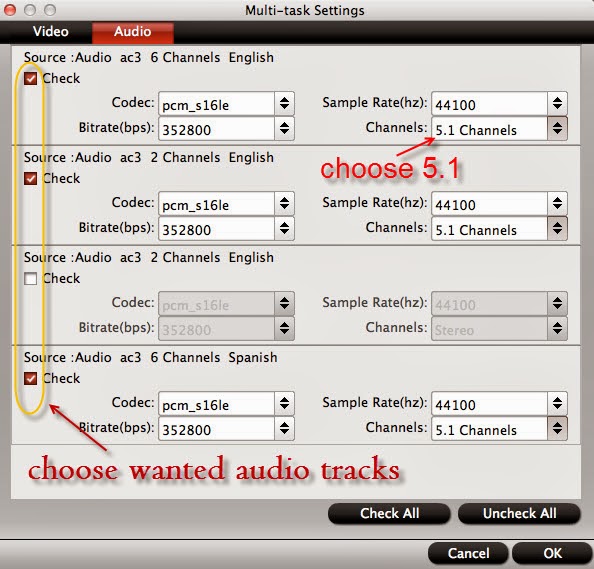
Just leave unwanted audio tracks unchecked, change audio channels to “5.1 Channels”. Click OK to confirm the change.
Step 4. Start conversion.
Back to main interface and hit “Convert” to start ripping Blu-ray/DVD to multi-track ProRes 422HQ. After it completed, click “Open output folder” to quick locate the converted MOV files.
Read more: