This is a magic WAV to iTunes guide to let you add songs in WAV format to iTunes, so that you can stream them to iPhone, iPad, iPod via iTunes.
However, when it comes to Mac OS, some of the WAV files still can't be loaded to iTunes although it claims to support WAV format. It means you cannot stream your WAV songs to iPhone, iPad and iPod in this way.
In order to solve "iTunes won't import WAV" problem, I've tried several ways including convert WAV to aac format via iTunes but it still cannot be accepted by my iPod. So I turned over to third party software and luckily I found this Pavtube WAV Converter Ultimate (Read review).
This Pavtube Video Converter Ultimate, as the Pavtube WAV to iTunes Converter, is an all-in-one tool which does not only support converting WAV format to MP3 for iTunes, it support various audio & video (excluding CRM files) format so that you can stream the files to iPhone, iPad, iPod for watching. Moreover, it's also capable of digitalizing your Blu-rays and DVDs to MP4, MOV, etc. formats that your IOS devices accept; isn't it cool?
Tips: Find its Mac version here – iMedia Converter for Mac
Download a trial below:


How to convert WAV to MP3 format for iTunes on iPad, iPhone and iPod
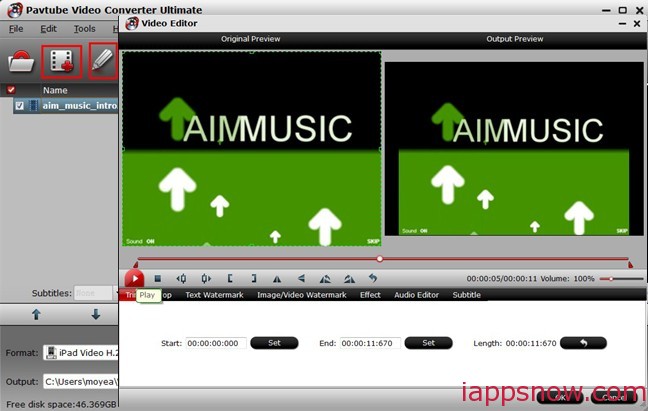
Step 1. Import WAV files; choose format.
Click the plus icon to import WAV files into it, or you can drag-and-drop directly. Then you will find a horn icon on the left that indicates it's an audio file.
Move your cursor to Format and choose "Common Audio > MP3 – MPEG Layer-3 Audio(*.mp3)" as below:
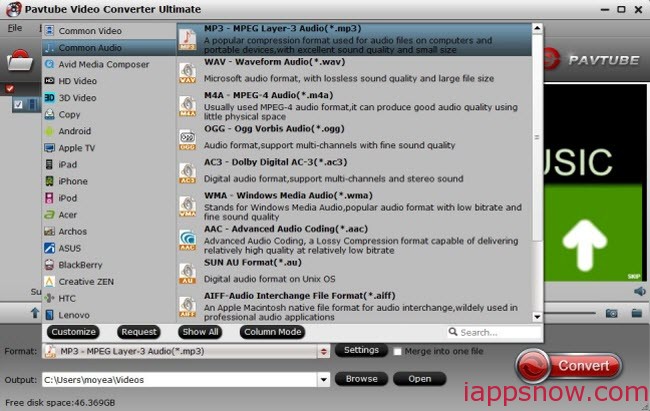
As listed above, there are several presets for other audio format; just choose one as your needs.
Step 2. Adjust audio specs (optional).
If you are not satisfied with the default audio quality, just click the "Settings" icon and choose wanted audio settings including sample rate, bitrate and audio channel.
Step 3. Start converting WAV to MP3.
Now back to the main interface and hit "Convert" to convert your WAV files to MP3 format. It will start batch conversion automatically one by one. Wait for a while during the progress; after it completed, click "Open output folder" to locate the converted audio file.
Ok, now your WAV song has been converted to MP3 which is perfect for iTunes.
See how to transfer Media Files from iTunes to iPhone | Move Video/Music/Photo from iTunes to iPad
Related articles:
Q: "Hello hello. I'm having a bit of trouble with my iTunes at the minute. I have an album on my computer and the songs are in .wav format, and iTunes not letting me import them. Any help? Btw, my iTunes is at version is up to date."WAV is an audio format for storing sound in files developed jointly by Microsoft and IBM. Support for WAV files was built into Windows 95 making it the de facto standard for sound on PCs. WAV sound files end with a .wav extension and can be played by nearly all Windows applications that support sound.
However, when it comes to Mac OS, some of the WAV files still can't be loaded to iTunes although it claims to support WAV format. It means you cannot stream your WAV songs to iPhone, iPad and iPod in this way.
In order to solve "iTunes won't import WAV" problem, I've tried several ways including convert WAV to aac format via iTunes but it still cannot be accepted by my iPod. So I turned over to third party software and luckily I found this Pavtube WAV Converter Ultimate (Read review).
This Pavtube Video Converter Ultimate, as the Pavtube WAV to iTunes Converter, is an all-in-one tool which does not only support converting WAV format to MP3 for iTunes, it support various audio & video (excluding CRM files) format so that you can stream the files to iPhone, iPad, iPod for watching. Moreover, it's also capable of digitalizing your Blu-rays and DVDs to MP4, MOV, etc. formats that your IOS devices accept; isn't it cool?
Tips: Find its Mac version here – iMedia Converter for Mac
Download a trial below:
How to convert WAV to MP3 format for iTunes on iPad, iPhone and iPod
Step 1. Import WAV files; choose format.
Click the plus icon to import WAV files into it, or you can drag-and-drop directly. Then you will find a horn icon on the left that indicates it's an audio file.
Move your cursor to Format and choose "Common Audio > MP3 – MPEG Layer-3 Audio(*.mp3)" as below:
As listed above, there are several presets for other audio format; just choose one as your needs.
Step 2. Adjust audio specs (optional).
If you are not satisfied with the default audio quality, just click the "Settings" icon and choose wanted audio settings including sample rate, bitrate and audio channel.
Step 3. Start converting WAV to MP3.
Now back to the main interface and hit "Convert" to convert your WAV files to MP3 format. It will start batch conversion automatically one by one. Wait for a while during the progress; after it completed, click "Open output folder" to locate the converted audio file.
Ok, now your WAV song has been converted to MP3 which is perfect for iTunes.
See how to transfer Media Files from iTunes to iPhone | Move Video/Music/Photo from iTunes to iPad
Related articles:
- The Best Blu-ray to MKV Ripper for HD Media Players and HTPCs
- Copy Region 2 DVD to Plex in Multi-track MKV
- 3 Ways to Convert MKV to MP4 for iTunes Playing
- How to Play MKV to Sharp TV Over the Network?
- How to Play MKV Files on LG TV Smoothly?