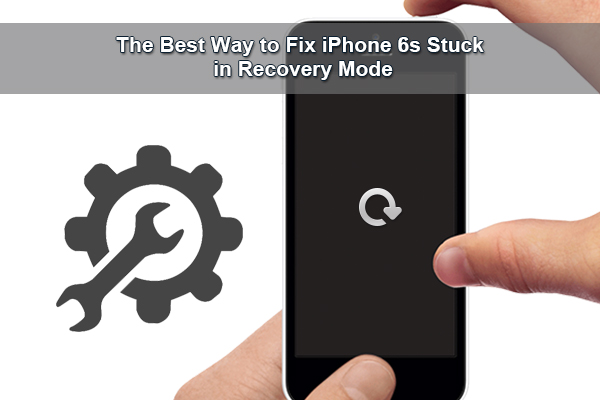
White screen of death is a phenomenon that many iPhone users including iPhone 6S (Plus) have to face every now and then. White screen of death shows as a black screen with an Apple logo or just completely blank scree. It occurs for several reasons but the main reasons are as below:

The Reason for iPhone White Screen of Death:
1.Multi-tasking maybe the reason:
If your iOS is lower than iOS 7.0.2, you maybe encounter the issue that you were multi-tasking between several apps.
2. Stressed out Hardware components:
If you have been using your iPhone for prolonged periods of time without giving it some time off, the hardware components of the iPhone may get stressed out and result in the appearance of a black screen of death.
3. Software Malfunction:
White screen of death may also be a result of a glitch in the software or iOS of your iPhone.
4. Application Incompatibility:
Trying to run apps that may be taking too much toll on your iPhone’s software and hardware may result in the appearance of white screen of death.
Generally, there are several ways to fix the white screen of death situation. You can try to handle this by yourself as the following steps:
1.Turn off your iPhone with the "Sleep/Wake" button. Now it is completely powered off. Then you can turn on it again.
2.Press both the Home button and Sleep/Wake button, holding them for at least for 10 seconds. Then the battery symbol or the Apple logo will appear on your screen when iPhone is reset. If you see the battery symbol, please charge your iPhone until it is totally charged.
3.If the white screen is still there, go to connect your iPhone to the computer with the data cable.
4.Get in to iTunes and select your device from the Devices list.
5.Tap "Summary" and then tap "Restore". Click "Back Up" if prompted.
6. Tap "Restore" to restore your iPhone.
All the things have been done now, and if there still is a white screen on your iPhone you had better to ask for professional help. You can go to visit an Apple store to get the device checked and repaired but you must afford to pay $199 and more upfront. Local repair shops can also repair a hardware caused white screen of death but when it comes to software, the user does not has many options to look forward to.
If you didn’t handle white screen of death issue as above steps and you don’t want to afford extra $199 to repair it, maybe you can try Wondershare Dr.Fone for iOS for Mac. Although it also is a paid one, it is cheaper and it not only can fix white screen of death but handle stuck in recovery mode issue and recover you lost iOS data, like message,contacts, notes, call history on your iPhone, iPad and iPod Touch. It supports iTunes 12.1 and Mac OS X 10.11 El Capitan. (Read its review)
For Windows users, pls turn to Wondershare Dr.Fone for iOS Windows.
Free Download and Install Mac iPhone Data Recovery


How to Fix White Screen of Death with Wondershare Dr.Fone for iOS?
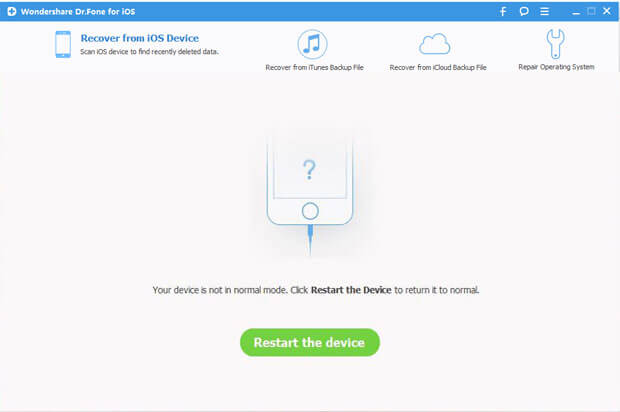
Step 1: Download and install Wondershare Dr.Fone for Mac and launch it. Connect your iPhone or iPad with USB cable to computer. From the main window, select "Fix iOS to Normal" located at the bottom left of the screen. Wait for Wondershare Dr.Fone for Mac to detect your iOS device. Click "Start" once the device has been detected.

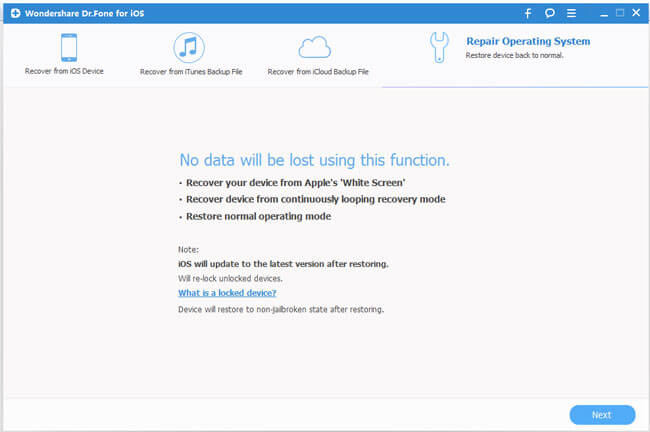
Step 2: To fix white screen of death on your iOS, Dr.Fone will download the latest version of your firmware after detecting your current iOS version. Hit "Download" and wait for the download to complete.

Step 3: After downloading and selecting the official firmware for your iPhone (iOS 9 supported), you should click the button "Start Fix" to let the program to fix the white screen of death issue for you without damaging your data. In less than 10 minutes, you will get a message saying that your device is restarting to normal mode.
Now, you should handled your white screen of death issue on your iOS device if you have followed the steps aforementioned.
Tip: How to avoid white screen of death?
1.The most important but simple trick to prevent getting your iPhone (including iPhone 6s and iPhone 6s Plus) into the white screen of death is to take good care of it. Don’t drop it; if butterfingers run in the family, keep it inside your pocket as much as you can.
2.Buy a protective case with extended edges to prevent direct contact of the phone with the surface that it fell on. Minimal impact means minimal chances of hardware abnormality resulting from the drop.
3.Sometimes, extra stress on the battery and other hardware resources of the iOS device can be the cause of the white screen of death. Therefore, avoid using the device for abnormally prolonged periods of time. If you notice that the device is heating up or getting stuck every now and then, give it some rest.
4.Shut down your phone once a month and then turn it back on after 10 seconds. Your phone runs non-stop for you, fetches all your emails, keeps all your pictures safe, it probably deserves this little break. This simple activity will give your phone with the time out that it needs minimizing the chances of appearance of a white screen of death.
5. White screen of death is not always caused by faulty hardware. Sometimes, glitches in the software cause the screen to go blank and white without any apparent reason. Such glitches are more common in iOS version below the iOS version 7. Therefore, keep your iOS devices updated to the latest iOS 9 version.
Related Software:
Wondershare Dr.Fone for Android for Mac - First aid to recover deleted or lost contacts, text messages, photos, videos, audio files, documents, whatsapp history, call history, etc from Android phones and tablets.
Wondershare MobileTrans for Mac - One click and risk-free solution to move contacts, text messages, call logs, calendar, photos, music, video and apps between iPhone, Android, Blackberry and Nokia(Symbian) phones.
Wondershare TunesGo for Mac - Transfer and copy music, videos, playlists and other media files from iPhone, iPad and iPod touch to iTunes and PC with no difficulty.
Pavtube iMedia Converter for Mac - Convert any 4K/SD/HD and Blu-ray/DVD to iPhone, iPad, iPod Touch with suitable format.
Source site: http://iphone-ipad-recovery.over-blog.com/fix-white-screen-of-death
Related Articles:
The Reason for iPhone White Screen of Death:
1.Multi-tasking maybe the reason:
If your iOS is lower than iOS 7.0.2, you maybe encounter the issue that you were multi-tasking between several apps.
2. Stressed out Hardware components:
If you have been using your iPhone for prolonged periods of time without giving it some time off, the hardware components of the iPhone may get stressed out and result in the appearance of a black screen of death.
3. Software Malfunction:
White screen of death may also be a result of a glitch in the software or iOS of your iPhone.
4. Application Incompatibility:
Trying to run apps that may be taking too much toll on your iPhone’s software and hardware may result in the appearance of white screen of death.
Generally, there are several ways to fix the white screen of death situation. You can try to handle this by yourself as the following steps:
1.Turn off your iPhone with the "Sleep/Wake" button. Now it is completely powered off. Then you can turn on it again.
2.Press both the Home button and Sleep/Wake button, holding them for at least for 10 seconds. Then the battery symbol or the Apple logo will appear on your screen when iPhone is reset. If you see the battery symbol, please charge your iPhone until it is totally charged.
3.If the white screen is still there, go to connect your iPhone to the computer with the data cable.
4.Get in to iTunes and select your device from the Devices list.
5.Tap "Summary" and then tap "Restore". Click "Back Up" if prompted.
6. Tap "Restore" to restore your iPhone.
All the things have been done now, and if there still is a white screen on your iPhone you had better to ask for professional help. You can go to visit an Apple store to get the device checked and repaired but you must afford to pay $199 and more upfront. Local repair shops can also repair a hardware caused white screen of death but when it comes to software, the user does not has many options to look forward to.
If you didn’t handle white screen of death issue as above steps and you don’t want to afford extra $199 to repair it, maybe you can try Wondershare Dr.Fone for iOS for Mac. Although it also is a paid one, it is cheaper and it not only can fix white screen of death but handle stuck in recovery mode issue and recover you lost iOS data, like message,contacts, notes, call history on your iPhone, iPad and iPod Touch. It supports iTunes 12.1 and Mac OS X 10.11 El Capitan. (Read its review)
For Windows users, pls turn to Wondershare Dr.Fone for iOS Windows.
Free Download and Install Mac iPhone Data Recovery
How to Fix White Screen of Death with Wondershare Dr.Fone for iOS?
Step 1: Download and install Wondershare Dr.Fone for Mac and launch it. Connect your iPhone or iPad with USB cable to computer. From the main window, select "Fix iOS to Normal" located at the bottom left of the screen. Wait for Wondershare Dr.Fone for Mac to detect your iOS device. Click "Start" once the device has been detected.
Step 2: To fix white screen of death on your iOS, Dr.Fone will download the latest version of your firmware after detecting your current iOS version. Hit "Download" and wait for the download to complete.
Step 3: After downloading and selecting the official firmware for your iPhone (iOS 9 supported), you should click the button "Start Fix" to let the program to fix the white screen of death issue for you without damaging your data. In less than 10 minutes, you will get a message saying that your device is restarting to normal mode.
Now, you should handled your white screen of death issue on your iOS device if you have followed the steps aforementioned.
Tip: How to avoid white screen of death?
1.The most important but simple trick to prevent getting your iPhone (including iPhone 6s and iPhone 6s Plus) into the white screen of death is to take good care of it. Don’t drop it; if butterfingers run in the family, keep it inside your pocket as much as you can.
2.Buy a protective case with extended edges to prevent direct contact of the phone with the surface that it fell on. Minimal impact means minimal chances of hardware abnormality resulting from the drop.
3.Sometimes, extra stress on the battery and other hardware resources of the iOS device can be the cause of the white screen of death. Therefore, avoid using the device for abnormally prolonged periods of time. If you notice that the device is heating up or getting stuck every now and then, give it some rest.
4.Shut down your phone once a month and then turn it back on after 10 seconds. Your phone runs non-stop for you, fetches all your emails, keeps all your pictures safe, it probably deserves this little break. This simple activity will give your phone with the time out that it needs minimizing the chances of appearance of a white screen of death.
5. White screen of death is not always caused by faulty hardware. Sometimes, glitches in the software cause the screen to go blank and white without any apparent reason. Such glitches are more common in iOS version below the iOS version 7. Therefore, keep your iOS devices updated to the latest iOS 9 version.
Related Software:
Wondershare Dr.Fone for Android for Mac - First aid to recover deleted or lost contacts, text messages, photos, videos, audio files, documents, whatsapp history, call history, etc from Android phones and tablets.
Wondershare MobileTrans for Mac - One click and risk-free solution to move contacts, text messages, call logs, calendar, photos, music, video and apps between iPhone, Android, Blackberry and Nokia(Symbian) phones.
Wondershare TunesGo for Mac - Transfer and copy music, videos, playlists and other media files from iPhone, iPad and iPod touch to iTunes and PC with no difficulty.
Pavtube iMedia Converter for Mac - Convert any 4K/SD/HD and Blu-ray/DVD to iPhone, iPad, iPod Touch with suitable format.
Source site: http://iphone-ipad-recovery.over-blog.com/fix-white-screen-of-death
Related Articles: