Thursday, October 16, 2014

Backup Jurassic Park 3D Blu-ray Disc to M2TS, MKV, MP4, M4V, AVI, WMV

Have you heard of the 3D Jurassic Park has been released as 3D Blu-ray Disc? This guide can teach you how to enjoy it with M2TS, MKV, MP4, M4V, AVI,WMV.

Forever love with Jurassic Park--- scriptures in our hearts.

Jurassic Park is a 1993 American science fiction adventure film directed by Steven Spielberg. It has brought a great influence to our audience who love adventure films so much during these years. Now, this film has been released as 3D Blu-ray Disc on the market. With the vivid effect and wonderful enjoyment experience, how could we preserve the work in other video formats? Such like M2TS, MKV, MP4, M4V, AVI, WMV?

How to backup Jurassic Park 3D Blu-ray Disc on Windows or Mac?


For freely and perfectly backup Jurassic Park 3D Blu-ray Disc with the 3D and high quality preserved, we here introduce you a professional 3D Blu-ray Converter for Windows/Mac, which can 1:1 backup Blu-ray movies with no quality loss. Two methods here you can choose to back them up in a general way.

Preparation for backup 3D Blu-ray movies:


1.Download the program and launch it on your computer.
2.load your 3D movies in with ‘Add ISO/IFO Files’ or ‘Add from folder’. 

Method 1 for backup:

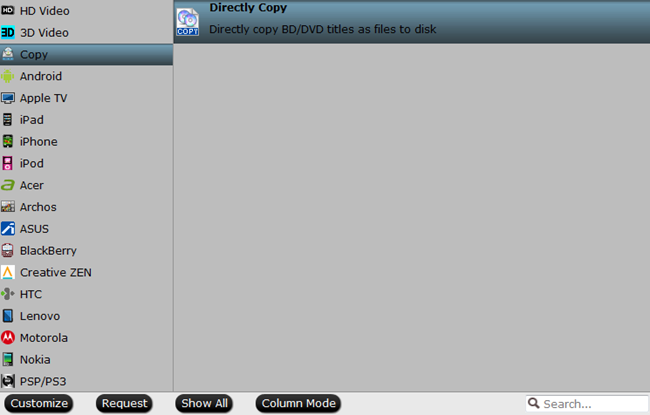
Click the format bar to choose “Copy > Directly Copy” to backup or copy your Blu-ray movies. Please note that the trial version only allows a 6-time directly copy.

By default setting, Pavtube BDMagic will automatically recognize the main movie which has been checked after loading Blu-ray movie. As for the directly copy here, you need to check all the title boxes. This method is only for the main movies and also, the output put blu-ray videos are encoded as M2TS


Method 2 for backup:

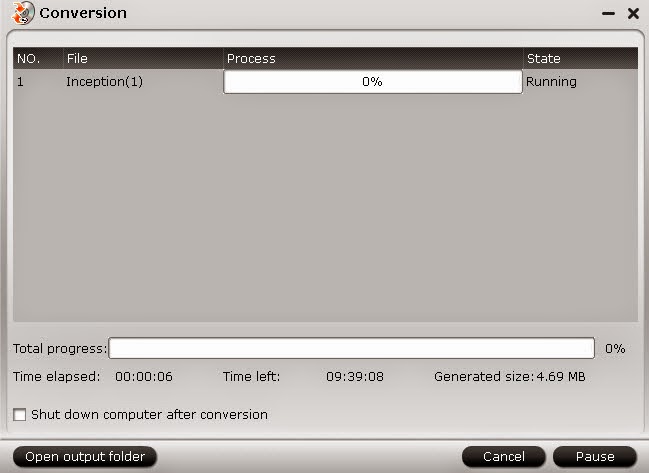
On the interface, could you find the item ‘copy the entire disc’? Click it you’ll see the tip as ‘you have only 3times for full disc copy’ go to ‘OK’ to start the copy. Don’t forget to set your output video location on your computer. As the picture shows here.


Play Jurassic Park 3D Blu-ray movies on devices with MKV, MP4, M4V, AVI, WMV?

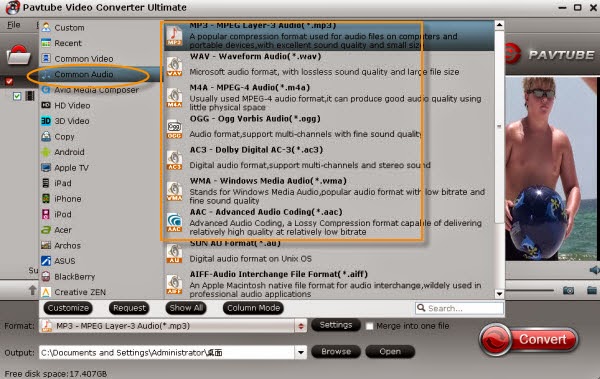
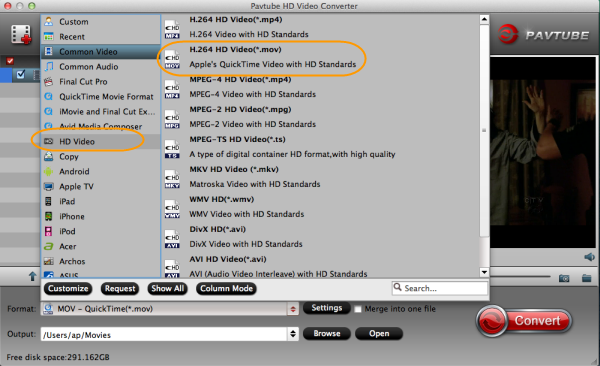
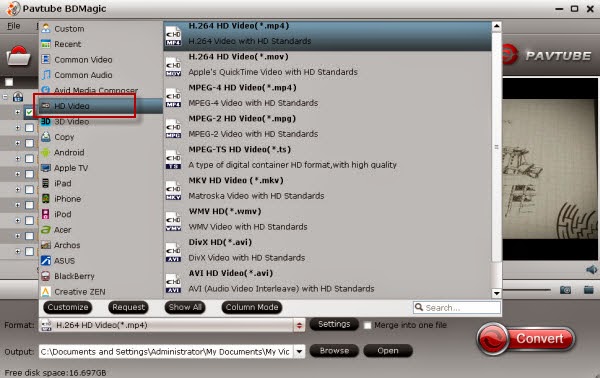
Except for the function of copy, additionally, this program can make it possible to play 3D Blu-ray movies with other formats for such as iPhone, iPad or some tablets, etc. Just back to the interface, click the ‘Format’ bar for ‘HD Video’, you can find all the common videos formats there you want. Take the following picture as a reference.


Do you wanna continue the legend of Jurassic Park enjoy the shocked vidion effects just on your devices? Come on! Let’s do it right here right now!

More guides?

Tuesday, October 14, 2014

Change YouTube Audio Files into MP3, M4V, FLAC, AAC, OGG?

Download some audio files from YouTube and don’t know how to make them work in MP3, M4V, FLAC, AAC or OGG etc? Just follow this article here.


Do you like watching YouTube videos online or on some media players after downloading? Do you ever meet the trouble there is no voice or something wrong with the audio when playing the videos? Non-native audio with incompatible devices, that’s the point. 

Fortunately, there are already some popular online audio converters such like ‘Zamza’ , ‘YouConvertit’, etc that can make it easier to get the YouTube videos work well, but have you ever known there is a kind of video converting tool can convert the video and audio files to others you want at the same time? Today here we introduce you a substantial tool named YouTube Audio Converter for Mac/Windows for you, which has the capacity of showing the wonderful video and audio effects for us. 

Almost all common audio formats you may know supported in YouTube Audio Converter such as MP3, M4V, FLAC, AAC, OGG, etc. Here let’s show you some necessary tips on how to work the program well.

Special Remind here: For those DVD or Blu-ray lovers, you won’t miss the big discount here, ByteCopy+Video Converter Ultimate can meet your requirements. From the discount, you can save nearly 30 dollars. Various videos, DVD or Blu-rays can all be accepted in this bundled product. What a big surprise!

Here we got some tips on how to work well with YouTube Audio Converter for Windows, take a reference? You won’t be disappointed.

Download this program from the official website and load your files in two ways, for method 1. Drag your files from computer to the program interface. For method 2. ‘Add video’ from the main interface.

Then from the ‘Format’ button, you may see some special video formats listed for popular media players or editing tools, also for different audios, ‘Common Audio’ to such as ‘MP3-MPEG Layer-3 Audio (*.mp3), M4A MPEG-4 Audio (*.m4a) or AAC Advanced Audio Coding (*.aac), etc. Just fine one you need.


Especially for audio converting users, you may pay more attention to the audio quality, so don’t miss the ‘Settings’ here. Get into the interface and find the ‘Audio Channels’ for ‘Stereo’, ‘Mono’ or ‘5.1 channels’.


As soon as you get the work done by click the ‘Convert’ button, if you get any other opinions or suggestions, please leave some message below. Wish you a nice day!

More:

Friday, October 10, 2014

Import FLV Files to Keynote 09 Freely on Mac

No trouble in importing FLV files to Keynote 09 on Mac if you have read this page below.


Hello, guys! Welcome to this page and take part in the discussion about how to import FLV files to Keynote 09 for a freely editing. Firstly, have you guys got any FLC videos that wanna edit or play in editing software or media players? As the FLV video format appears frequently on some video websites like YouTube, etc. 


For FLV, it is a container file format used to deliver video over the Internet. We usually download some flash or short videos from website for watching or disposing. However, as the special format, it can’t be accepted by most editing tools or media players. So have you ever think it will be easier if you convert FLV files to other compatible formats?

Today here we have found a professional FLV to Keynote Converter for Mac to solve this problem. Maybe you don’t know the best format for Keynote is MOV. How to work Keynote 09 well with FLV files we may learn from the following page.

Preparation: Download the FLV to Keynote Converter for Mac for a first step.

Launch the program, drag your FLV files from your computer to the program main interface or load your files by ‘Add video’ and ‘Add from folder’. Then to keep the original video quality preserved, choose the format list ‘HD Video’ and select the item ‘H.264 HD Video (*.mov)’ as the output format.


For more users, this program is not only a converting tool but also a simple editor. From the pencil icon ‘Editor’, we can see more editing items in. Something like ‘Trim’, ‘Crop’ or ‘Effects’ you can have a try by yourselves.


Additionally, if you got some FLV video clips, here also you can ‘Merge them into one’ by the item ‘merge into one’ on the left of the ‘Format’ button. You can see the icon below. Finally, we’ll be appreciate if you give more suggestions at the end.


Related guides:

Wednesday, October 8, 2014

AVI Video has only Audio but no Video in Premiere?

When you import AVI videos in Premiere with no video but audio, you may take the following article as a reference.


For different video files in different media players or editing software, we should know better for a first step if they are compatible or not. Recently here we have got a question on why import AVI video in Premiere only with audio but no video. It seems something like this:

‘The file plays perfectly in VLC however it’s running into problems with Premiere. When I import the AVI it only imports the audio. I tried to get around this by using a batch file to change the wrapped to mp4, however the video appears as a green screen on the source and preview windows.’

Cause the VLC has the automatic video and audio settings itself, it can support most video formats. So for AVI video, we can’t freely edit it in Premiere Pro because of the limited video formats. Sometimes there may cause such problems like ‘only audio no video’. If you get the AVI Video Converter for Mac/Windows to convert your AVI videos to MPG, MOV or WMV, the best formats for Premiere, everything will be easier. You can have a try by this way here:

Load the AVI Video Converter and launch it to get into the interface, two buttons you can import your AVI files, ‘Add video’ and ‘Add from folder’. Then we come to the important step, choose your favorite Premiere video format. On the ‘Format’ bar list, From ‘Adobe Premiere Pro’ to ‘MPEG-2 (*.mpg), MOV (AVC) (*.mov) or WMV (VC-1) (*.wmv), just choose one as your output video.


For advanced users or those just want to do some simple settings with your AVI videos, ‘Editor’ here you may have a try, add ‘subtitles’ to your videos, ‘trim’ to decide your video length or ‘crop’ to cut off the video edges you unwanted, etc.


Additionally, when you receive the output videos, if you are the first time to work with Premiere Pro, open here to find some surprise!

For more related:

Monday, October 6, 2014

How to Enjoy 4K Movies on Sony PS4

It must be cool if you are going to play 4K movies on Sony PS4. Follow this article to know more about it!


How much do you know about Sony PlayStation 4?--- the latest generation for video game enthusias
The PlayStation 4 system opens the door to an incredible journey through immersive new gaming worlds and a deeply connected gaming community. PS4 puts gamers first with an astounding launch lineup and over 180 games in development. You can even directly share your epic triumphs game experience with your friends by simply press the “Share” button. With the HDMI 2.0 cable connected, it has another high-light, it can supports 4K movie streaming. Do U want a try?

Play 4K moives on Sony PS4?


Generally speaking, although Sony PS4 can supports 4K streaming but not for all, such as recorded in MXF/RAW/XAVC/XAVC-S format. Cause 4K MP4 video format is the best format for PS4, we sometimes have to make these 4K movies available for PS4. Fortunately, we here recommend you a Pavtube 4K Video Converter to perfectly convert any 4K videos to PS4 also with high 4K quality reserved.

Preparation for conversion: download the program here and launch it in a correct way.

Run this 4K Video Converter and import your 4K files with ‘Add videos’ or ‘Add from your folder’. You files will be listed on left after the first step. Then another button called ‘Editor’ on the main interface above. You can optionally trim/crop the video, or you can adjust the video/audio parameter settings, modify the video volume, add special effect or watermark to the video. Like the picture showed below.


Next we come to the most important point, select the PS4 accepted output format. From ’Format’ bar to ‘HD Video’, we choose the ‘H.264 Video (*.mp4) as the best. After that, we also recommend you the ‘Settings’ item to make the default and optimal output video resolution for PS4 will be 1920*1080.


Finally, if you are satisfied with the output video effects, don’t forget to tell your friends. Or you can leave us some comments below to show your opinions.

Others: