The Zenmuse X4S is a powerful camera featuring a 20 megapixel 1-inch sensor and a maximum ISO of 12,800. This 84° FOV, high resolution lens makes the Zenmuse X4S as powerful during aerial imaging as it is on the ground.Combined with CineCore 2.0, the Inspire 2’s powerful image processing system, it can record 4K/60 H.264 and 4K/30 H.265 videos at a 100Mbps bitrate, and oversample 5.2K video into 4K video in real-time, capturing fine image details. In Burst Mode, the Zenmuse X4S supports 14fps shooting at 20 megapixels in both JPEG and DNG formats. It is able to make the difficult balance between agility and image quality.
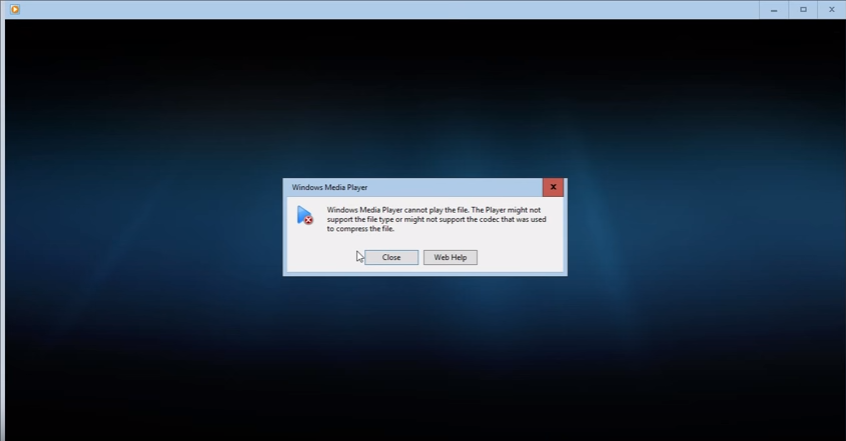
With such 4K camera in hands, you may think about editing the 4K material with iMove on your Mac when you have shot the landscape. However, the truth is that playback 4K material is a plain on the Mac. As we all know, the DJI Zenmuse X4S captures 4K video in MP4 or MOV (H.264 or H.265 codec) format, however, iMovie doesn't support H.264 video very well, since H.264 is an ideal video compression codec but not a good video editing codec. In addition, the 4K H.264 codec is very intense, it will be CPU consuming to decode the 4K footage and it also will take a lot of time to render the file and also potentially compromise the final effects, especially, color correction and compositing with gradients if you native edit this footage with iMovie.
How to edit DJI 4K video in iMovie without any obstacle? To solve this problem, the best panacea is to covnert DJI Zenmuse X4S 4K video to iMovie best editing format - Apple Intermediate Codec. Here we highly recommend you Pavtube Video Converter for Mac , which can help you directly convert DJI Zenmuse X4S 4K video to Apple Intermediate Codec with fast and smooth post-production workflow.
Pavtube Video Converter for Mac supports to Output Apple ProRes, DVCPRO, HDV, Avid DNxHD, Apple Intermediate Codec(AIC) for NLE software, like iMovie, FCP, After Effects CC 2017, Premiere Pro, Elements. With this smart assistant, you will have free access to watching SD videos, digital camcorder recordings (e.g. MXF, MTS AVCHD, MOV, MP4, MVI, etc), DVR videos , audio files on devices such as Apple, Android, Windows series, media players, game consoles, etc. Some DJI users complain that what's the best option for their Macbook limited hardware when they are out for traveling with DJI Zenmuse X4S in hands. Good news, Pavtube Video Converter grants you to downscale the 4K video to 1080p without lossing video quality for saving more storage space. Professional editing functions such as inserting SRT/ASS/SSA subtitle, setupping video effect, trimming and cropping video allows you to create splendid personal movie.
Part 1: How to transcode DJI Zenmuse X4S 4K video to iMovie AIC for Editing?
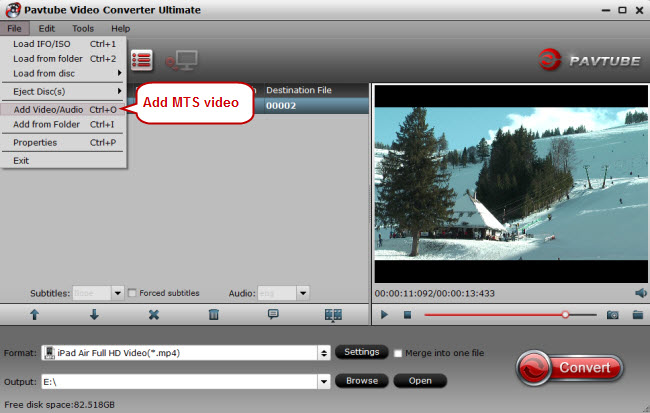
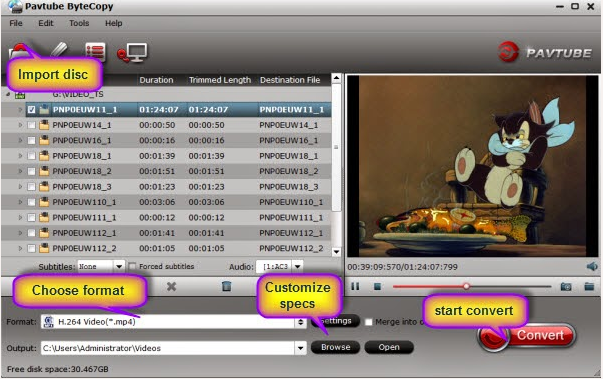
Step 1: Add DJI Zenmuse X4S 4K video files.
Launch this assistant on your Mac, click the “Load file” or “Add Video” icon on the main interface to import DJI Zenmuse X4S 4K video into the program.

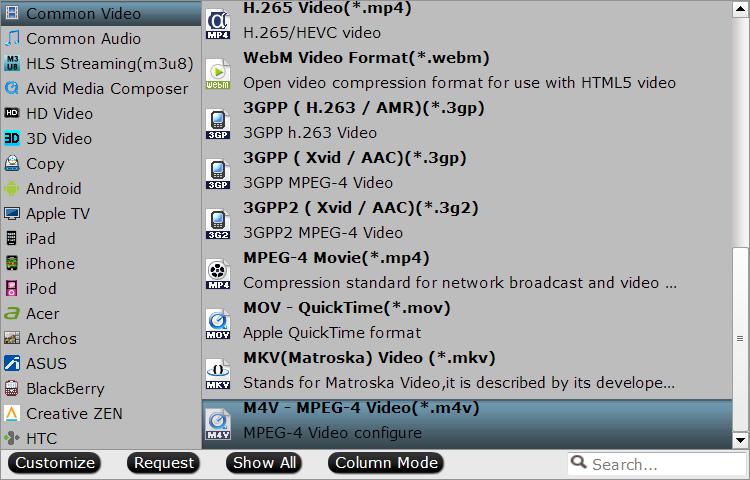
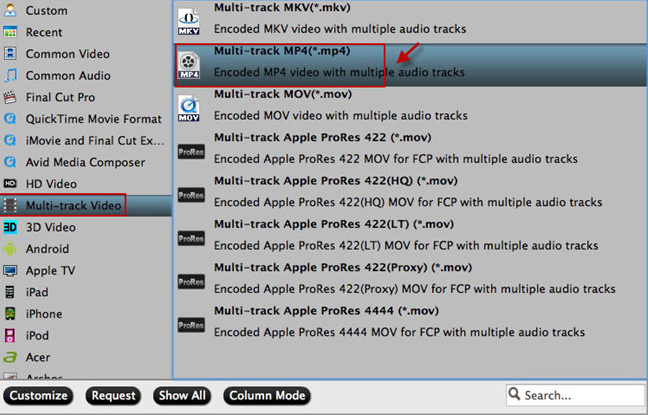
Step 2: Choose output file format.
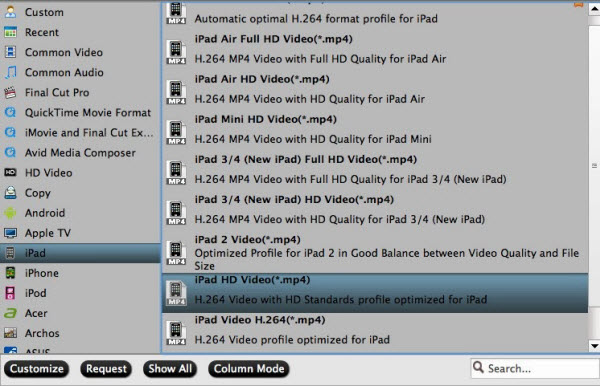
Click "Format" bar, from its drop-down option, choose iMovie or FCE best editing codec by selecting "iMovie and Final Cut Ex..." > "Apple Intermediate Codec (AIC)(*.mov).

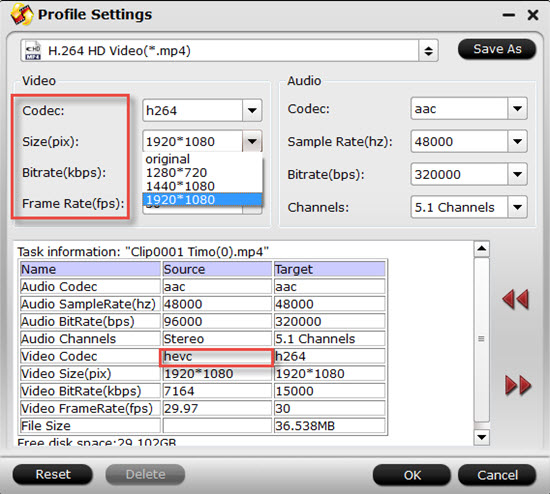
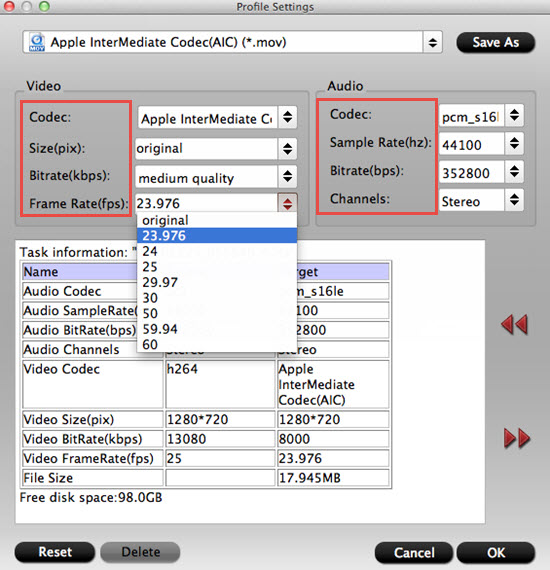
Step 3: Downscale 4K to 1080p(Optional).
If you worry about the Mac storage space, you can click "Settings" on the main interface, then change Video Size from "3840*2160" to "1920*1080". To make the video size smaller, you can lower the bitrate to get this goal.
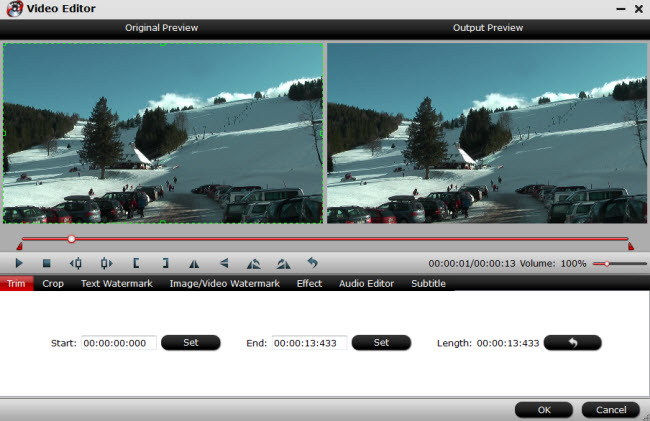
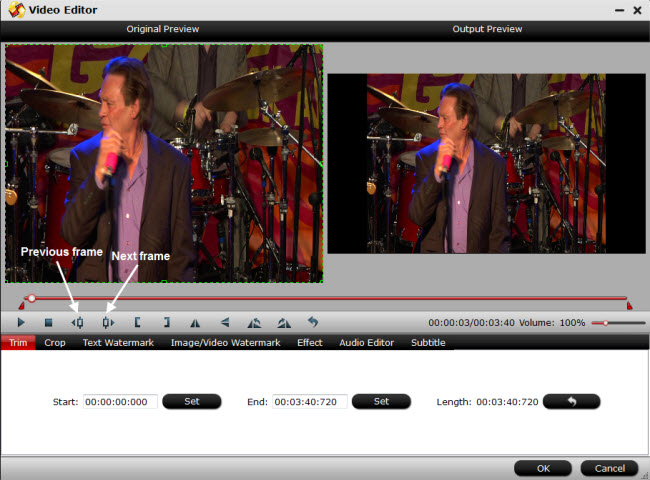
Step 4: Edit video.
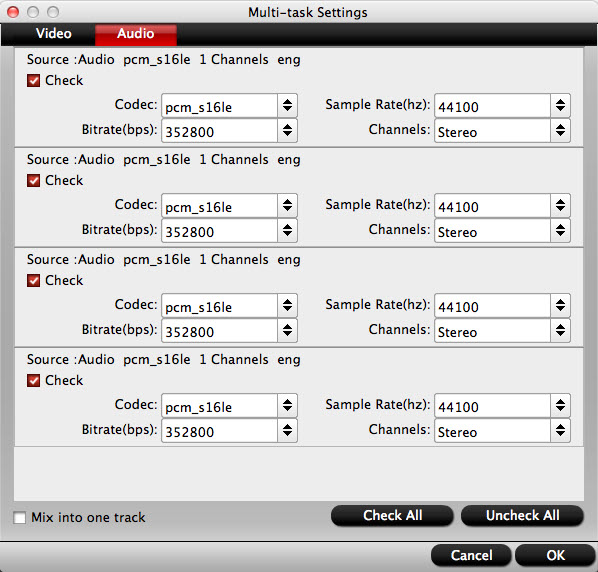
This converter offers simple video editing function. You can click the pen icon, and enter the "Video Editor" interface, there are seven edit tabs: Trim, Crop, Text Watermark, Image/Video Watermark, Effect, Audio Editor and Subtitle for you to select.

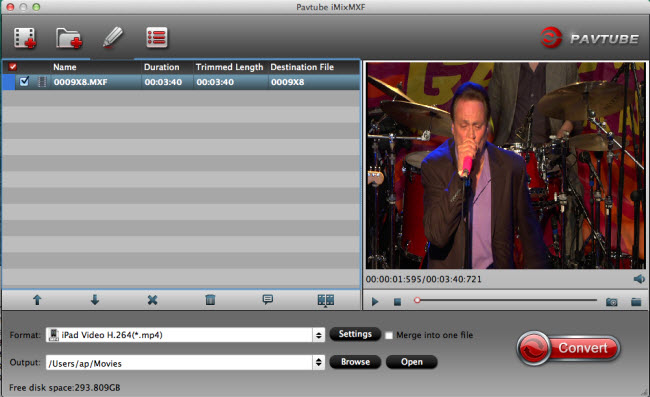
Step 4: Start the conversion process.
After all the setting is over, go back to the main interface and hit right-bottom "Convert" button to start DJI Zenmuse X4S 4K video to iMovie Apple Intermediate Codec conversion process.
Then you can click "Open" and pop up the folder with converted file, then launch iMovie on your Mac to import DJI Zenmuse X4S 4K video to iMovie for editing.


Part 2: Top 5 iMovie Converter for Mac
Pros:
-Support to convert DJI Phantom 4 Pro, DJI MAVIC 4K video, Sony 4K Camera video, Panasonic 4 video, recording software export and normal MP4, MKV, etc video.
-Rich editing functions (trim, crop, add watermarks, special effects, adjust audio, insert subtitle)
-Export video formats compatible with popular editing programs like iMovie, FCP, FCE, Adobe Premiere, Kdenlive, Keynote, Avid Xpress Pro, Adobe Creative Suite 6, etc.
-Support playback on different devices: iDevices (iPhone 7 Plus, iPad Pro, Apple TV 4, etc), Android devices (Samsung Galaxy Note 7, Sony Xperia Z6, Huawei Meta 8, etc), Windows devices, game consoles (PS4 Pro, Xbox One S, etc), HD media players (WD TV series, Seagate Media Player, etc)
-Batch conversion to save time and energy
-Optimize audio and video settings (size, bitrate, sample rate, frame rate, etc)
Pros:
-Support inputting and outputting a huge number of audio and video formats
- Rich editing functions: clip, flip, rotate, crop, add subtitle and watermark.
-Support playback on different devices: iDevices (iPhone 7 Plus, iPad Pro, Apple TV 4, etc), Android devices (Samsung Galaxy Note 7, Sony Xperia Z6, Huawei Meta 8, etc), Windows devices, game consoles (PS4 Pro, Xbox One S, etc), HD media players (WD TV series, Seagate Media Player, etc)
- "Darg-and-Drop" feature and batch conversion are supported.
-Split one file into several and merge several into one
-Optimize audio and video settings (size, bitrate, sample rate, frame rate, etc)
Pros:
-Can handle both HD and SD videos for iMovie
-Free of charge
Cons:
-Only output iMovie supported video format
-Limited output formats
-Relatively fewer editing functions
Pros:
-Support a lot of input files
(AVI, DivX, Xvid, ASF, WMV, MKV, MPEG, RM, RMVB, VOB, 3GP, FLV, MOD, TOD, MOV, AVCHD, MTS, M2TS, MP4, H.264, and more)
Cons:
-Limited output formats
-Only convert video files for the editing system iMovie
Pros:
-Support input and output considerable formats
-Download and convert online video in HD 1080p/720p, 3D or SD 360p/480p to any video or audio formats on Mac.