If you run a Windows system like most users do, you must have trouble in encoding Apple ProRes on Windows PC. Now you can read the following article for a help.
As a Windows system user, we can’t avoid receiving some edited Apple ProRes codec videos from FCP --- a professional editor produced by Apple Company. In fact, we all know that Windows PC can’t accept these types of videos, they are incompatible with each other. So what should we do to encode Apple ProRes on Windows PC?

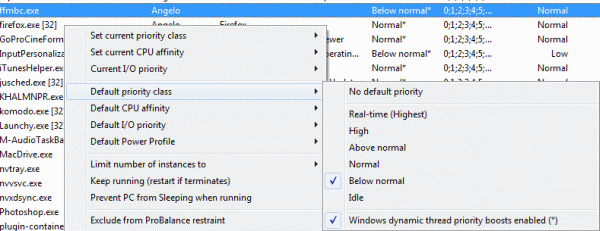
Today, I’ve found an alternative workflow that is semi-automated and cheap using FFMPEG---This is a command line encoder and decoder for many video formats including ProRes (or more specifically, a version called FFMBC with extra features for broadcast formats) and a neat Python script to bridge it with Redcine X Pro, or any other batch media encoder like Adobe Media Encoder or Sorrenson Squeeze.
If you want to transcode multiple files without supervision, or at least minimal supervision, maybe it’s a good choice for you.
Step 1. Download the RedToProRes. Open it up in Komodo Edit and look at the settings area. You’ll need to edit this gingerly. Do not remove the r or the single quotes, but edit your path to FFMBC. What follows is mostly command switches for FFMBC: 16 threads is acceptable on a quadcore machine, the input which is filled in automatically, the ProRes codec and profile .You can encode Proxy, LT, Standard, HQ, and 4444.
Step 2. Install Blackmagic Design’s 10bit Quicktime codec
Step 3. Open Redcine X Pro and create the following export preset with these compression settings.
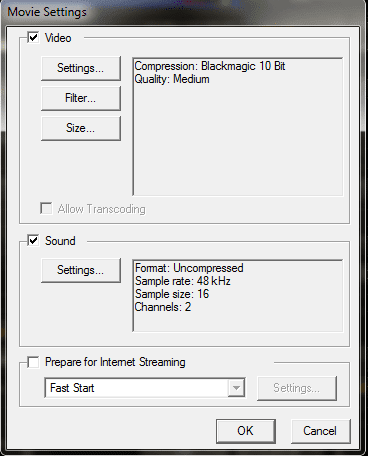
Step 4. Start your batch, then double-click on the Python script
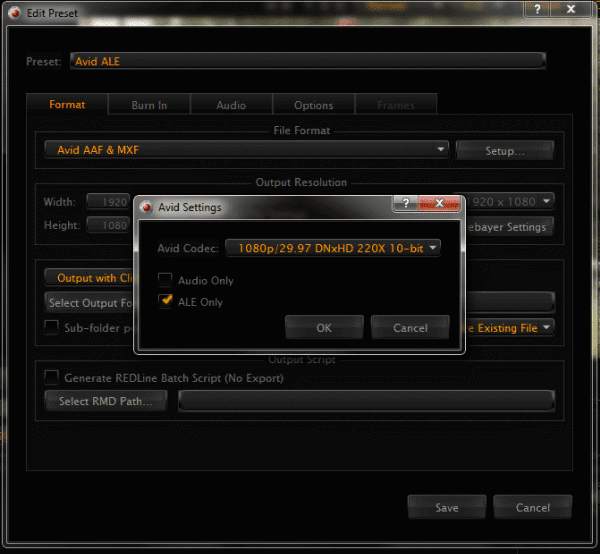
Step 5. After the encoding is finished, create an export preset in Redcine X Pro with the file format Avid AAF & MXF. Click Setup and select ALE Only and ignore the codec quality. Process the same batch of files in the previous step.
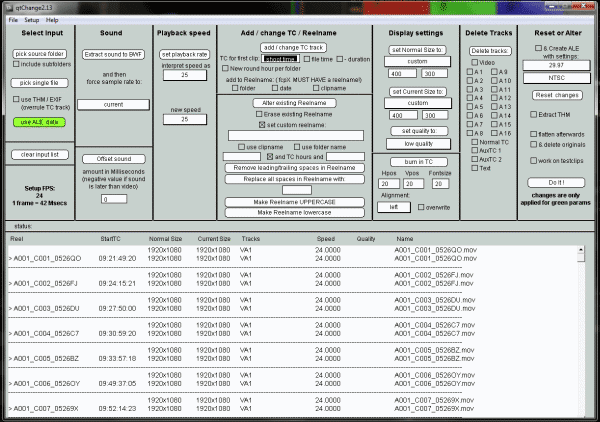
Step 6. Open QtChange and on the left click Source Folder. Find the folder containing your ProRes files. Next click Use ALE Data and load the ALE file we created in the previous step .Then that’s are all set!
Additional Notes: Although this two encoders are free and able to encode Apple ProRes on Windows PC, there are still some advantages we need to pay attention to:
- The operation of encoding codec is complex for our primary users.
- This two encoders’ version can’t be always compatible with update of our Windows system so we can’t ensure it can work all the time.
- Safety is not guaranteed, right?
Here we also recommend you another Apple ProRes for Mac called Pavtube Mac HD Video Converter. Some basic steps are also offered for you here. If you want know more abot various kinds of video formats converted to Apple ProRes by this Mac Video Converter, such as MXF, MTS, MP4,MOV, etc. Other items maybe you don't know:
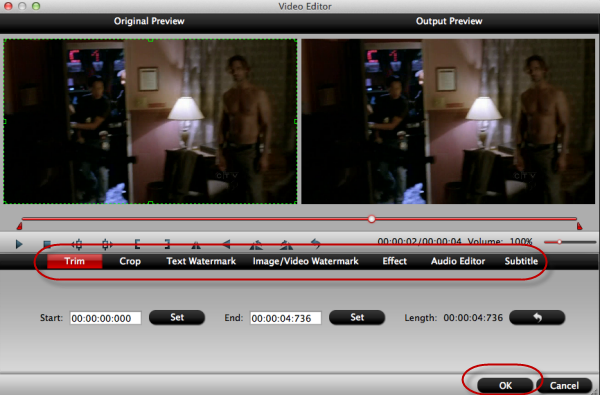
1. Some simple editing you can also do here:'Trim''Crop''Subtitle'etc.
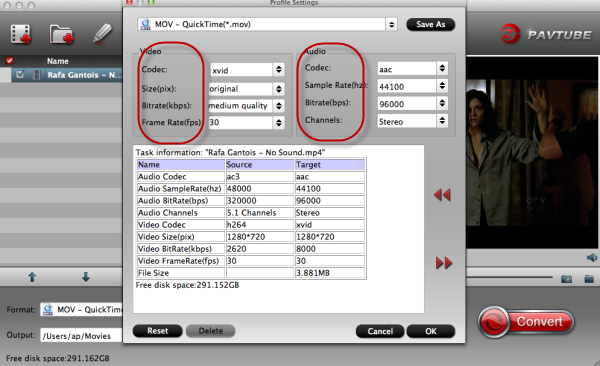
2.'Settings' button also offered for your output format.
Some related guides:
- Apple ProRes Specifications
- Working with Apple ProRes Codecs
- Edit 2014 World Cup MXF recordings in FCP X
- Work with Sony F55/F5 XAVC in FCP/iMovie/Premiere/Avid MC