Thursday, June 22, 2017

MP4 Won’t Played on DVD Player, Solved!

Have some online downloaded movies, TV shows or device recorded footage in MP4 file format and wish to get them played on your home DVD players. The bad news is that regular DVD players only read an MPEG-2 DVD structure file, and very few of them are compatible with MEPG-4 video. The good news is that you can convert MP4 to DVD player compatible file formats such as MPEG-2 or VOB for playing through DVD player’s USB port or directly burn the files onto a DVD disc for viewing on DVD player. The following article will illustrate those 2 solutions for you with great detailed information.

Convert and play MP4 on DVD Player via USB port
Burn MP4 to DVD disc for DVD Player viewing

Convert and play MP4 on DVD Player via USB port

As technology continues to advance, you don't even need to burn home movies to disc to watch them on your television. High-end DVD player models feature USB inputs that can be used to house USB flash drives filled with movies. You can then access the files through your DVD player's main menu and watch them on your TV screen.

If you fail to open the MP4 files stored on USB flash drive with the DVD player, then it would be essential for you to perform a format conversion process. Here, you can get the job easily completed with a simple to use application called Pavtube Video Converter Ultimate. The program has full support for all MP4 files with various different file resolution and video/audio compression codec, you can easily produce DVD player readable MPEG-2 or VOB format with best file quality and fast conversion speed.

To get better output video and audio quality, you can flexibly adjust output profile parameters including video codec, resolution, bit rate, frame rate, audio codec, bit rate, sample rate, channels, etc as you like.

Hot Search: Play MKV on DVD Player | Play MP4 on DVD Player | Play MOV on DVD Player

Get Pavtube Video Converter Ultimate with 20% off discount, coupon codec: 45K2D47GJH

Simple steps to Convert MP4 to DVD Player Supported File Formats

Step 1: Import MP4 files into the program

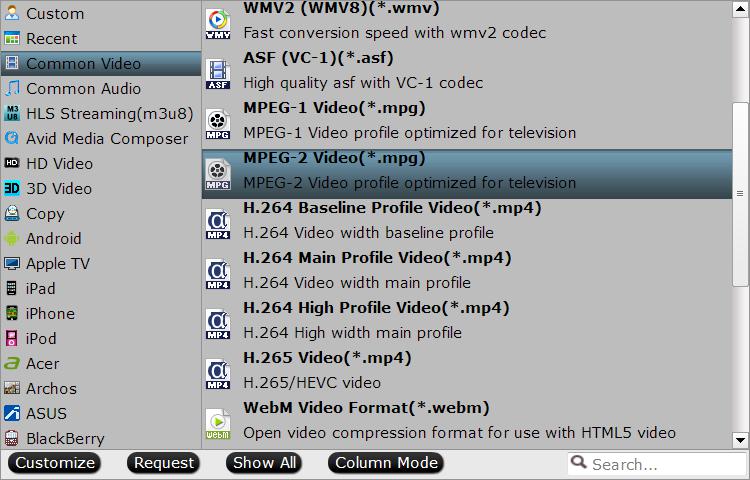
Step 2: Output DVD player supported MPEG-2 format.

output DVD to MPEG-2 format

Output DVD player supported file formats

Step 3: Adjust output profile parameters.

Step 4: Begin the conversion process.

When the conversion is completed, following the steps below to transfer and play converted files on DVD player from USB port.

Step 1: Put your USB flash drive into a USB port on your computer.
Step 2: Open your USB flash drive by clicking on "My Computer" and then clicking on the icon for your flash drive.
Step 3: Drag the appropriately formatted video files into this window. They will now be transferred to your USB flash drive.
Step 4: Remove the USB flash drive from your computer.
Step 5: Put your USB flash drive into an open USB port on your DVD player.
Step 6: Use your DVD player's remote control to navigate to the "USB Flash Drive" menu. Select the file you want to play from the list by highlighting it and pressing the "Enter" or "Play" buttons on the remote. The file will now play on your TV screen.

Burn MP4 to DVD disc for DVD Player viewing

Burn MP4 files to DVD disc is pretty easy with a reliable and workable DVD burning software such as Pavtube DVD Creator (get Mac version). The program offers powerful DVD burning functions and beneficial DVD menu editing features. You can comprehensively burn all 4K/2K/HD/SD MP4 files with the compression codec of MPEG-4, H.264, H.265, VC-1/WMV, MVC, MPEG-4 (A)SP, MPEG-1, MPEG-2, etc to DVD disc. The versatile DVD menu customizing features allow you to customize the DVD menu template/style, menu text, display aspect ratio and background, you can also set chapter maker and playback mode.

Step by Step to Burn MP4 to DVD Disc for DVD Player Watching

Step 1: Insert a blank DVD disc into your computer optical drive.

Insert a blank DVD-R (DVD+R, DVD+RW, DVD-RW) into the DVD-ROM drive of your computer.

Step 2: Add MP4 video into the program.

Run the DVD Creator software, import Halloween videos or movies into it for burning DVD disc project.

Add MP4 video

Step 3: Customize DVD menu.

Switch to the menu pane, double click a DVD menu beneath the Menu Template to apply it to your DVD. You can customize the background video/image, background music, text, title thumbnail and more for your DVD menu. You can also choose the DVD quality at the bottom of the software, higher quality requires bigger DVD disc volume.

Customize DVD menu

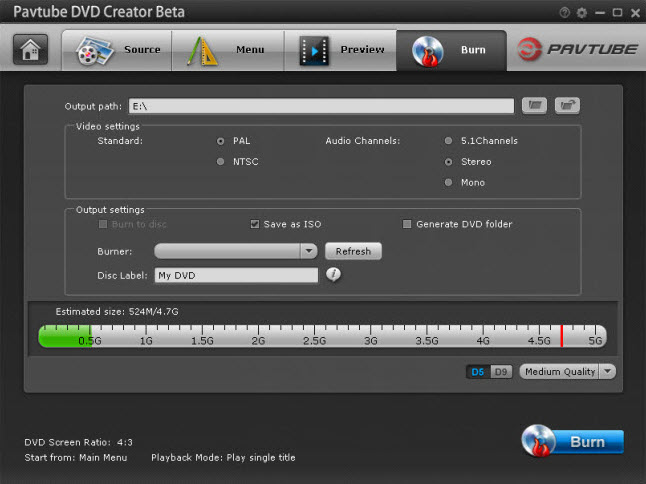
Step 4: Start MP4 video to DVD burning process.

Click the "Burn" button to start burning Halloween videos to DVD. You can burn MP4 video to DVD disc, save as ISO file or Generate to DVD Folder.

Burn MP4 to DVD

Thursday, June 15, 2017

Movavi Video Converter Alternative for Windows

A powerful video converter like Movavi Video Converter is essential to have in our daily life for us to convert video to any format, save to any devices or compress large file size into small for space saving. However, sometimes, we may need to find an alternative to Movavi Video Converter for Windows to import more media types or file formats, produce more output format options with perfect quality and super fast conversion speed.

An beneficial video conversion tool can do more than just conversion. You can also treat it as a small video player, a simple video editor. For advanced users, you can also use it to compress file size, change codec, bit rate, sample rate, channels, etc to get better quality. Pavtube Video Converter Ultimate (review) can fullfil all your great demand, so we highly ranked it as the best windows alternative to Movavi Video Converter.

Main functions of Pavtube Video Converter Ultimate

- Full importing support for commercial Blu-ray/DVD disc and digital video
- Various output format options: popular digital formats and devices/programs preset profile formats
- Batch conversion mode to load multiple video at one time
- 6x H.264 encoding acceleration and 30x H.265 encoding acceleration
- Trim/Crop/Merge/Split/Watermark/Apply effect/Add subtitle/Deterlace video
- Fine tune output profile parameters to get better video/audio quality
- Perfect compatibility with the new macOS Sierra 10.12, 10.11, 10.10, 10.9, Windows 10/8.1/8/7

Pavtube Video Converter Ultimate VS Movavi Video Converter

The better distinguish Pavtube Video Converter Ultimate and Movavi Video Converter, we will show you a comparison charts with detailed comparison parameters of this program.

Software Pavtube Video Converter Ultimate Movavi Video Converter
Input File Formats
Blu-ray Disc/BDMV Folder

-
DVD Disc/Video_TS Folder/IFO/ISO Image File

-
AVI/WMV/MP4/MOV/MKV/FLV/3GP/ASF/WebM

MXF

AVCHD MTS/M2TS

XAVC/XAVC S

-
H.264

H.265

MEPG-1

MPEG-2

Prores

WMV/VC-1

Divx/Xvid

Output File Formats
AVI/WMV/MP4/MOV/FLV/MKV/VOB/3GP

HD AVI/WMV/MP4/MOV/MKV/MPEG-2/H.264/H.265

no HD H.265 output
4K H.264 High Profile MP4

-
4K H.265

-
Prores 4444/422 HQ/422 Proxy/422 LT

-
3D SBS/TAB/Anaglyph MP4/MKV/AVI/WMV/MOV

-
Device Preset Profile Formats

Advanced Features
Adjust output profile parameters

-
Trim/Merge

Crop/Rotate

Add Watermark

Split

-
Apply Special Effects

-
Insert External Subtitle

-
Remove/Replace Audio in Video

-
Nvidia CUDA or NVENC Acceleration

-
Supported New Windows OS
Windows 10
Windows 10

Conclusion:

From above comparison charts, we can see that Pavtube Video Converter Ultimate has more media input and output options and also more editing and output profile customization function than Movavi Video Converter. All those great functions and features can help to enhance your media entertainment to another great high level.

Wednesday, June 7, 2017

Play MP4 on TV from USB

It is likely that you may Have downloaded some movies from online video sharing sites with MP4 file formats or captured a MP4 video with your camera, camcorder, smartphone or tablets, you may often feel confused that your TV even can't recognize your USB storage devices or you can play certain MP4 files from USB on TV but fail to play other MP4 files due to the unknown reasons. The following article will illustrate those problems for you with helpful tips and solutions.

Why your TV not read your USB drive?

Do not simply assume that because a television has a USB port, it can play files from a USB drive. In some case the port is solely designed for use by engineers who need to run software on the television, for example to update or repair the set. Some sets may only be able to display video files once you have enabled an option in a service menu that isn't officially publicized to consumers; take care with such menus as you could affect the TV's performance by changing service menu settings.

Why fail to play certain MP4 files on TV from USB?

If your TV does support video playback from USB, the main factor that affects your ability to watch a particular video is the file format. You will need to consult the user manual or promotional material for the particular set to see which formats it supports. It is well known that MP4 is a container file format, which can be encoded with vavrious different video and audio codec, your TV may only supports to play certain MP4 files with specification compression codec such as H.264, H.265 within specification resolution and resolution range.

To solve "TV not playing MP4 from USB" issues, you will need a MP4 to TV Converter. Here, a powerful yet simple to use application called Pavtube Video Converter Ultimate is highly recommended to you. The program has full support for all MP4 file types listed below:
Video codec: MPEG-1, MPEG-2, MPEG-4 (A)SP, H.264/MPEG-4, H.265/HEVC, VC-1/WMV, Real Video, Theora, Microsoft MPEG4 V2, VP8, MVC
Audio codec: MP3, WMA, AAC, AC-3, DTS,ALAC, DTS-HD

You can easily convert MP4 to TV supported file formats. And then flexibly adjust output video and audio quality by flexibly adjusting output profile parameters including video codec, resolution, bit rate, frame rate, audio codec, bit rate, sample rate, channels, etc as you like. For those people who have no ideal how to adjust those settings on your own, you can use the program to directly output MP4 to Sony/Samsung/LG/Panasonic TV Preset Profile formats with the optimal playback settings.

For Mac users, please download Pavtube iMedia Converter for Mac to get the job completed on macOS Sierra or macOS High Sierra.

Free download Windows version

Free download Mac version

How to Convert MP4 for TV Playback via USB?

Step 1: Load MP4 files into the program.

Download the free trial version of the program. Launch it on your computer. Click "File" menu and select "Add Video/Audio" or click the "Add Video" button on the top tool bar to import source MP4 files into the program.

Load MP4 files into the program

Step 2: Define the output format.

Clicking the Format bar, from its drop-down list, choose one of TV playable file formats such as "H.264 HD Video(*mp4)" under "HD Video" main category.

Define the output format

Tips: Click "Settings" on the main interface to open "Profile Settings" window, here, you can flexibly choose or specify exactly the profile parameters including video codec, resolution, bit rate, frame rate, audio codec, bit rate, sample rate, channels, etc as you like to get better output video and audio quality.

If you have no idea how to adjust output profile settings on your own, just choose to output Sony/Samsung/LG/Panasonic TV preset profile formats.

output TV preset profile formats

Step 3: Begin the conversion process.

After all setting is completed, hit the "Convert" button at the right bottom of the main interface to begin the conversion process from unsupported MP4 to TV supported or preset profile formats.

When the conversion is finished, click "Open Output Folder" icon on the main interface to open the folder with generated files. Then feel free to transfer the files to USB drive for viewing on your TV.

Wednesday, May 31, 2017

Play Wedding Videos on Smart TV

Have recorded some great and memorable moment on your daughter's wedding party and wish to re-watch them on your Samsung/Sony/Panasonic/LG Smart TV. The following article will show you how to transfer and play wedding videos on smart tv with different solutions.

Solution 1: Play wedding videos on Smart TV from USB port
Solution 2: Stream Wedding videos to Smart TV via Plex

Solution 1: Play wedding videos on Smart TV from USB port

If your television set has a USB port and your TV does support video playback from USB, then you may be able to use it to watch wedding videos that you have copied from your computer. The main factor that affects your ability to watch the wedding video is the file format. You will need to consult the user manual or promotional material for the particular set to see which formats it supports. Your Smart TV may only play video in very limited file formats, in addition, some sets will only play a supported video at a specific resolution or within a particular range of resolutions.

The wedding video captured by your smartphone, camera, camcorder or other devices can be in different compression codec or file resolution. What's more, you may fail to find the detailed information about what file formats can be viewed on Smart TV. To fix all those head-scratching issues, you can download Pavtube Video Converter Ultimate (review), which has full support for all media types, you can comprehensively load wedding videos in Blu-ray/DVD disc, digital video in virtually any file formats with the resolution of 4K/2K/HD/SD. The biggest merits of this program is that it allows you to directly output Sony/Samsung/LG/Panasonic Smart TV preset profile formats with the optimal playback settings so that even if you don't know what file formats can be viewed on your Smart TV, you can still use our program to produce the best playback results if you happen to own a Samsung/Sony/LG/Panasonic TV.

Solution 2: Stream Wedding videos to Smart TV via Plex

If you are fortunately to own a TV that are included in Plex supported Smart TV television models listed below, you will then be able to stream and view the wedding videos on your large screen TV with Plex's beautifully organized interface.

LG

Plex app is available on LG television models running the following software:
NetCast (2013 models)
webOS Lite
webOS 1.0
webOS 2.0
webOS 3.0

Samsung

The app is available on 2016 and newer model year Samsung sets that are Tizen-based. The exception is for users located in Brazil, China, or Iran; the app is not currently available for users in those countries.

Sony

The app is available through the Opera TV Store for many 2013 and newer Sony Bravia models. (Note that the Opera forum list does include models older than 2013, which are not supported by the Plex for Smart TVs app.)

Toshiba

The app is made available through the Smart TV Alliance for Toshiba televisions. You can find the list of supported Toshiba models on the Smart TV Alliance website.

VIZIO Televisions

Supported Models
Most 2013 to 2016 model VIZIO televisions are supported. You can determine whether a model is compatible:
- If the app store is named Vizio Internet Apps Plus, then the model is compatible
- If the app store is named anything else (including just "Vizio Internet Apps"), then the model does not currently support the Plex App

To directly play wedding video on Smart TV via Plex, the wedding video must be 100% compatible with your Smart TV. If not, Plex will try to transcode the file for you. However, as the file transcoding process is very CPU intensive, if your computer is serveral years old, it may simply not be powerful enough to perform the transcoding, then you will suffer video buffering issues during the streaming process. In addition, the transcoding process uses temporary disk storage for the converted media. By default, the temporary files are stored on the OS boot disk. This can cause problems if your boot drive is very small.

To have a smooth streaming process with Plex Media Server, it would be much ideal for you to use a our powerful video media conversion app - Pavtube Video Converter Ultimate listed above to convert unsupported video to Smart TV supported file formats or specially optimized file formats for viewing.

Free download Windows version

Free download Mac version

How to Convert and Play Wedding Videos on Samsung/Sony/LG/Panasonic Smart TV?

Step 1: Load wedding videos.

Download the free trial version of the program. Launch it on your computer. Click "File" menu and select "Add Video/Audio" or click the "Add Video" button on the top tool bar to import wedding video into the program.

Load wedding videos

Step 2: Choose output file format.

Clicking the Format bar, from its drop-down list, select your Smart TV supported file formats such as "H.264 HD Video(*.mp4)" under "HD Video" main category.

Output Smart TV playable file formats

You can then adjust other profile settings such as video codec, resolution, bit rate, frame rate, audio codec, bit rate, sample rate, channels, etc as you like to get better output video and audio quality for Smart TV.

If you have no ideal how to adjust those settings on your own, just directly output TV preset profile formats under "TVs" main category.

Output TV preset profile formats

Step 3: Begin the conversion process.

After all setting is completed, hit right bottom convert button to begin the conversion process from wedding videos to Samsung/Sony/LG/Panasonic Smart TV playable file formats or specially optimized file formats.

When the conversion is completed, you can click "Open output folder" to popup output directory with the converted files. Then feel free to play wedding videos on Smart TV from USB or add video to Plex for streaming to Smart TV.

Tuesday, May 23, 2017

Copy and Convert Educational DVDs for Kindergarten

Kindergarten teacher prefer to collect some educational DVDs for make them played for Kindergarten. But it is not convenient to play educational DVD except DVD player, computer. So maybe you are looking for the easy way to play educational DVD for Kindergarten. Here we share one easy way to play educational DVDs.

We recommend that you can copy or rip educational DVDs for more easy playback. Why copy or rip educational DVDs?

Reason 1: Disadvantages of DVD disc

  • DVD is easily broken
  • DVD occupies much space of our room
  • Regional lockout causes DVD won't play error
  • DVD playback requires DVD drive and MPEG2 decoder

Reason 2: For playing Educational DVD on any devices

Although many people claim DVD industry is gradually waning, the DVD/Blu-ray sales are still quite high, which determines the DVD-closely-connected tool would not disappear from the mainstream OSs in the near future. The fact is no matter how gigantic the new system upgrade is, both Windows and Mac always contain at least one add-on for DVD. If you copy or rip Educational DVD, you can transfer them to any devices like iPhone, iPad, TV, projector etc for easy playback.

Best Educational DVD Copier/Ripper

Pavtube ByteCopy (Read Review) is a professional DVD ripper. You can use it to copy Educational DVDs to computer and then easy playback. Also you can rip educational DVDs to any formats for iPhone, iPad, TV, projector etc for free playing. So that Kindergarten can play Educational DVDs on anydevices anytime anywhere.

Pavtube ByteCopy, the best DVD to Lossless MKV solution, is a powerful program with the ability of backing up DVD collection to multi-track MKV without quality loss, ripping DVD movies to MP4 and MOV with multiple audio streams, and converting DVD from hard discs to virtually any popular video and audio format so that you can freely watch movies on Apple iOS devices, Android OS devices, Windows RT/Pro devices, HDTV, 3D TVs, PSP, PS4, PS3, Plex, WDTV Live, Roku 3 and more devices. In recent update, ByteCopy now has improved H.265 Encoding speed With NVIDIA GPU Acceleration. If you want to copy Blu-ray or rip Blu-ray, you can also use Pavtube ByteCopy to help you done.

Mac user please get Pavtube ByteCOpy for Mac to convert Educational DVDs and other DVD, Blu-ray on Mac (macOS Sierra, El Capitan Yosemite, Mavericks, Lion included).

How to Copy and Convert Educational DVDs for Kindergarten

Step 1: Click “File” to find “Load from disc” to import source educational DVD movies to Encrypted this DVD ripper software. If you have some Blu-rays, you also can load to convert to any formats.

load Blu-ray

Step 2: Remove educational DVD encryption. Here, you have 3 options:

Option A - Full Disc Copy educational DVD

Full disc copy allows you to keep the whole file structure in your Blu-ray disc complete without any quality loss. Click the “Copy the entire disc” button   
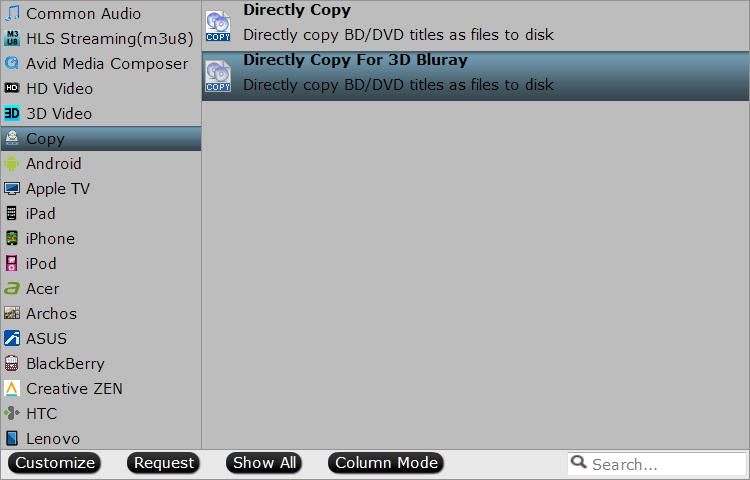
on the top menu to start Blu-ray full disc copy.

Option B - Directly Copy educational DVD

If you want to reduce the time consuming, you can try copying Blu-ray main movie only which will leave out any extras for you. Click the format bar to follow “Copy” > “Directly Copy.”

directly copy

Option C – Rip educational DVD to popular MP4/MOV/AVI/MKV formats

You also can choose to convert educational DVD to common MKV, MP4, AVI, MOV, etc format. If you choose to convert educational DVD to MKV, you can select lossless MKV format in "Multi-track Video". In this way, you can keep lossless image and sound quality and all the subtitle and audio tracks.

lossless MKV

Tip: All formats here are set with optimized video/audio codecs, bitrates, frame rates, etc. But you can still specify as you like by clicking Settings button. In the Profile Settings window, you can choose or specify exactly the parameters you like. And in the Task information section, you can compare the detailed information of the source video and the target video.

Step 3: If you choose the second or third way to copy Blu-ray to Kodi, you need to hit the “Convert” button in bottom right corner to start educational DVD main movie copy or educational DVD to MKV, MP4, MOV and AVI conversion. When the process is completed, open output folder and find the ripped DVD file.

After the ripping, you can play educational DVD on any media player, portable devices, TV, projector, PS4, Xbox etc freely. Have a try!