Showing posts with label Final Cut Pro. Show all posts

Thursday, March 20, 2014

Convert & Import Blu-ray/DVD to Final Cut Pro X with 5.1 sound on Mac Mavericks

This is a detailed guide to help you extract Blu-ray/DVD movie, convert it to ProRes 422 HQ with 5.1 surround sound in FCPX with a clean edit.  

Why I am missing 5.1 surround sound after converting Blu-ray/DVD to ProRes? Why FCP X log and transfer does not work with Blu-ray/DVD? Can I obtain all the languages without losing surround sound in my digitized Blu-ray/DVD movies?

You may have tried some blu-ray ripping tools and run into problems above. To be fair I have not tried many of them but also have problems like this. Hereby, with a successful trial, I'd like to share my experience here.


Firstly, you need a tool which is capable of rolling off Blu-ray/DVD disc protection, then convert them to multi-track ProRes 422 HQ with surround sound for editing in FCPX. On this step I recommend Pavtube ByteCopy for Mac because it’s quite easy to use and work reliably.
  
How to rip BD/DVD to ProRes 422 HQ with 5.1 sound for FCP X?

Step 1. Download and install this Pavtube ByteCopy for Mac, load disc.

Note: you need an external Blu-ray drive to make your Mac recognize Blu-rays firstly. Insert your discs, launch Pavtube and click the top left icon, you will find it detects your disc and shows the name automatically. Just click it to load.


Step 2. Choose format for editing on FCP X.

Click the “Format” icon; you may notice there’re two options of ProRes 422HQ. One is inside the “Final Cut Pro” the other is inside >Multi-track Video”. The only difference between these two presets is that the former is common one-track preset while the later could keep all your audio tracks (languages). I’d prefer the Multi-track one.

Okay choose “Multi-track Video>Multi-track Apple ProRes 422(HQ)(*.mov).


Step 3. Customize V&A settings.

Let’s move to “Settings” icon (right besides “Format”), you will find two tabs one for Video and the other for Audio. On Video tab, you can change target video quality as there are three levels for you to choose. 

In the Audio tab, we can check the audio tracks we need as below:


Just leave unwanted audio tracks unchecked, change audio channels to “5.1 Channels”. Click OK to confirm the change.

Step 4. Start conversion.

Back to main interface and hit “Convert” to start ripping Blu-ray/DVD to multi-track ProRes 422HQ. After it completed, click “Open output folder” to quick locate the converted MOV files.

Read more:

Thursday, January 23, 2014

Pavtube Found Solution to Convert 4K Ultra HD Videos to Apple Prores for Final Cut Pro

Pavtube Studio's HD Video Converter for Mac provides users of solution to convert 4K Ultra HD Videos to Apple ProRes and any other formats for editing in Final Cut Pro or editing and playing on different platforms.

The latest updated version of Pavtube's iMedia Converter for Mac enables users to import and convert 4K digital videos to Apple ProRes for Final Cut Pro and any other formats for editing, playing, and burning.

4K resolution also known as Ultra HD is quite a new term coming out just a few years ago. It is a generic term for displays, devices or content having horizontal resolution on the order of 4,000 pixels.

There are more than 21 types of cameras having the ability to record 4K format videos but not that many editing software system, and digital video players are able to edit and play those videos in 3840 x 2160, 4096 x 2160, 5120 x 2160, 5120 x 3200, 4096 x 1716, or 3996 x 2160 resolutions. And there comes the need to convert 4K Ultra HD videos into other formats for editing and playing. The latest Pavtube HD Video Converter for Mac is updated for this need.

"We prepared hundreds of output format presets for 4K videos, such as Apple ProRes 422, Apple ProRes 422(HQ), Apple ProRes 422 (LT), Apple ProRes 422 (Proxy), and Apple ProRes 4444 for Final Cut Pro, AIC MOV for FCE (Final Cut Express) and iMovie, MP4 for any mobile or PC video players, and more formats for better editing, playing, and burning," said Anda Wu, the software developer.

Audience's tastes for video quality increase every year and there comes the need of output videos with higher and higher resolutions. Pavtube knows this well and makes HD Video Converter for Mac available to customize the output resolutions to any size the users want.

"What we are always doing is to provide the most useful tool that accepts all kinds of video formats and output whatever formats the users want. We paid very much attention to our users feedbacks and the supporting of 4K videos is a perfect example that our users are always the God," Wu continued.
"After this update, the software becomes a perfect 4K Ultra HD video converter for Mac. And in 2014, we will provide more updates to enhance Pavtube products' quality and usability. The customers' thumb up is always the No. 1 thing to our team," concluded Wu.

About Pavtube Studios

Founded in 2007, Pavtube creates expert multimedia software applications that help consumers access, transfer and share their digital content across different devices that range from PC, Mac, tablets, smartphones, to HD media players, game consoles, and home theatre systems.

On the basis of computer OS, Pavtube products are divided into two categories - Windows solutions and Mac solutions, spanning across BD/DVD backing up, video trans-coding, camera/camcorder footage and DVR recordings (e.g. TiVo) conversion.
With creativity, expert knowledge as well as cutting-edge technology, Pavtube helps consumers throughout the world enjoy more in a digitally connected audio-visual world. See http://www.pavtube.com for more information.

Source: This article originally published at PRWeb.

Read More:
  

Thursday, January 9, 2014

Convert Sony HDR PJ790V MTS to ProRes 422, ProRes 422 LT for editing in FCP

Description: This article aims to lead you to resurrect corrupted MTS videos from camera SD card, and transcode Sony HDR PJ790V MTS footage to edit in FCP on Mac easily and efficiently.

Q: “I shot some videos of my friend’s wedding but the SD card was corrupted, so I could not download videos from the card. I’ve tried many ways to copy the video to FCP but still could not get it to work. The files shout be in MTS together with many garbage which I can found in card but cannot log and transfer. Can someone help?”

Many of us may encounter many issues when downloading footages from cameras: like this camera is not supported by Windows/Mac; like the SD card may not be formatted correctly although it works as it’s good when shooting, in any case we just can’t move the videos to computer. Usually if we lose the original file structure, the footages cannot be downloaded smoothly.

So what can we do to resurrect the MTS footages if the SD card corrupted?
Don’t worry, according to my experience, the footages should be save in a PRIVATE folder inside your card; so use a card reader and plug it to your computer, run this Pavtube MTS/M2TS Converter for Mac to extract the real videos.

Pavtube MTS/M2TC Converter for Mac is a tool which works on Mac; it’s capable of rolling off MTS video clips from your camera and SD card directly, and converting to various video formats including Apple ProRes for editing in Final Cut Pro. You can download a free trial version before purchase.

How to convert Sony HDR PJ790V MTS clips to Prores for FCP?

Step 1. Install and launch this Mac MTS/M2TS Converter; add MTS files

First, plug your card reader or camera to Mac. Click the top left “Add video” and browser source video path, find the MTS files inside your card PRIVATE folder and import.


Step 2. Choose format.

Click the drop-down list besides “Format” and choose Final Cut Pro>Apple ProRes 422 as the preferred video codec for FCP on Mac.

Step 3. Adjust target video settings.

If you are not satisfied with the default video size, bitrate, frame rate and audio specs, click “Settings” to adjust them according to your needs.

Step 4. Start conversion.

Now just click the big red “Convert” to start converting Sony HDR PJ790V MTS to ProRes for FCP. This program will stat to do batch conversion automatically. After it completed, click “Open” or “Open output folder” to locate the converted videos.

You may want to read:

How to load the converted ProRes MOV to FCP for further editing?

How to work with other Sony footageMTS video and Final Cut Pro on Mac?

Wednesday, December 25, 2013

Create 3D & Multiple Audio tracks Videos for Videographers With Latest Update to Pavtube iMixMXF


The latest upgrade to Pavtube's MXF MultiMixer and iMixMXF software allows users to now create 3D videos and still support multi-track audio preservation. The latest upgrade also allows MXF videos to be played on websites, tablets, smartphones, HD Media Players and TVs.

Photographers and videographers can now convert 2D videos to 3D and preserve or mix MXF multi audio tracks with the latest upgrade to Pavtube's Video Converter Ultimate and its Mac version, iMedia Converter for Mac.


The MXF video format is familiar to most professional videographers and enthusiasts if they use any sort of professional camera or camcorder. However the MXF format is not supported by major editing software(Convert Canon MXF to multiple audio tracks ProRes 422 for FCP 6/7), most websites, tablets, smart phones and TVs, and people cannot play MXF video on them directly.

The Pavtube MXF MultiMixer software is designed to help those video-graphing fans to be able to edit or play videos on these platforms and also do much more with their videos.

"I get numerous customer requests everyday asking for ways to convert MXF video for all usable formats. A lot of users shoot videos with camcorders in HD quality and then want to upload the videos online, to websites like YouTube and others," said Sally Lee, one of Pavtube's customer support professionals.

Sally continued, "Many people converting MXF multi-track videos have tried to have all audio tracks in one video, but weren't able to do so. They simply mix them up into one, or lose one or two tracks. Some customers also have the need to output 3D videos. With the recent upgrade to our software, we found a way to help them."

Many professional cameras and camcorders now record videos with multiple audio tracks in MXF format. Canon XF series cameras, for example, are the most typical and widely used models which include two audio tracks, one is recorded by the microphone and the other recorded by headset. Of course, more audio tracks options come with more professional devices, such as Panasonic P2 MXF, and Sony XDCAM MXF.

Pavtube's developers found ways to meet customers' needs with some advanced technology in the first version of MXF MultiMixer/iMixMXF and helped users retain the original audio tracks in .MKV, .MP4 and .MOV. With this latest upgraded version they were able to add 3D output.
Sally continued "Some customers also found it helps fix some Cannon C300 clips that were corrupt, and can merge several clips into one bigger clip. These 2 features are also frequently mentioned and favored by other Pavtube users."

"With this latest update with 3D video output feature, Pavtube MXF MultiMixer/iMixer becomes unique among MXF converters. It is really good news for video editing hobbyists. They are now able to convert their current 2D videos to 3D in MKV, MOV, AVI, MP4, WMV formats so that they can play 3D video on various portable devices, and make 3D Stereoscopic editing with Premiere Pro CS5 etc. And it's still a perfect multi-track MXF mixer and preserver," concluded Sally. (How to Mix multiple audio tracks into one track on Mac?)

From Videographers Can Now Create 3D & Multi-track Videos With the Latest Update to Pavtube MXF MultiMixer
  

Thursday, September 5, 2013

Free Convert C300 multi audio channels MXF files to FCP X, FCP 6/7 with best quality

How to editing Canon C300 multi audio channels MXF footage in Final Cut Pro 7 and FCP X? Follow our tips to make video editing with C300 MXF footage go as smoothly as possible.

------------------------------------------------------------------------------

Working with Canon C300 footage – which is XDCAM 422 50/Mbs footage in a .MXF wrapper – should ordinarily be quite straight forward. MXF files will work natively in Adobe Premiere and ingest quite happily through a free plugin in Final Cut Pro 7 and FCP X.  You can also bring this footage in through AMA into Avid Media Composer 6. AbelCine has an excellent step by step guide to importing C300 footage to Premiere CS6, FCP X, FCP 7 and Avid Media Composer 6. You can check it out here.

Everything will work seamlessly, that is, if your cards have been copied correctly to the hard drive with their entire folder structure intact. Without that folder structure you are effectively locked out of accessing your footage and an editing application like FCP7 will give you an error message like this one:


How to Copy MXF Files Correctly

So how do you copy cards correctly?

Well first, and this may go without saying, but if you're going to get an intern or producer to do it make sure they know what they're doing. Essentially you must copy the entire card structure (preferably not through dragging and dropping in the finder).

Sony and Canon both have free browser apps that will let you back up your media. Or you could invest in something like Shotput Pro to duplicate your cards to multiple drives simultaneously. You are backing them up as you go, right?

If that's not enough detail, just watch this great tutorial on a correct tapeless media workflow from Shane Ross. Although the tutorial winds up in Final Cut Pro 7, the initial principles are the same for any system. If you want even more tips, check out this great video from Chase Jarvis on his complete tapeless workflow.

<iframe width="560" height="315" src="http://www.youtube.com/embed/AhDnyWFAM10" frameborder="0" allowfullscreen></iframe>

What To Do If Your C300 Card Structure Is Broken

If for whatever reason your card structure doesn't come across intact, what can you do?

Depending on your NLE you have various options. If you're in Adobe Premiere it doesn't matter, as it will read the MXF files just fine.

First, you can try to 'fake it' out by recreating the C300 card structure (which should look like the example below). In the past I'm sure I've gotten lucky with it but its a pretty slim chance of actually working.

FCPX needs a correct card structure so if you have to, transcoding in a 3rd party app is a feasible workaround.


Free App For Converting C300 MXF Files

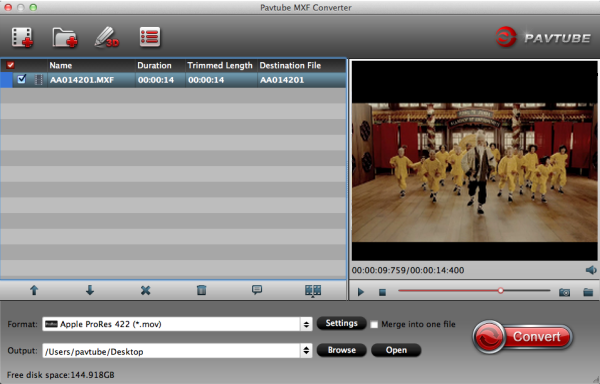
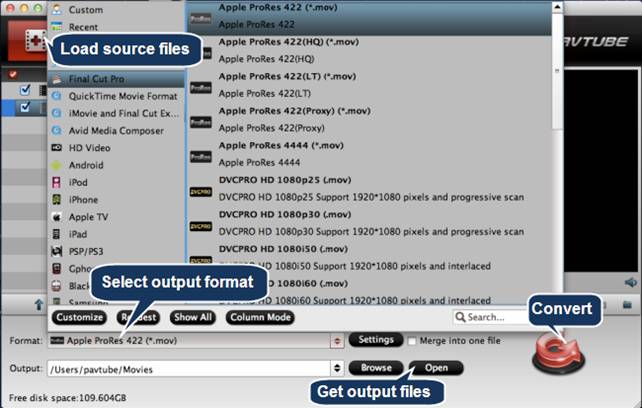
Miro is a great free app (one of the few free apps I found) that actually works and works well. Miro Video Converter will allow you to grab the .MXF files and transcode them into ProRes 422, DNxHD and AVC Intra 1080p and 720p. You can batch transcode as many of them as you like and it works pretty quickly. The files look great and were a higher quality than files I created using the demo of MXF Converter for Mac from Pavtube. But as Miro is a free app, there are a few catches.
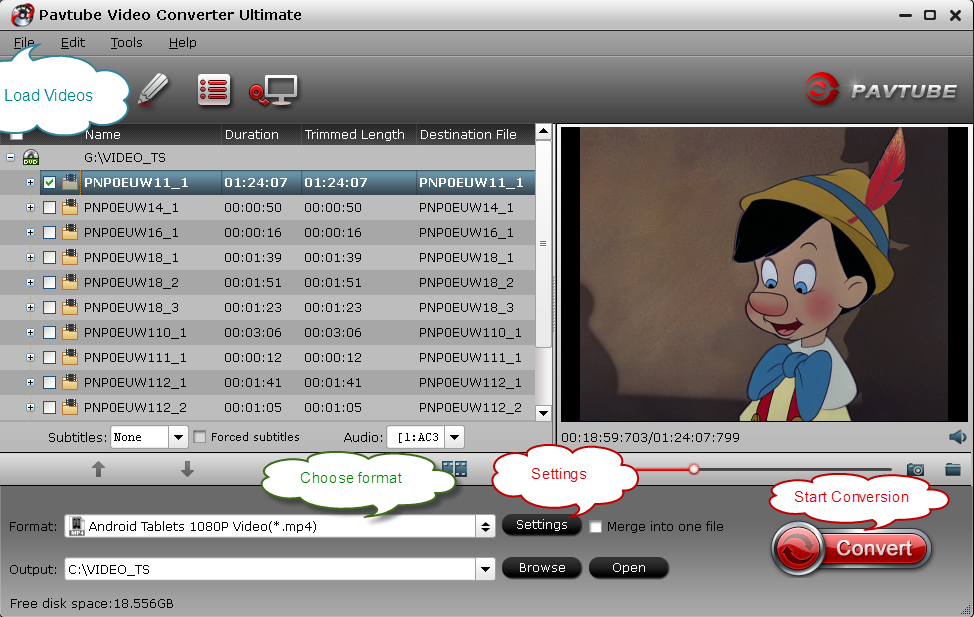
(Tips: If you want to preserve multi audio channels when convert Canon C300 MXF, or mix multi tracks into one track, Pavtube iMixMXF is highly recommended to you. Refer to the guide: How to convert MXF to ProRes 422 preserving multi-track for FCP?)


canon c300 mxf to fcp converter


First, you cannot specify the output folder and it defaults to your MacHD > User > Movies folder. So you need to have enough space on your boot drive to transcode the footage too. This is also a problem if you have multiple files with the same name, (which I had on this edit with a two camera shoot) as this means you have to transcode one set at a time and move them out of the folder so as not to overwrite them with the next batch. Annoying.

Also the original camera footage I was working with had two audio tracks in it where as Miro would only export a single mono track. This was not helpful either as I needed to be able to mix each track individually.

Paid Apps for Working With C300 MXF Files


As I was editing on an FCP7 system I had to find a way to get my C300 MXF files to play nice with Final Cut Pro 7, while getting around the broken file structure. A cry for help on Twitter led to this great recommendation from Andy Mees who saved the day by suggesting I check out both MXF Import from Calibrated {Q} or MXF4Mac from Hamburg Pro Media. Both plugins essentially do the same thing which is to allow Quicktime (and any apps that make use of the Quicktime architecture) to work with MXF files, just like any other file.

Calibrated{Q} MXF Import for OSX is a QuickTime Import component for NATIVE Importing and Editing of MXF Files within Final Cut Pro 6, 7, and X without using Log and Transfer.

And you’re not just limited to Final Cut Pro, you can also natively import and work with MXF files in CatDV, Compressor, Motion, Sound Track Pro, QuickTime Player and Shake.


You can download a free demo of MXF Import from Calibrated {Q} to test that it will work on your system. The demos only restriction is that it only allows you to view the first 30 seconds of the clip, other than that it’s the same as the full app. After installing the plugin I could drop the C300 MXF files directly onto the timeline in FCP7 and get editing – and with the dual audio tracks in the original files! Huzzah.

Hopefully these tips will save you some time, effort and frustration with broken MXF file structures.  And next time you’ll just copy the cards structure correctly…and get to editing!
  

Thursday, August 22, 2013

Convert Canon XA20 MP4/MTS files to Final Cut Pro X with best quality on Mac

Canon XA20 is one of the high-end camera which is newly released on mid-June, 2013. This professional camera shoots Full HD 1080 60p/60i/30p/24p footages in AVCHD MTS format and 1080 60p/30/24p as well as 720/360 30p/24p in MPEG MP4 format.

Shutterbugs and professional editors must be very excited to watch these HD footages and see it edited to be the most perfect ones on your own hands.

So here comes the problem you may concern: how do Mac users edit Canon XA20 MP4/MTS files in Final Cut Pro X?
“Can't import short clip recorded on the XA20 into Final Cut Pro X on my mac book pro. Reads mpeg file as imcompatible file. Followed all directions, using their CD loaded software. Any help appreciated. 

Problem source: https://discussions.apple.com/thread/5172201?start=0&tstart=0”
  
Theoretically, FCP X supports both of these two format footages as it's said in Apple store. In fact, Final Cut Pro does not prefer to work with .mts and .mp4 for that it appreciates MOV files especially encoded in Apple ProRes. So, if you find it doesn't work and you don't want to bother so much about the further setting of FCP X, you can take my advice into consideration. That is, you can use some third-party software to convert your Canon XA20 MTS/MP4 footages to Apple ProRes 422 MOV, the best supported format for FCP x. If you want to try, use Pavtube HD Video Converter for Mac. It has excellent quality of videos as it applies advanced audio and video sync technology, which is a native format for FCP X

People usually use the best Mac HD Video Converter to convert the incompatible format files for editing in their mac editing softwares or transferring to their tablet/phone/tv etc. devices for playback, maybe in your situation, you can have a try as well. If you don't know how to use, here we have an easy way to get it working within a few clicks; follow this guide to see how to convert Canon XA20 MP4/MTS files for editing in Final Cut Pro X with best quality on Mac(Mavericks, Mountain Lion included).

First, You can try the free trial version to test the functions.

Step 1. Load Canon XA20 files.

Connect Canon XA20 camcorder to your Mac via USB, or insert your SD card to Mac, browser the .mts files from AVCHD > BDMV > STREAM. Load your 1080/60p .mts or .mp4 files from XA20 or local computer which you have copied from camcorder before into Pavtube HD Converter for Mac. P.S. There are two ways for you to import files: add video directly and add the entire folder.

pavtube canon xa20 mts/mp4 to fcp x converter

Step 2. Click “Format” and choose "Final Cut Pro", you will see several "Apple ProRes presets". The ProRes 422 outputs low quality videos comparing with others, but the converted videos are smaller in size. Usually the ProRes 422 HQ is recommended for its good video quality and perfect video/audio sync settings.

convert canon xa20 mts/mp4 to apple prores 422

Step 3. Click “Settings” to customize output video size, bitrate, frame rate and other settings at your needs.

Tips: You are allowed to adjust output video and video parameters. However, if you have no idea about profile setting, keep it as original recordings will provide you the files with less quality loss, and keep default settings is also a good choice for your to get a high quality files. 

Step 4. Now just click the big red “Convert” to start converting Canon XA20 MP4/MTS clips to FCP X preferred format. Click “Open” to locate the converted video directly for Final Cut Pro X.

In this way, you will have no difficulty in importing and editing Canon XA20 MTS/MP4 footage into FCP X with excellent audio and video quality. You can enjoy sharing edited video with friends and taking any individual frames you want. 

Wish you can solve your problem soon and good luck~

More Tips:

Tip 1: This Mac Canon MTS/MP4 to FCP X Converter also includes the editing function to let you trim, crop, edit audio, add 3D effect, add watermark and subtitles before conversion.

Tips: In order to get customized videos, you can attach subtitles to your videos.

The free Subtitle Edit will help you to edit your own subtitles then put it into videos.
  
editing mts/mp4 videos from canon xa20

Tip 2: If you want to burn Canon XA20 MTS/MP4 videos to DVD on Mac, Pavtube DVD Creator for Mac is recommended. 

Tip 3: If you are using other Mac editing softwares, like iMovie, FCE, Avid Media Composer, Adobe Premiere Pro, After Effects CS6, Apple Aperture 3, Kdenlive, DaVinci Resolve, iPhoto and more, please view the follow guides:

Canon XA20 Test - 60p


Tuesday, May 7, 2013

Problems Import MXF files to Apple Final Cut Pro 6 and 7

Question:

"I'm using the non-linear editing Apple Final Cut Pro versions 6 and 7, as well as Avid Media Composer and try to import material (files MXF), filmed on camera Canon C300, Canon XF300 and Ikegami GFCam HDS-V10, but can not do it, t . K. said mounting systems "see" the data files. Is there a way to solve this problem?"


Answer:

MXF is an industry standard that is the standard "package" file. The problem is not that these mounting systems do not support this package, but the fact that, in its standard configuration does not support the codec MPEG-2 HD Long GOP 4:2:2, which is used in cameras Canon C300, XF305/XF300/XF105/XF100; Ikegami GFCam HDS-V10 and HDS-F90: and also camcorders Sony XDCAM Ruler.
                    
Simply put, the reason lies in the nuances of how to support the codec, and in support of the correctness of the various types of "packages" of video files.

I note that for Final Cut is especially typical: Apple offers the user a "naked" system with a set of only "native" codec, other codecs to install on the system manually. You also need to add and support of "packages."

I am of the opinion that this is a typical marketing ploy, and quite successful, which on the one hand, to minimize the cost of the development and implementation of additional systems (CPU) or other processing of the codec. On the other hand, allows you to abstract the most problems, knitted with the correctness of processing video with varying degrees of coding, which can be attributed codecs MPEG-2 HD MXF (I-frame & Long GOP), H.264 (AVC HD, AVC-Intra), DVCPro HD, MPEG-2 HD MP4 (XDCAM EX), MPEG-2 SD (IMX), DV100 etc.

With the third party is a major opportunity to claim the payment from manufacturers of equipment for the implementation of the shooting support their formats and codecs (even if these formats are generally accepted and standardized), ie opens an additional channel of earnings.

Sometimes there are problems with editing systems Avid, although in their case the situation is much better: the vast majority of the MXF file support without additional plug-ins, so the problems with importing files MXF, obtained with Canon cameras and Ikegami, should not occur.

These problems are not the fault of the producers of film-making equipment, all claims should be addressed exclusively to developers and manufacturers of non-linear editing.

So now, how to solve this problem.

Here is an example for Final Cut Pro, as it is when it is used there is vast compatibility issues, but I will note at once that, in any case, the need to install additional third-party software and plug-ins, such is the policy of Apple.

In the case of Canon cameras to properly import the files into Final Cut Pro simply download the appropriate plug-ins from the official website of the company - it's plugins Canon XF Plugin for Final Cut Pro 1.2 or Canon XF Plugin for Final Cut Pro X 2.0.

For the same universal support for all types of MXF as in the past, as well as earlier versions of Apple Final Cut, there are two options.

Option 1:

This is the most logical, the best and convenient option, but also the most expensive.

To import and work with MXF files purchased a tool called Calibrated MXF Import, which is immediately after installation will effectively work with the files MPEG-2 MXF.

A complete list of supported formats shown below:

Ikegami GFCAM MXF File Formats
  • I-Frame MPEG2 100Mb 1080/720
  • Long-GOP MPEG2 50Mb 1080/720
  • I-Frame MPEG2 50/40/30Mb SD
       
Canon MXF File Formats
  • Long-GOP MPEG2 50Mb 1080/720
  • Long-GOP MPEG2 25Mb 1080/720
     
Sony XDCAM MXF File Formats
  • XDCAM HD (35Mb and 25Mb)
  • XDCAM HD 422 (50Mb)
  • XDCAM EX (converted from MP4 to MXF by Sony Clip Browser)
  • IMX
  • DV25
     
Panasonic P2 MXF File Formats
  • AVC-Intra
  • DVCProHD
  • DV50
  • DV25
   
Avid Media Composer MXF File Formats
  • DNxHD
  • AVC-Intra
  • DVCProHD
  • DV50
  • DV25
  • IMX
  • 1-1
  • 1-1-10b
  • Meridien
   
Buy and download here perhaps.

The program has a test period of 30 days, which is quite correct: it allows you to pre-test the results and efficiency within a particular editing station and has to decide whether to purchase.

Option 2:

Over a long and difficult option, but it is quite cheap.

Use Pavtube MXF Converter for Mac - a professional Canon/Panasonic/Sony MXF converter / transfer MXF files to Apple Final Cut.

The principle of operation is as follows:

1. Download Pavtube Mac MXF Converter for FCP (download and purchase this converter here).

2. Installing the program and import the files into it MXF.

3. Select in the column formats desired output format for editing: for example, for efficient editing Canon MXF files or Ikegami MXF you can choose Final Cut Pro -> Apple ProRes 422 (*. Mov).


4. To edit the settings for conversion (the selection of audio track, output resolution, bit rate, etc.) you need to click "Properties" ("Properties").


5. Click on the button "Convert", wait for converting MXF files to Apple ProRes and then import the ProRes into the mounting system.

Which option to choose in the end, it's only you yourself.

The proposed methods are not universal solutions for all occasions and do not claim to such.

Read More: